
A SIEM for Security information and event management is a security solution which centralizes the logs and events of numerous devices in a computing network in order to process them and generate alerts in the event that abnormal behavior is detected.
We will see here how to deploy Elastic Stack solution.
Elasticsearch is a real-time, distributed storage, search, and analytics engine.
Kibana is an open source analytics and visualization platform designed to work with Elasticsearch. Kibana will be used to search, view, and interact with data stored in Elasticsearch indices.

root@host:~# apt update && apt-get install apt-transport-https gnupg curl wget
root@host:~# wget -qO - https://artifacts.elastic.co/GPG-KEY-elasticsearch | gpg --dearmor -o /usr/share/keyrings/elasticsearch-keyring.gpg
root@host:~# echo "deb [signed-by=/usr/share/keyrings/elasticsearch-keyring.gpg] https://artifacts.elastic.co/packages/8.x/apt stable main" | tee /etc/apt/sources.list.d/elastic-8.x.list
root@host:~# apt update && apt-get install elasticsearch
[…]
--------------------------- Security autoconfiguration information ------------------------------
Authentication and authorization are enabled.
TLS for the transport and HTTP layers is enabled and configured.
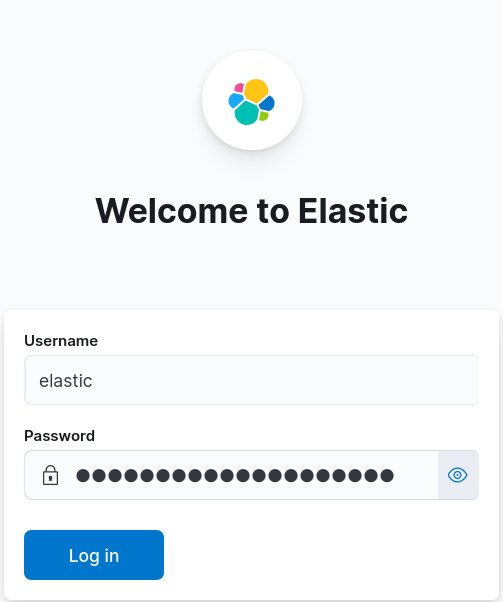
The generated password for the elastic built-in superuser is : elastic_password;)
If this node should join an existing cluster, you can reconfigure this with
'/usr/share/elasticsearch/bin/elasticsearch-reconfigure-node --enrollment-token <token-here>
after creating an enrollment token on your existing cluster.
You can complete the following actions at any time:
Reset the password of the elastic built-in superuser with
'/usr/share/elasticsearch/bin/elasticsearch-reset-password -u elastic'.
Generate an enrollment token for Kibana instances with
'/usr/share/elasticsearch/bin/elasticsearch-create-enrollment-token -s kibana'.
Generate an enrollment token for Elasticsearch nodes with
'/usr/share/elasticsearch/bin/elasticsearch-create-enrollment-token -s node'.
-------------------------------------------------------------------------------------------------
root@host:~# apt update && apt-get install kibana
network.host: 0.0.0.0
root@host:~# systemctl start elasticsearch.service
root@host:~# curl --cacert /etc/elasticsearch/certs/http_ca.crt -u elastic https://localhost:9200
Enter host password for user 'elastic': elastic_password;)
{
  "name" : "std",
  "cluster_name" : "elasticsearch",
  "cluster_uuid" : "StdgreaTBanDKphU4S0ceg",
  "version" : {
    "number" : "7.12.0",
    "build_flavor" : "default",
    "build_type" : "deb",
    "build_hash" : "ff17057114c2199c9c1bbecc727003a907c0db7a",
    "build_date" : "2021-02-15T13:44:09.394032Z",
    "build_snapshot" : false,
    "lucene_version" : "8.7.0",
    "minimum_wire_compatibility_version" : "6.8.0",
    "minimum_index_compatibility_version" : "6.0.0-beta1"
  },
  "tagline" : "You Know, for Search"
}
server.host: "0.0.0.0"
server.publicBaseUrl: "http://X.X.X.X:5601"
root@host:~# systemctl start kibana.service
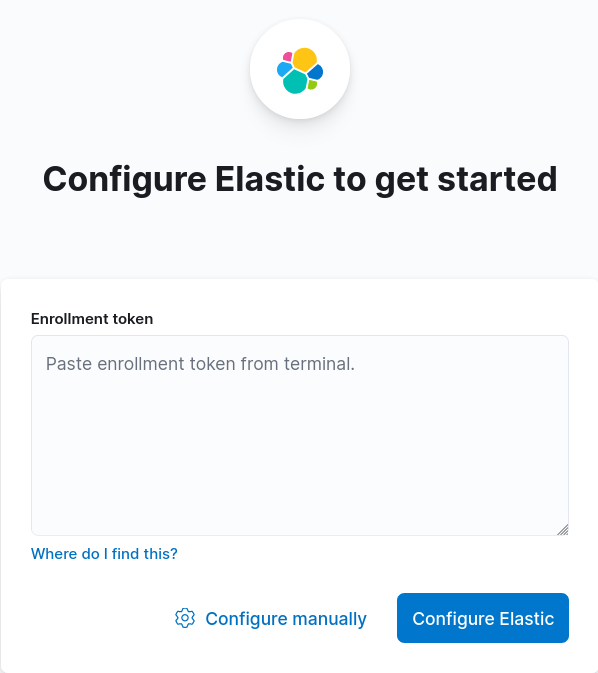
root@host:~# /usr/share/elasticsearch/bin/elasticsearch-create-enrollment-token -s kibana
eyJ2ZXIiOiI4LjEuMiIsImFkciI6WyIxOTIuMTY4LjEuNjY6OTIwMCJdLCJmZ3IiOiJmYzdiZmFmMjNmODEzN2M1NmY4YTg1NGMxNTdjMWFkYTNiZDdiOGM4NTE4YTZhNmI3wWNiYzBkNzc0ZTRjNzc1Iiwia2V5Ijoib1ZBTkVJQUIxWVNBT0BiUWVsUVc6cEU1WXF3U1FTUENjcFFaZUJvTGtKdyJ0
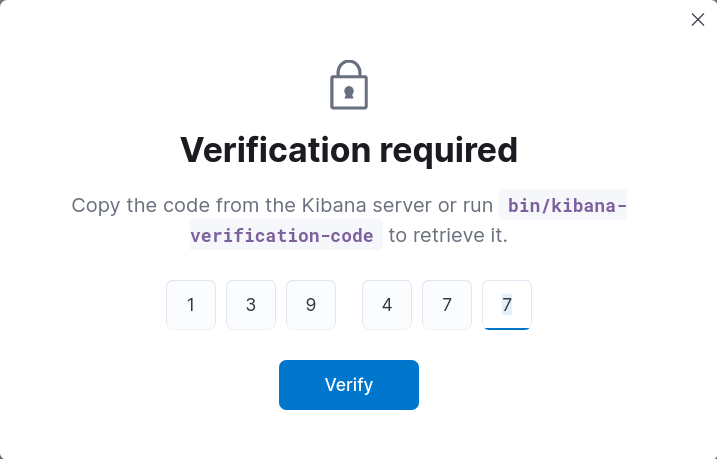
root@host:~# /usr/share/kibana/bin/kibana-verification-code
Your verification code is:  139 477
One of the big improvements in version 8 is that elasticsearch is automatically configured to encrypt its communications.
This is not the case with Kibana for which we connect using http. We will see here how to activate https connection.
root@host:~# /usr/share/elasticsearch/bin/elasticsearch-keystore show xpack.security.http.ssl.keystore.secure_password
592l_UJGSXmliJIvuokDab
root@host:~# cd /etc/kibana/
root@host:~# openssl pkcs12 -in /etc/elasticsearch/certs/http.p12 -out server.crt -clcerts -nokeys
root@host:~# openssl pkcs12 -in /etc/elasticsearch/certs/http.p12 -out server.key -nocerts -nodes
root@host:~# chown root:kibana /etc/kibana/server.*
root@host:~# chmod g+r /etc/kibana/server.*
server.ssl.enabled: true
server.ssl.certificate: /etc/kibana/server.crt
server.ssl.key: /etc/kibana/server.key
root@host:~# systemctl restart kibana.service
Wait some seconds and connect to kibana at https://X.X.X.X:5601
To make our Elasticsearch and Kibana services start at boot, we need to do some modifications.
root@host:~# systemctl enable elasticsearch.service
root@host:~# systemctl enable kibana.service
root@host:~# tail /var/log/elasticsearch/elasticsearch.log
root@host:~# tail /var/log/kibana/kibana.log
Contact :