
Setting Up OpenVPN, NAT and Routing on Windows Server 2025
- Last updated: Aug 1, 2026

This tutorial explains how to install and configure an OpenVPN server on Microsoft Windows Server 2025. It covers the complete setup, including server and client configuration, certificate generation, Windows Firewall rules, and NAT and LAN routing with RRAS. This allows remote VPN clients to access hosts on the private network behind the OpenVPN server.
- OpenVPN is a powerful VPN solution that offers several advantages:
- Free and open source
- Compatible with most operating systems
- Reliable and supported by an active community
- Relatively easy to deploy
- Highly configurable
Network diagram
We will first deploy a simple OpenVPN setup in which a Windows client establishes a VPN connection to a Windows Server 2025 host.
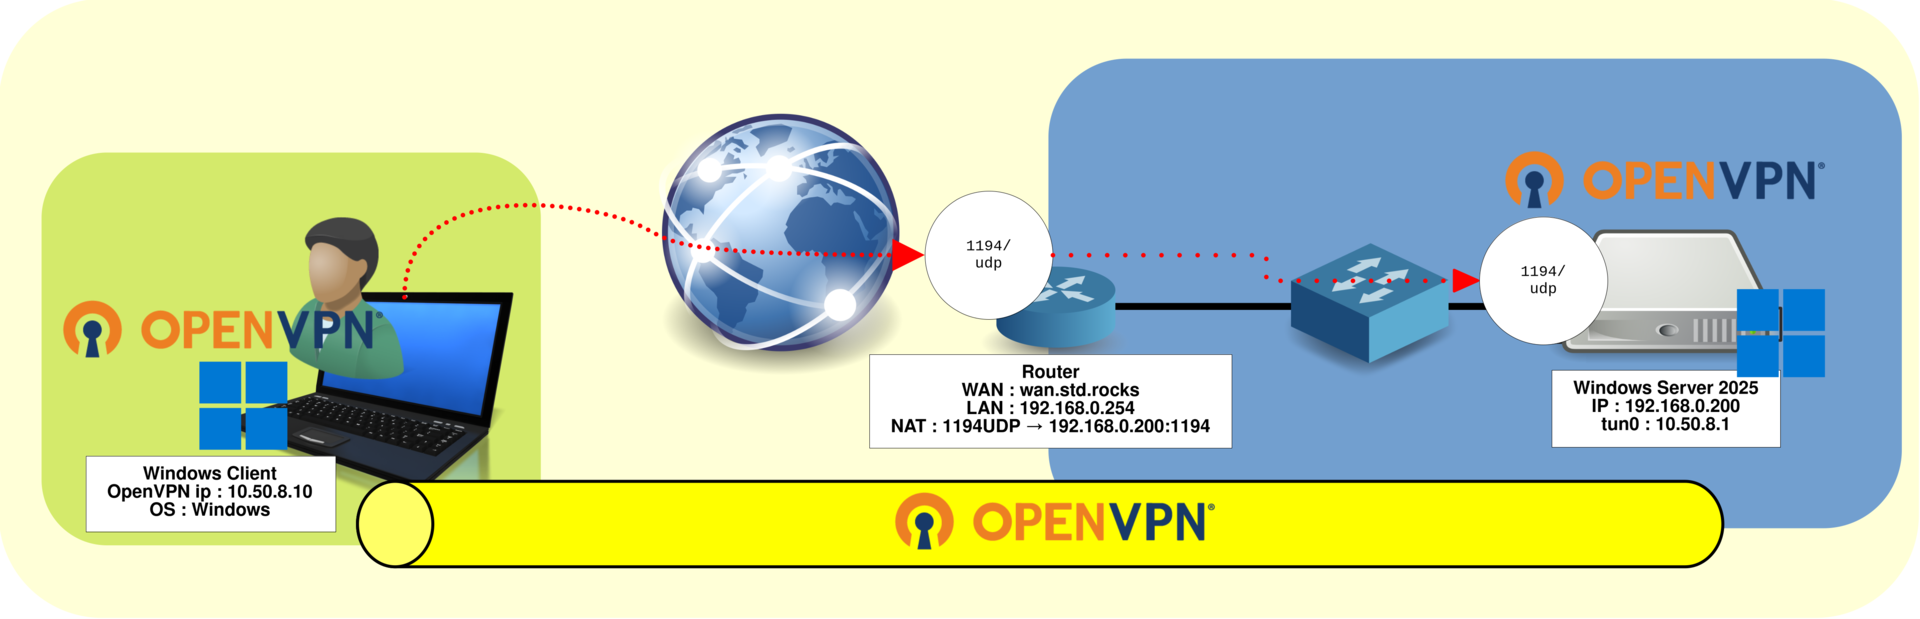
OpenVPN Server

- OpenVPN server properties:
- Operating system: Windows Server 2025
- Role: OpenVPN server
- LAN IP address:
192.168.0.200 - VPN IP address:
10.50.8.1 - VPN network:
10.50.8.0/24 - Protocol and port: UDP
1194
Prerequisites
OpenSSL

OpenSSL is required to generate the certificates and private keys used to authenticate the OpenVPN server and its clients. On Windows Server 2025, this tutorial uses the Win64 OpenSSL packages provided by Shining Light Productions.
Download OpenSSL
Download the latest 64-bit version of Win64 OpenSSL Light.
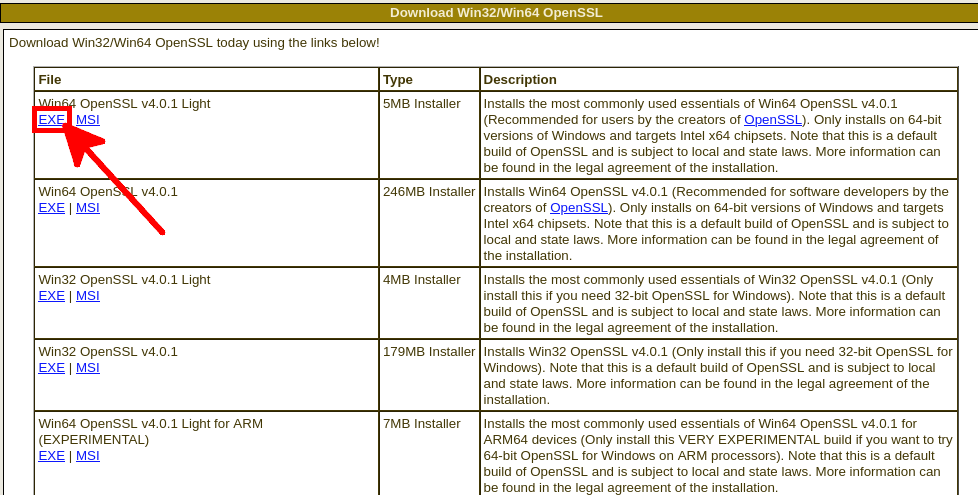
Install OpenSSL
- Start the OpenSSL installer. If the required Microsoft Visual C++ 2026 Redistributable (x64) is missing, click Yes to download it:
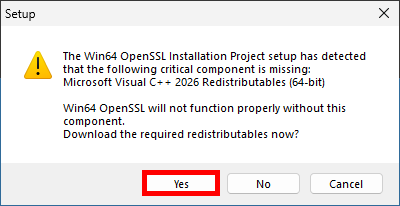
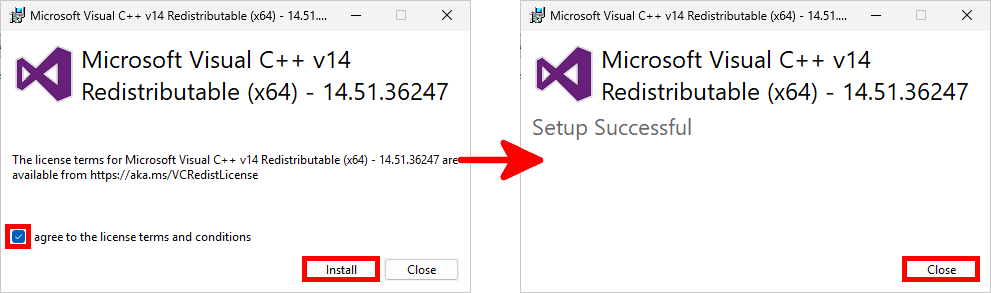
- Run the downloaded installer, accept the license terms, and click Install. When the installation completes, click Close:
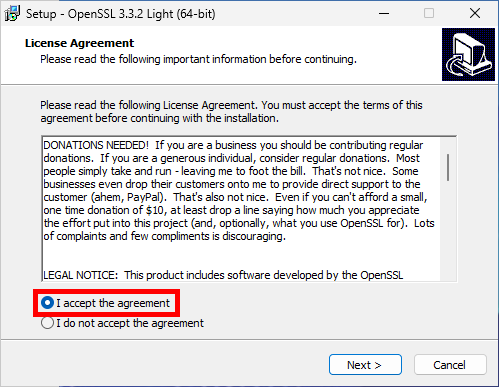
- Select I accept the agreement, then click Next:
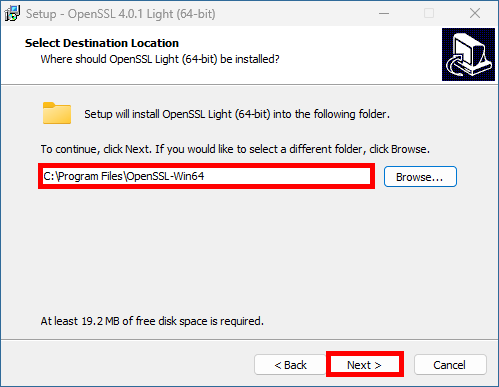
- Keep the default installation folder, or select another destination, then click Next:
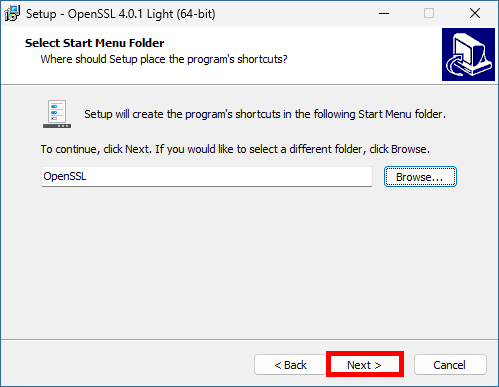
- Keep the default Start Menu folder, or choose another one, then click Next:
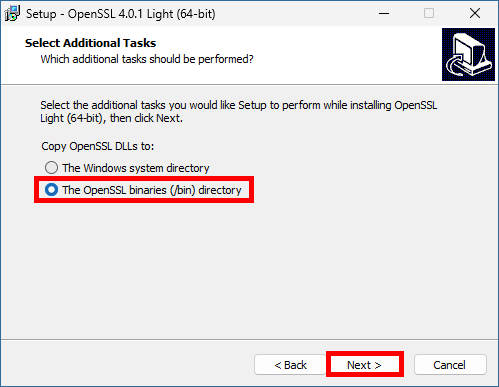
- Select The OpenSSL binaries (bin) directory, then click Next:
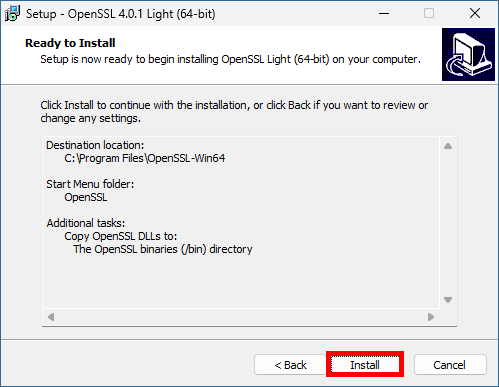
- Review the installation settings, then click Install:
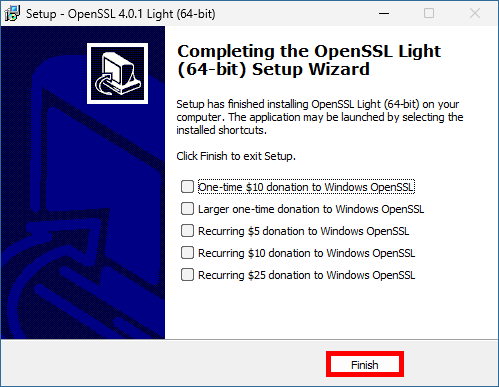
- When the installation is complete, click Finish to close the setup wizard (and make a donation if you can to support the project lead 😊):
Add OpenSSL to the System Path
Add the OpenSSL bin directory to the Windows system Path environment variable so that the openssl command can be run from any Command Prompt or PowerShell session.
- Run
SystemPropertiesAdvancedto open the advanced system settings:
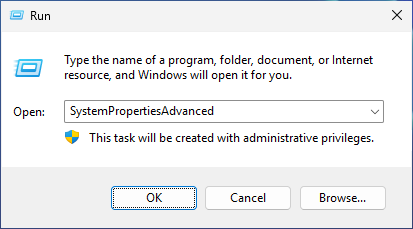
SystemPropertiesAdvanced to open the Advanced System Properties window.- On the Advanced tab, click Environment Variables…:
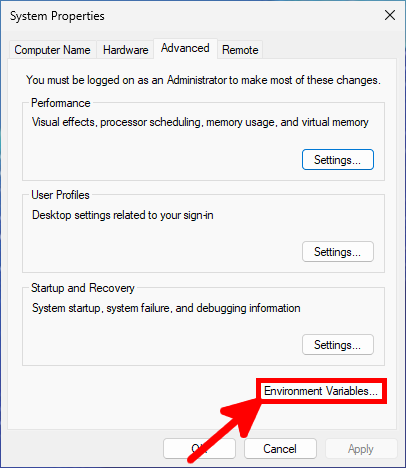
- Under System variables, select Path, then click Edit…:
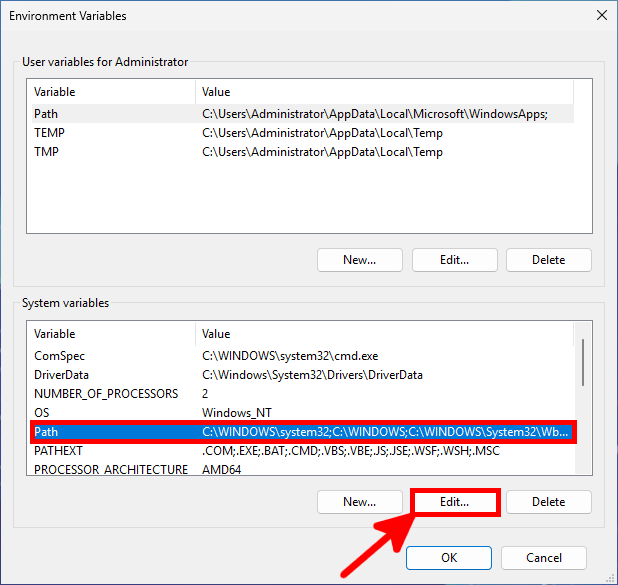
- Click New, add
%ProgramFiles%\OpenSSL-Win64\bin, then click OK to save the change:
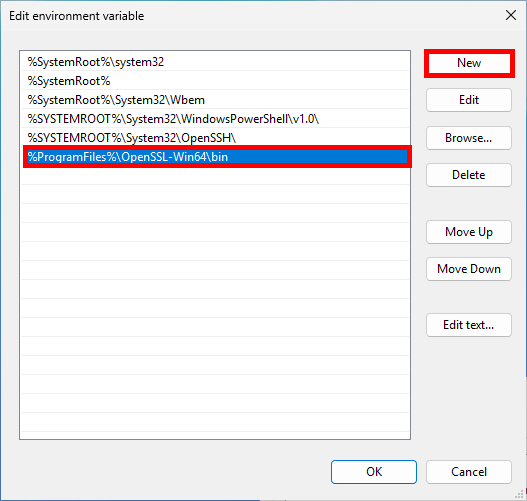
%ProgramFiles%\OpenSSL-Win64\bin to the system Path, then click OK.- Open a new PowerShell window and run the following command to verify that OpenSSL is available from the system Path:

openssl version in a new PowerShell window to verify that OpenSSL is installed and available in the system Path.Windows Firewall

Windows Firewall must allow inbound OpenVPN connections on UDP port 1194. An additional ICMPv4 rule can also be created to allow VPN clients to test connectivity to the server with the ping command.
- From an elevated Command Prompt, create the inbound OpenVPN rule:
C:\Windows\system32> netsh advfirewall firewall add rule name="OpenVPN UDP 1194" dir=in action=allow protocol=UDP localport=1194- Optionally, allow ICMP echo requests from the OpenVPN network:
C:\Windows\system32> netsh advfirewall firewall add rule name="OpenVPN ICMPv4 Echo" dir=in action=allow protocol=ICMPv4:8,any remoteip=10.50.8.0/24- Alternatively, create the same rules from an elevated PowerShell session:
PS C:\> New-NetFirewallRule -DisplayName "OpenVPN UDP 1194" -Direction Inbound -Action Allow -Protocol UDP -LocalPort 1194PS C:\> New-NetFirewallRule -DisplayName "OpenVPN ICMPv4 Echo" -Direction Inbound -Action Allow -Protocol ICMPv4 -IcmpType 8 -RemoteAddress 10.50.8.0/24Installing OpenVPN
Download the latest 64-bit OpenVPN Community Edition installer for Windows from the official OpenVPN download page.

- Because this installation will be used as an OpenVPN server, select Customize to choose the required components:
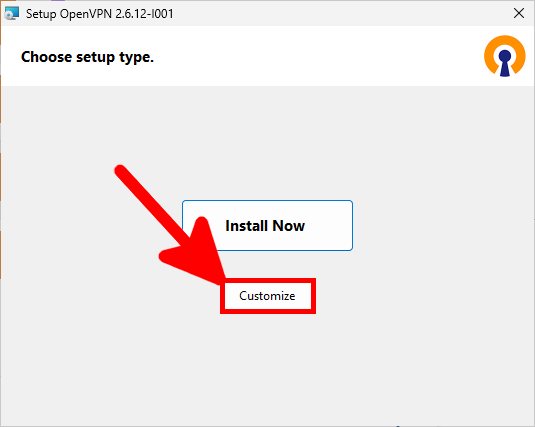
- Ensure that OpenVPN Service is selected. The OpenVPN Pre-Logon Access Provider component is optional and is not required for a standard OpenVPN server installation:
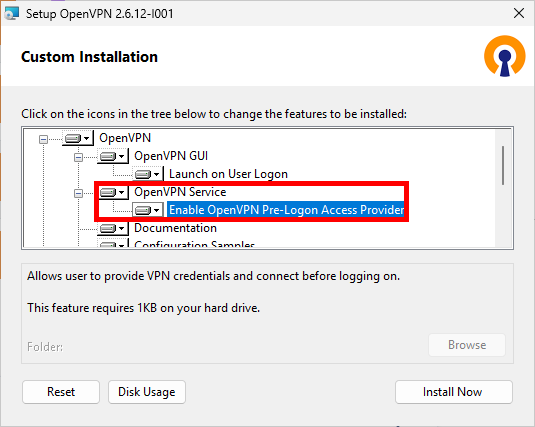
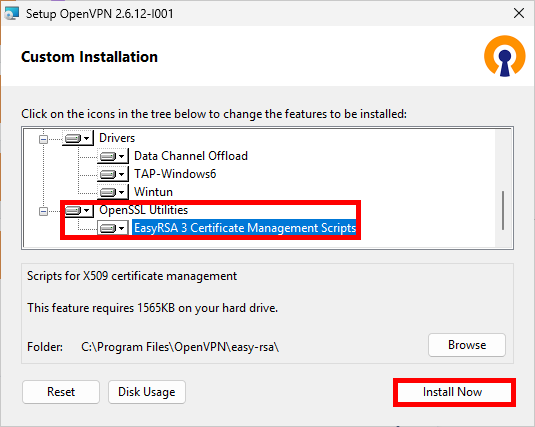
- Select EasyRSA 3 Certificate Management Scripts to generate the certificates and private keys required by the OpenVPN server and clients:
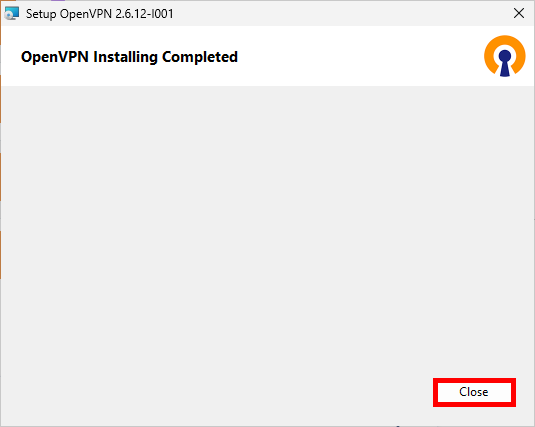
- When the installation is complete, click Close:
Certificates and PKI
Set Up the Certificate Authority and Generate Certificates
In this section, we will use Easy-RSA to create a Public Key Infrastructure (PKI), including the Certificate Authority, server certificate, client certificate, and their associated private keys.
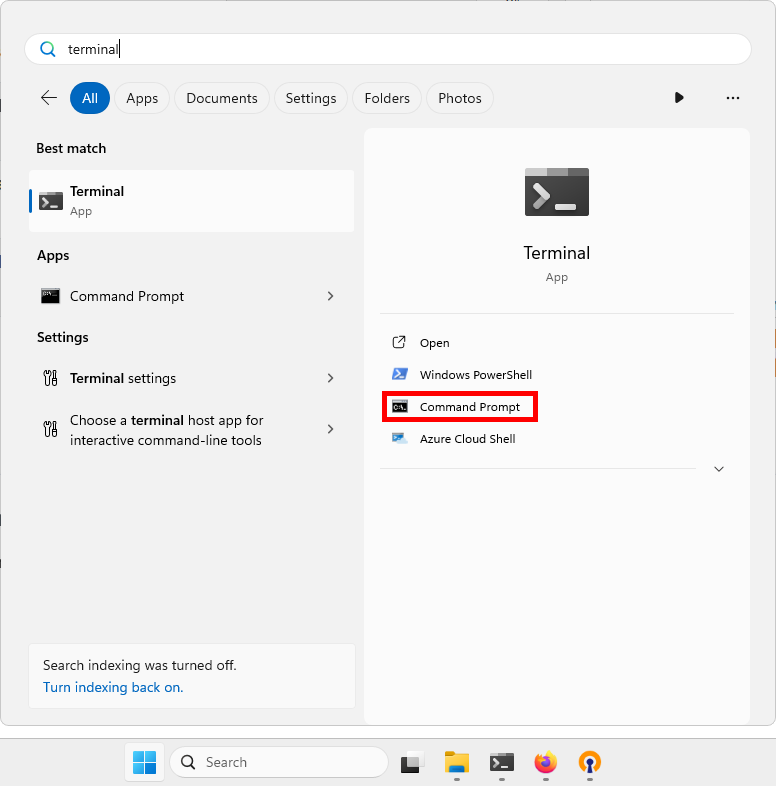
- Open Windows Terminal, then select the Command Prompt profile:
- Run the following commands to open the Easy-RSA shell:
C:\Windows\system32> cd "C:\Program Files\OpenVPN\easy-rsa"C:\Program Files\OpenVPN\easy-rsa> .\EasyRSA-Start.bat
Welcome to the EasyRSA 3 Shell for Windows.
Easy-RSA 3 is available under a GNU GPLv2 license.
Invoke 'easyrsa' to call the program. Without commands, help is displayed.
Using directory: C:/Program Files/OpenVPN/easy-rsa
EasyRSA-Shell: #- Initialize a new Public Key Infrastructure (PKI):
EasyRSA-Shell: # ./easyrsa init-pki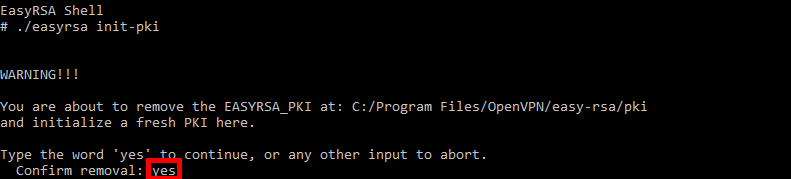
./easyrsa init-pki. If an existing PKI directory is detected, type yes to replace it and initialize a new one.- Create the Certificate Authority (CA). Enter a strong passphrase to protect the CA private key, then specify a Common Name:
EasyRSA-Shell: # ./easyrsa build-ca
[…]
Enter PEM pass phrase:MyPassW0rd
Verifying - Enter PEM pass phrase:MyPassW0rd
[…]
Common Name (eg: your user, host, or server name) [Easy-RSA CA]:ovpn- Generate and sign the OpenVPN server certificate and private key:
EasyRSA-Shell: # ./easyrsa build-server-full server nopass
[…]
Confirm request details: yes
[…]
Enter pass phrase for c:\Program Files\OpenVPN\easy-rsa\pki\private\ca.key:MyPassW0rd- Generate the Diffie-Hellman parameters used by the OpenVPN server:
EasyRSA-Shell: # ./easyrsa gen-dh- Generate and sign a client certificate and private key named
client01:
EasyRSA-Shell: # ./easyrsa build-client-full client01 nopass
[…]
Confirm request details: yes
[…]
Enter pass phrase for c:\Program Files\OpenVPN\easy-rsa\pki\private\ca.key:MyPassW0rdCopy the Server Certificates and Keys
Copy the following OpenVPN server files to C:\Program Files\OpenVPN\config-auto:
ca.crtfromC:\Program Files\OpenVPN\easy-rsa\pkidh.pemfromC:\Program Files\OpenVPN\easy-rsa\pkiserver.crtfromC:\Program Files\OpenVPN\easy-rsa\pki\issuedserver.keyfromC:\Program Files\OpenVPN\easy-rsa\pki\private
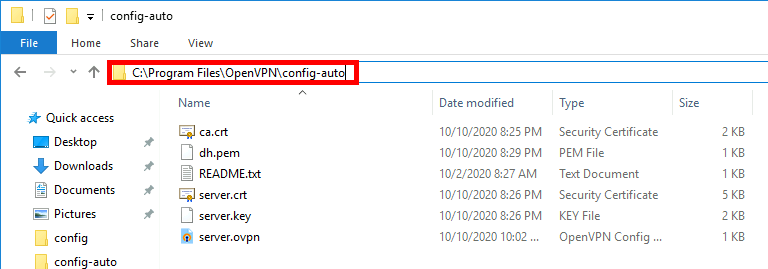
client.ovpn file in the selected OpenVPN client configuration directory.OpenVPN Server Configuration File
Create or edit C:\Program Files\OpenVPN\config-auto\server.ovpn using a text editor running with administrator privileges:
# Listen for OpenVPN client connections on UDP port 1194
port 1194
proto udp
dev tun

# Server certificate and cryptographic files
ca ca.crt
cert server.crt
key server.key
dh dh.pem

# VPN address pool assigned to connected clients
server 10.50.8.0 255.255.255.0
ifconfig-pool-persist ipp.txt

# Detect inactive or disconnected clients
keepalive 10 120

# Preserve the key and tunnel interface across restarts
persist-key
persist-tun

# Write connection status information to this file
status openvpn-status.log

# Logging verbosity
verb 3
Restart the OpenVPN Service
Restart OpenVPNService to load the new server configuration.
- Run
services.mscto open the Windows Services management console:

services.msc to open the Windows Services management console.- Right-click OpenVPNService, then select Restart:
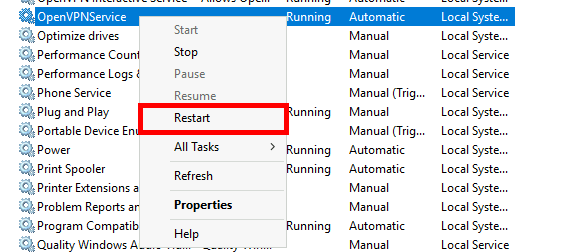
- Alternatively, restart the service from an elevated Command Prompt:
C:\Windows\system32> net stop OpenVPNService
C:\Windows\system32> net start OpenVPNService- Or restart it from an elevated PowerShell session:
PS C:\> Restart-Service -Name OpenVPNService -PassThruWindows Client Configuration

Install OpenVPN on the Windows Client
Download the same 64-bit OpenVPN Community Edition installer used on the server from the official OpenVPN download page, then install it using the default options.
Copy the Client Certificates and Private Key
Copy the following files from the OpenVPN server:
ca.crtfromC:\Program Files\OpenVPN\easy-rsa\pkiclient01.crtfromC:\Program Files\OpenVPN\easy-rsa\pki\issuedclient01.keyfromC:\Program Files\OpenVPN\easy-rsa\pki\private
Place the files in one of the following OpenVPN configuration directories on the Windows client:
C:\Users\user\OpenVPN\config\— recommended for a per-user configurationC:\Program Files\OpenVPN\config\— available system-wide and requires administrator privileges
- The client configuration directory should now contain the following files:
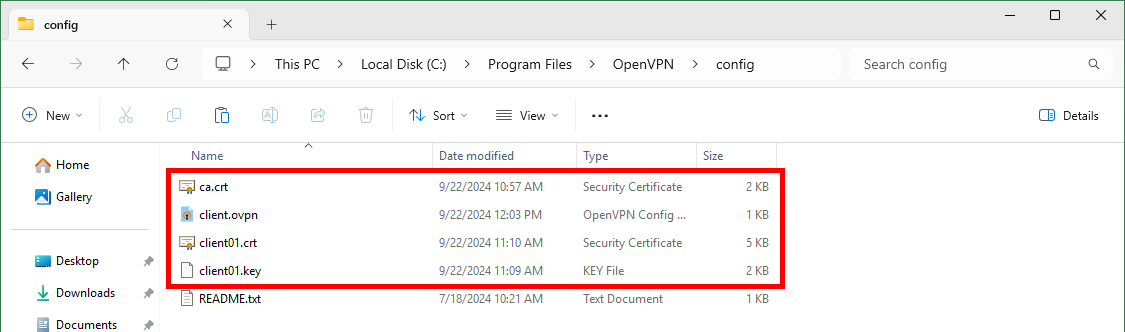
client.ovpn configuration file in C:\Program Files\OpenVPN\config.- Create the
client.ovpnconfiguration file in eitherC:\Users\user\OpenVPN\config\orC:\Program Files\OpenVPN\config\:
# Configure this file as an OpenVPN client profile
client

# Use a routed IP tunnel
dev tun

# Connect to the server over UDP
proto udp

# Replace this hostname with the public IP address or DNS name
# of your OpenVPN server
remote WAN.STD.ROCKS 1194

# Retry DNS resolution indefinitely if the server is unavailable
resolv-retry infinite

# Do not bind the client to a fixed local port
nobind

# Preserve the private key and tunnel interface across reconnects
persist-key
persist-tun

# Client certificate and private key
ca ca.crt
cert client01.crt
key client01.key

# Logging verbosity
verb 3- Run OpenVPN GUI with administrator privileges, then connect to the VPN profile:
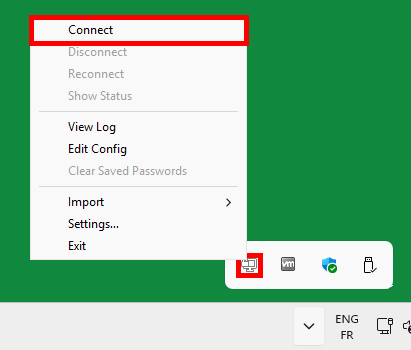
- An OpenVPN notification confirms that the connection has been established:
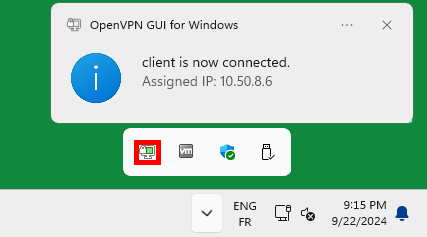
10.50.8.6.- Use the VPN address
10.50.8.1to test connectivity to the OpenVPN server:
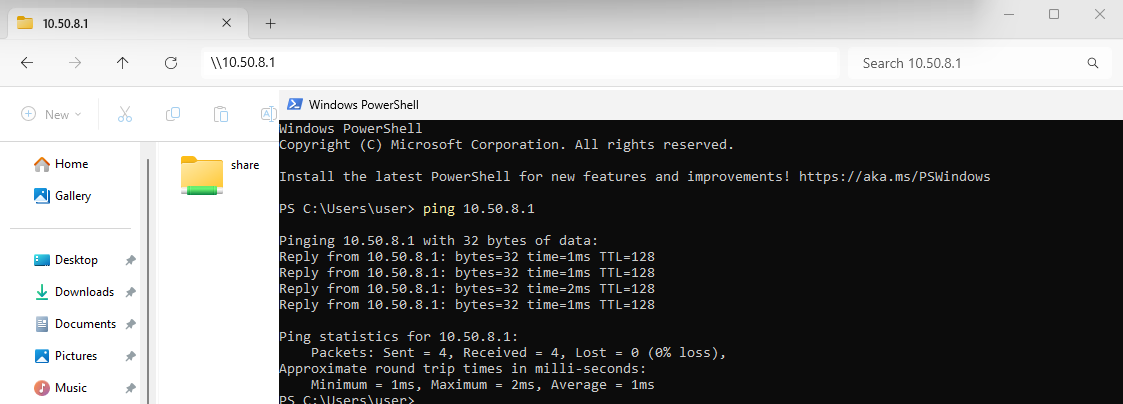
10.50.8.1 and accessing a server share through \\10.50.8.1.Enabling Routing and NAT
At this stage, the remote Windows client can connect to the OpenVPN server and reach its VPN address. To access other hosts on the remote LAN 192.168.0.0/24, we must enable LAN routing and Network Address Translation (NAT) on Windows Server 2025.
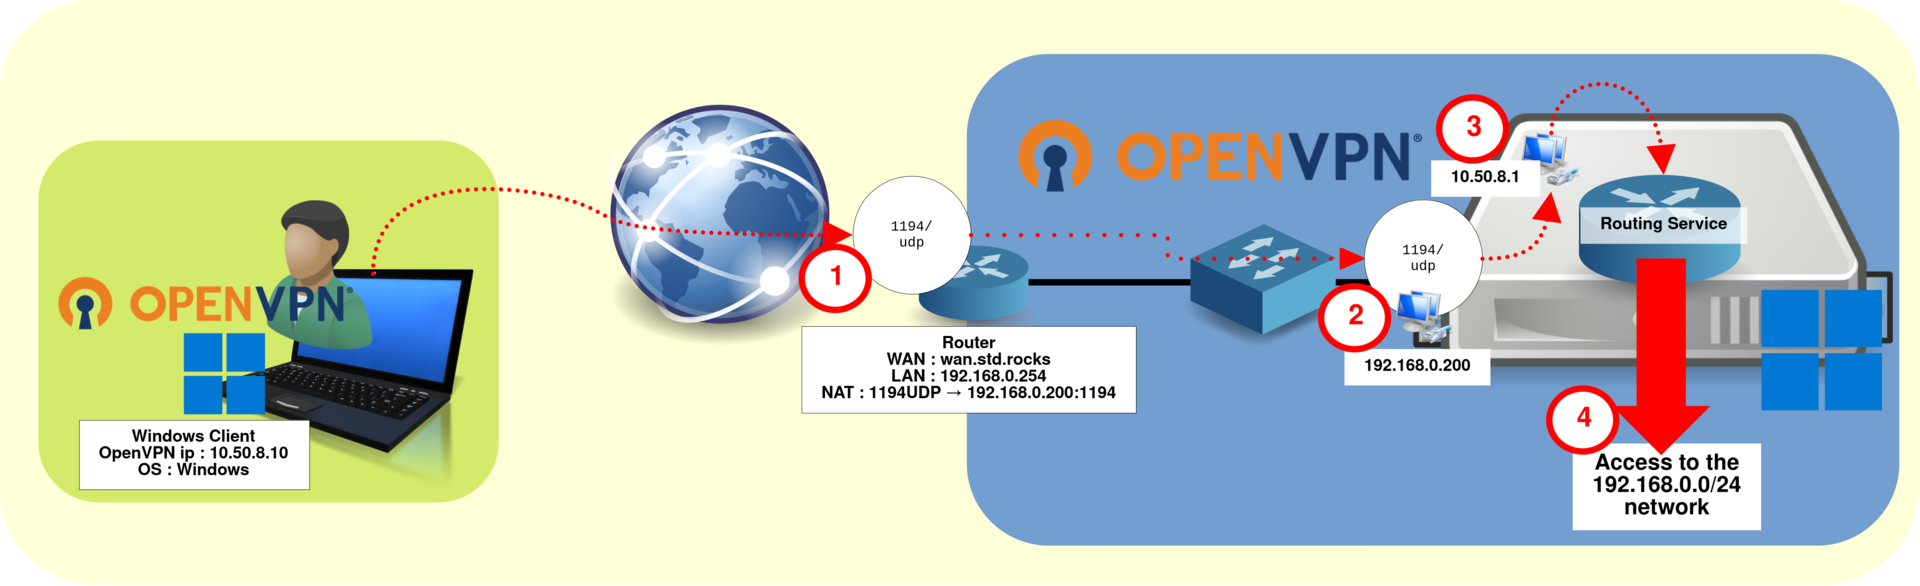
192.168.0.0/24 LAN through Windows Server 2025.OpenVPN Server
Update the Server Configuration
- Edit
C:\Program Files\OpenVPN\config-auto\server.ovpnwith administrator privileges, then add a pushed route for the remote LAN:
port 1194
proto udp
dev tun

ca ca.crt
cert server.crt
key server.key
dh dh.pem

server 10.50.8.0 255.255.255.0
ifconfig-pool-persist ipp.txt

# Advertise the remote LAN to connected VPN clients
push "route 192.168.0.0 255.255.255.0"

# Optional: configure an internal DNS server for VPN clients
push "dhcp-option DNS 192.168.0.200"

keepalive 10 120

persist-key
persist-tun

status openvpn-status.log

verb 3- Restart OpenVPNService from an elevated PowerShell session to apply the new configuration:
PS C:\> Restart-Service -Name OpenVPNService -PassThruInstall the Routing Role Service
- Open an elevated PowerShell session and run the following command to install the Windows Routing role service and its management tools:
PS C:> Install-WindowsFeature -Name Routing -IncludeManagementToolsConfigure Routing and Remote Access
- Run
rrasmgmt.mscto open the Routing and Remote Access management console:
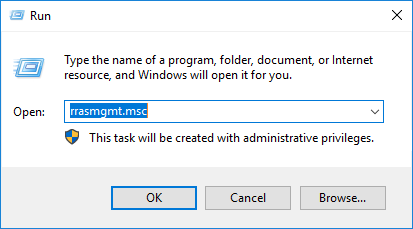
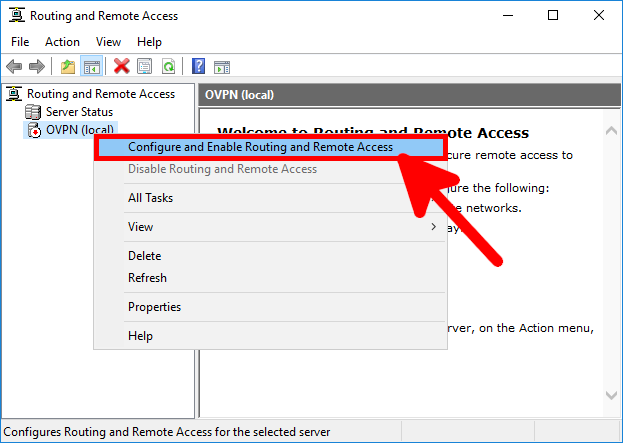
rrasmgmt.msc to open the Routing and Remote Access management console.- Right-click the server name, then select Configure and Enable Routing and Remote Access:
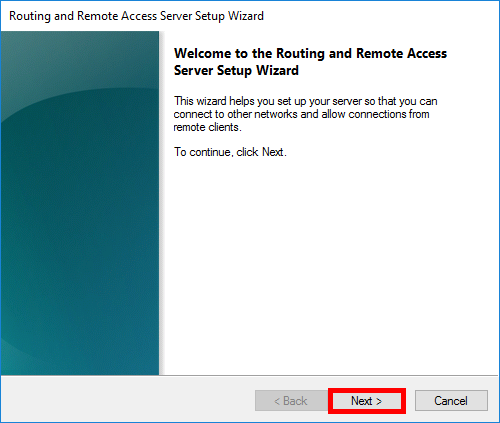
- Click Next to start the Routing and Remote Access Server Setup Wizard:
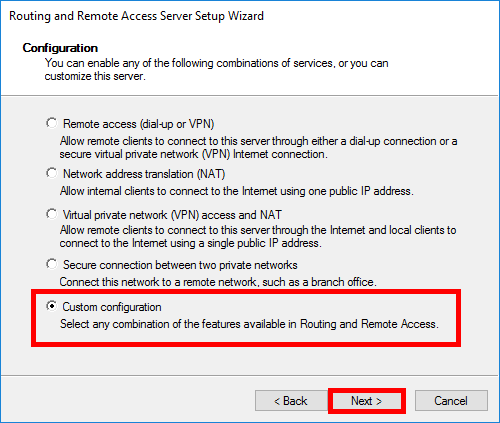
- Select Custom configuration, then click Next:
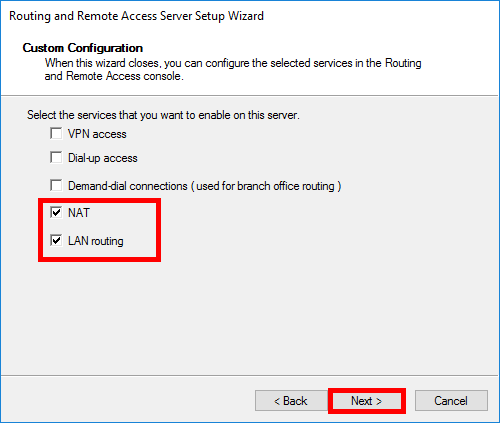
- Select NAT and LAN routing, then click Next:
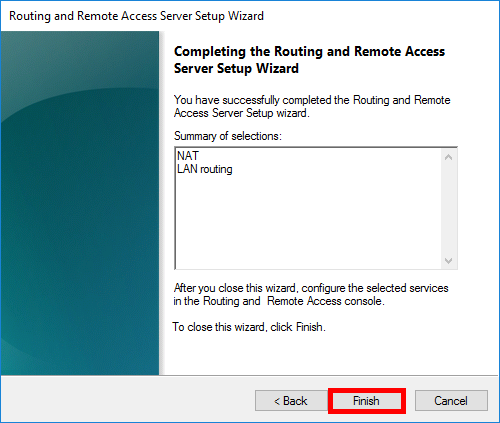
- Review the selected services, then click Finish:
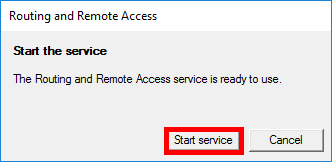
- Click Start service to start the Routing and Remote Access service. At this stage, the VPN client should be able to reach the Windows Server 2025 host through its LAN address
192.168.0.200or its VPN address10.50.8.1, depending on the routing and firewall configuration:
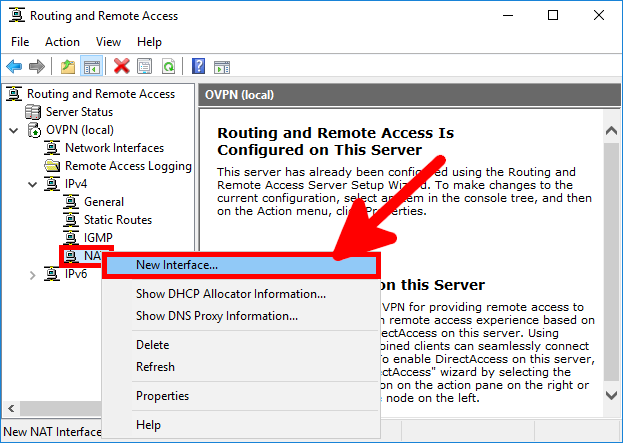
- To allow VPN clients to access hosts on the remote LAN, add the LAN network interface to the RRAS NAT configuration:
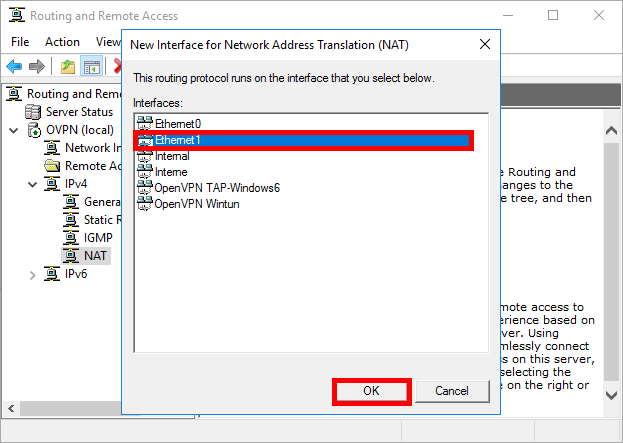
- Select the network interface connected to the remote LAN, here Ethernet1 with the address
192.168.0.200, then click OK:
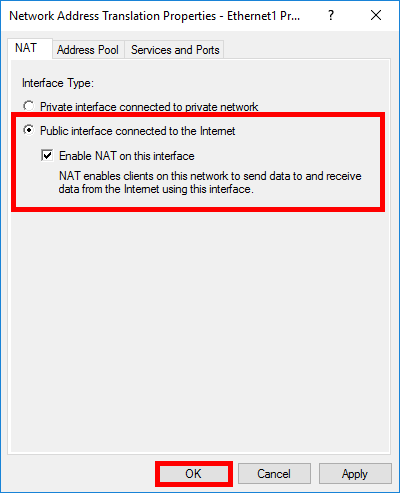
192.168.0.0/24 LAN, then click OK.- In the interface properties, select Public interface connected to the Internet, enable NAT on this interface, then click OK:
OpenVPN Client
- Open a Command Prompt and run
route printto verify that the route to the remote LAN192.168.0.0/24has been added by OpenVPN:
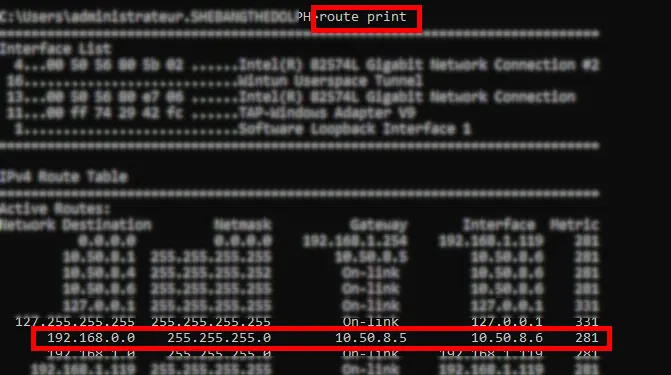
route print and verify that a route to 192.168.0.0/24 is present through the OpenVPN tunnel.- Test connectivity to hosts on the remote LAN:
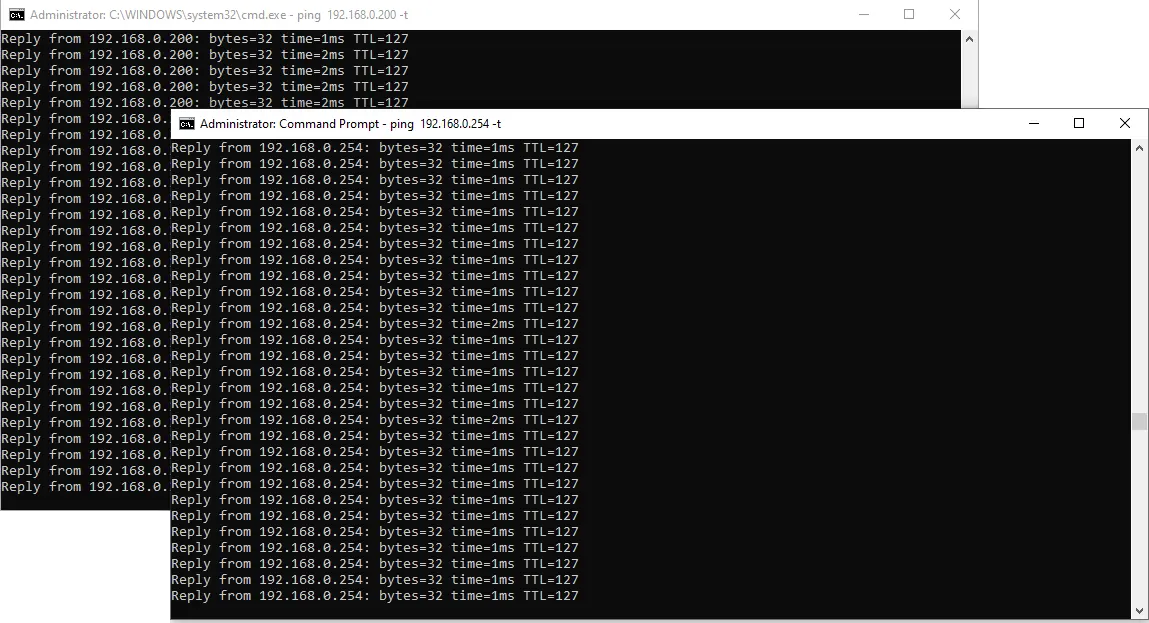
192.168.0.200 and the router at 192.168.0.254 through the VPN tunnel.