rss logo

Microsoft Entra: How to automate Microsoft 365 and AzureAD tasks with PowerShell by enabling passwordless authentication

Microsoft 365 Logo

In the enterprise, more and more Microsoft services are being outsourced to their in-house cloud solutions: Microsoft365/Azure/Entra. This may be indignant, but it's a fact. The use of PowerShell to administer these things is almost mandatory, and to open a powershell administration console we generally authenticate with a login, a password and also the microsoft authenticator software. But how can we run scripts that will be launched automatically and will therefore require authentication without any human interaction? Well, that's exactly what I'm going to explain in this article: how to authenticate to ExchangeOnlineManagement and AzureAD with PowerShell without a password.

Prerequisites

  • Prerequisites:
    • .Net: 4.7.2
    • Tls: 1.2

Make sure you have a version of .Net at least equal to 4.7.2 and Tls with version 1.2. For example from a Windows 2016 server, I had to update my .Net version and enable Tls to 1.2.

  • Display current configured Tls version:
PS C:\> [Net.ServicePointManager]::SecurityProtocol Ssl3, Tls
  • Set Tls to version 1.2 for the current session context:
PS C:\> [Net.ServicePointManager]::SecurityProtocol = [Net.SecurityProtocolType]::Tls12 PS C:\> [Net.ServicePointManager]::SecurityProtocol Tls12

Creating a new self-signed certificate

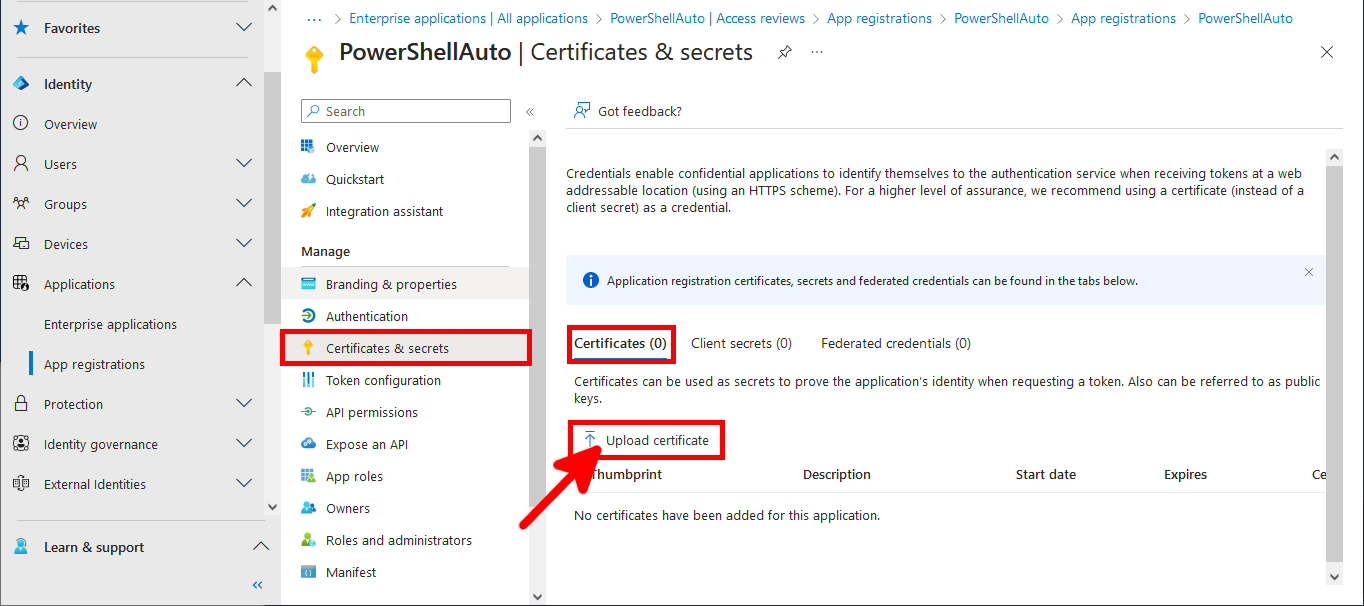
We will need a certificate to authenticate our script. So we're going to create one on the computer on which we want to run the script automatically.

  • From a PowerShell administrator console, create a self-signed certificate valid for 10 years and to the store Personnal Local Machine:
PS C:\> $cert = New-SelfSignedCertificate -CertStoreLocation Cert:\LocalMachine\My -NotAfter (Get-Date).AddYears(10) -Subject "CN=Office365Automation" -KeySpec KeyExchange
  • Use the certlm.msc command to open the Certificates Manager Tool console and check the presence of the previously created certificate:
Local Computer certificates console
  • Export the self-signed certificate to a mycert.cer file inside C:\:
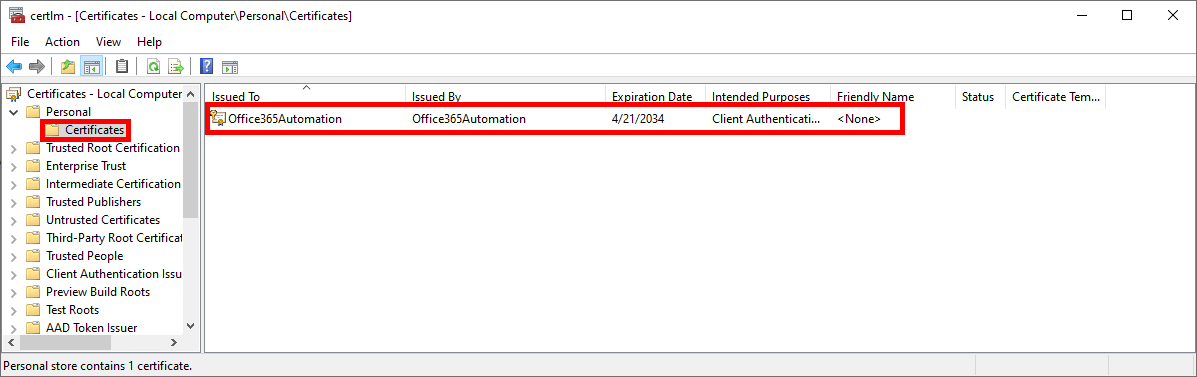
PS C:\> $cert = Get-ChildItem -Path Cert:\LocalMachine\My | Where-Object { $_.Subject -eq "CN=Office365Automation" } 
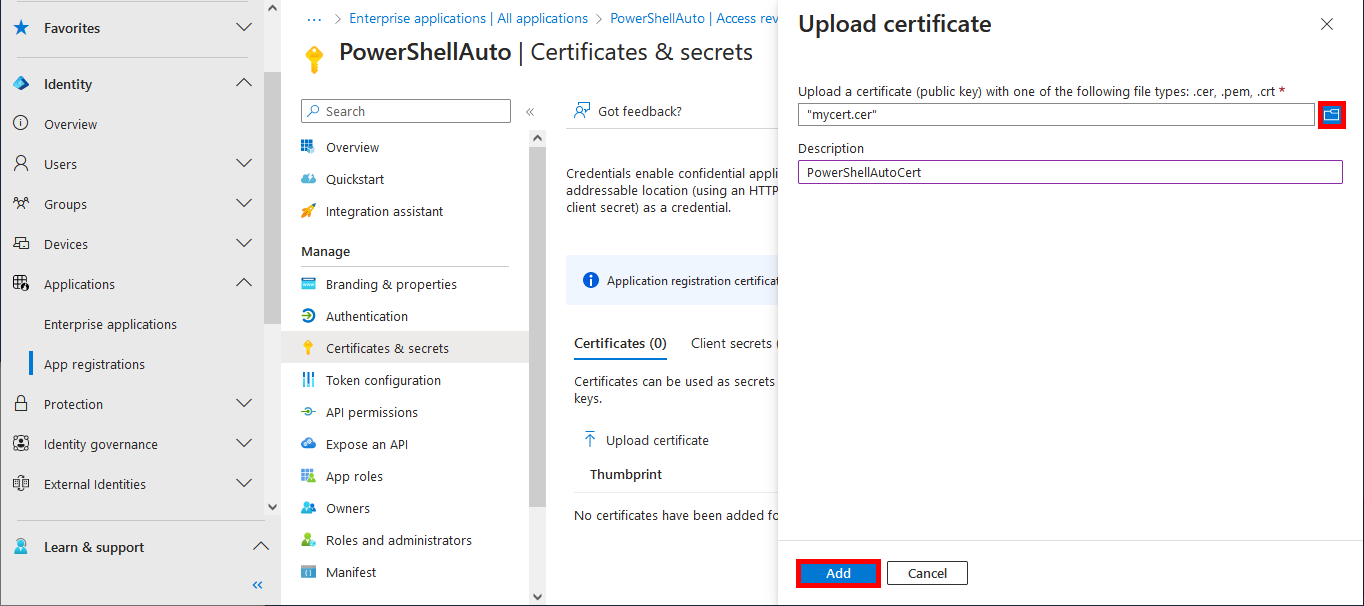
PS C:\> Export-Certificate -Cert $cert -FilePath "C:\mycert.cer"
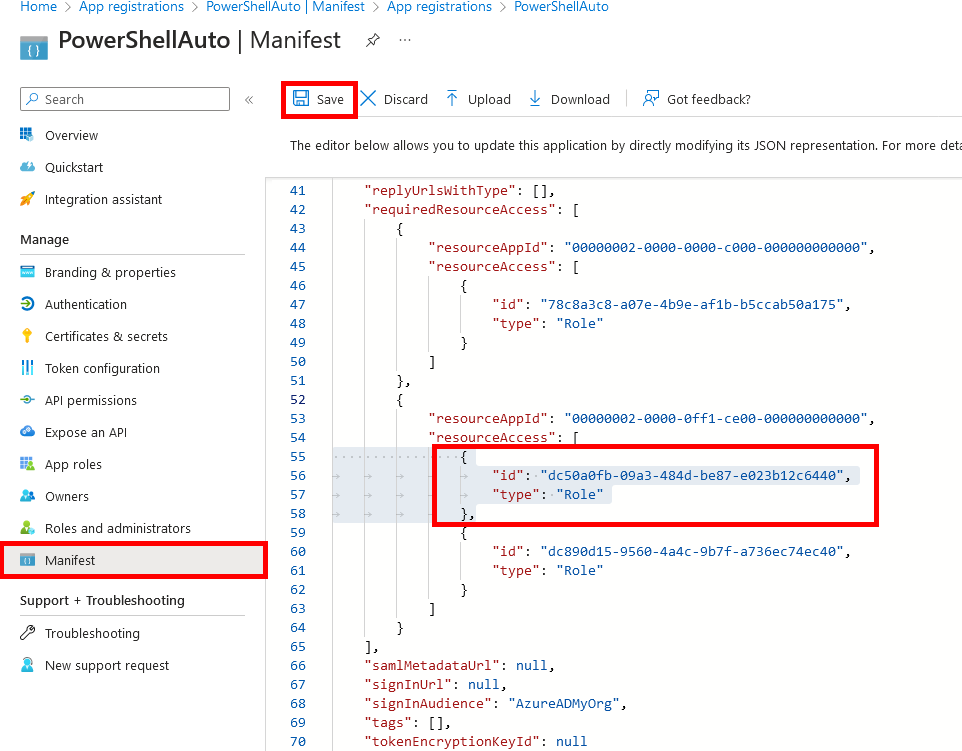
Microsoft Entra

Microsoft Entra Login Page

App Registration

  • Search for App Registrations in the search toolbar:
Microsoft Entra search menu
  • Click to New registration:
Microsoft Entra app registrations menu with the new registration entry highlighted in red
  • Enter a Name, select Single tenant and click on Register:
Microsoft Entra Register an application menu
  • Go to the API permissions menu and click on Add a permission:
Microsoft Entra API permissions menu with add a permission entry highlighted in red
  • In the APIs my organization uses tab, search for Office 365 Exchange (or with its id: 00000002-0000-0ff1-ce00-000000000000) and click on Office 365 Exchange Online:
Microsoft Entra Request API permissions menu with Office 365 Exchange entry highlighted in red
  • Select Application permissions then check the full_access_as_app box and click to Add permissions:
Microsoft Entra Request API permissions menu setting permissions for Office 365 Exchange
  • Do the same with Windows Azure Active Directory (or with its id: 00000002-0000-0000-c000-000000000000):
Microsoft Entra Request API permissions menu setting permissions for Azure Active Directory
  • Look for the Directory.ReadWrite.All permission, check the corresponding box and click on Add permissions:
Microsoft Entra Request API permissions menu adding the Directory.ReadWrite.All permission
  • We can remove permission for Microsoft Graph:
Microsoft Entra Request API permissions menu removing the Microsoft Graph Entry
  • Now go to the manifest menu and insert this code as show below, then click Save:
{ "id": "dc50a0fb-09a3-484d-be87-e023b12c6440", "type": "Role" }, Inserting code in the Microsoft Entra Manifest
  • In the API permissions menu, click on Grant admin consent:
Microsoft Entra Request API permissions menu granting admin consent
  • In the Certificates & secrets menu, click on the Certificates tab then on Upload certificate:
Microsoft Entra App registration uploading a certificate menu
  • Import the previously created Certificate and click on the Add button:
Microsoft Entra App registration uploading a certificate
  • Once imported, the certificate should appear:
a view of a certificate imported into microsoft entra
  • From the Overview menu, retrieve information on Application ID, Object ID and Tenant ID:
microsoft entra overview menu

Microsoft Entra roles and administrators

  • From the search bar, search for Microsoft Entra roles and administrators:
Microsoft Entra search bar with the terms Microsoft Entra roles and administrators
  • In All roles search for Exchange Administrator and edit the role (⚠️ this will gives full administrator rights to the application for Exchange, consider giving less rights⚠️):
microsoft entra all roles menu
  • Click on Add Assignments:
microsoft entra exchange administrator role editor
  • Add the name of the previously defined Application:
adding an application from the add assignments menu in microsoft entra
  • Still in All roles, search for global administrator (⚠️ this will give full administrator rights to the application for AzureAD, consider giving less rights⚠️):
microsoft entra all roles menu searching for authentication administrator
  • As for the Exchange Administrator role, click on Add assignments:
microsoft entra exchange administrator role editor
  • Add the name of the previously defined Application:
adding an application from the add assignments menu in microsoft entra

Connect with PowerShell

PowerShell logo

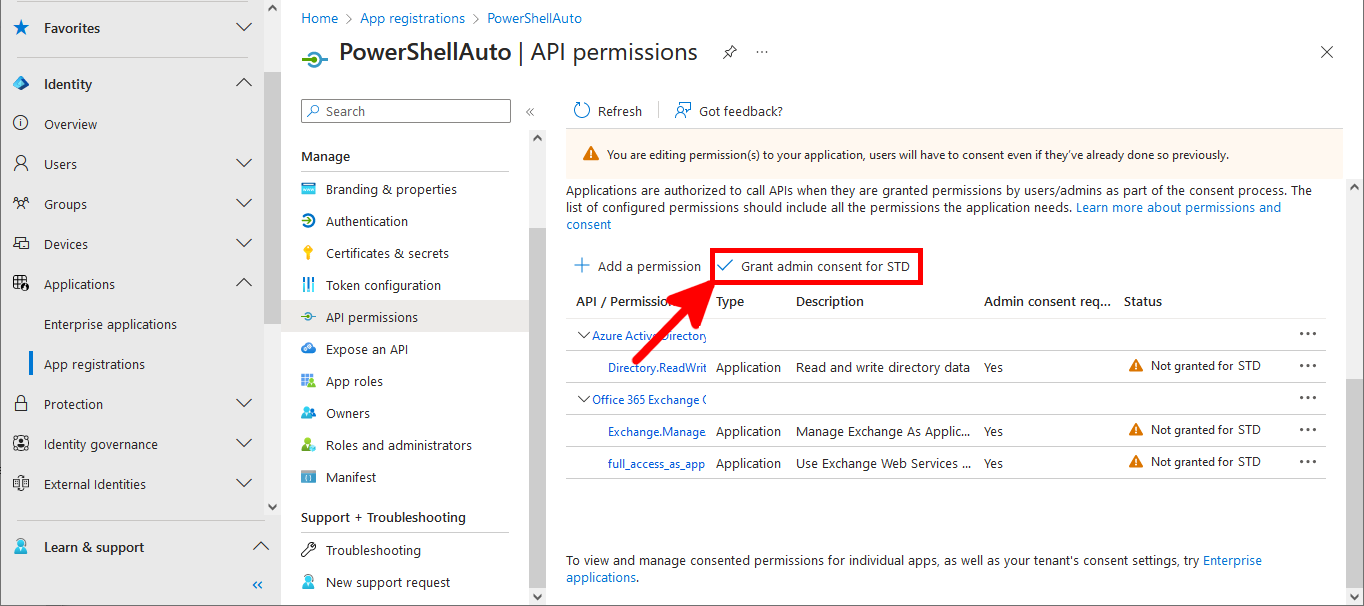
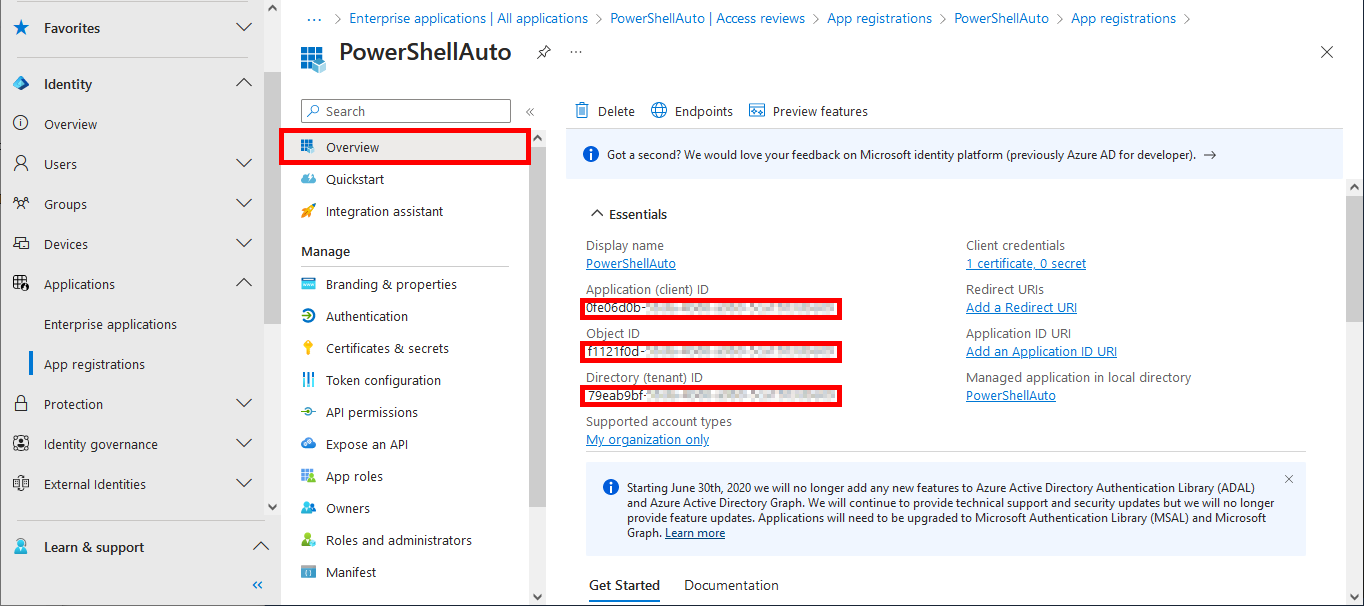
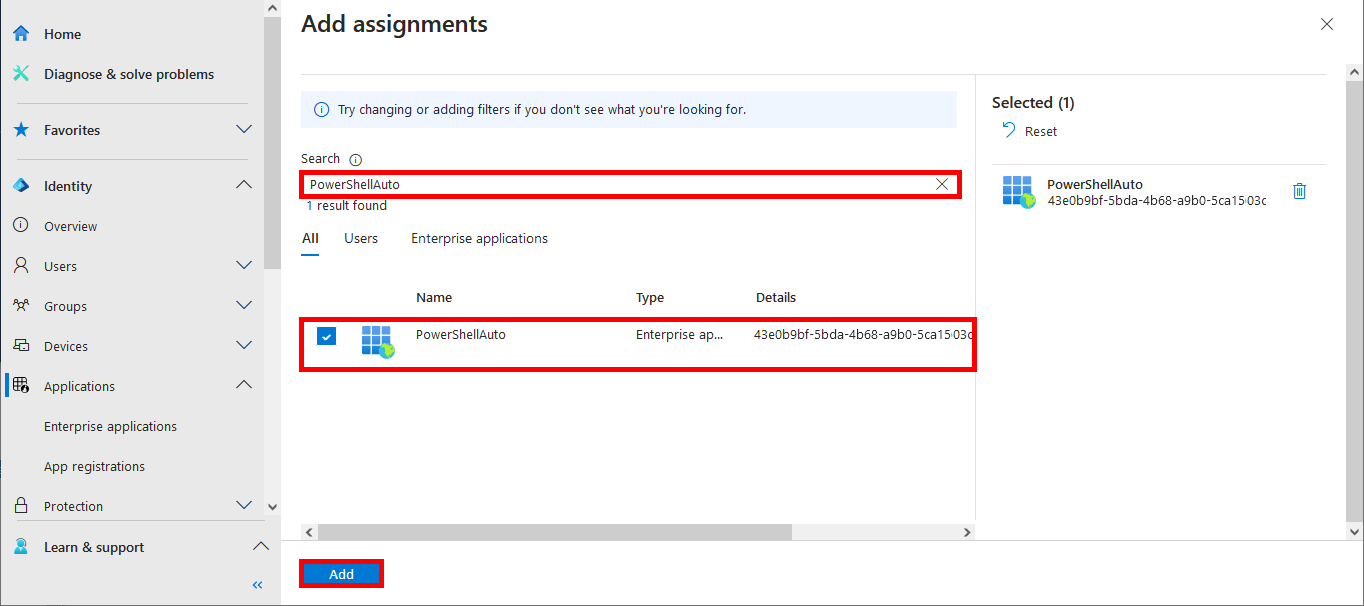
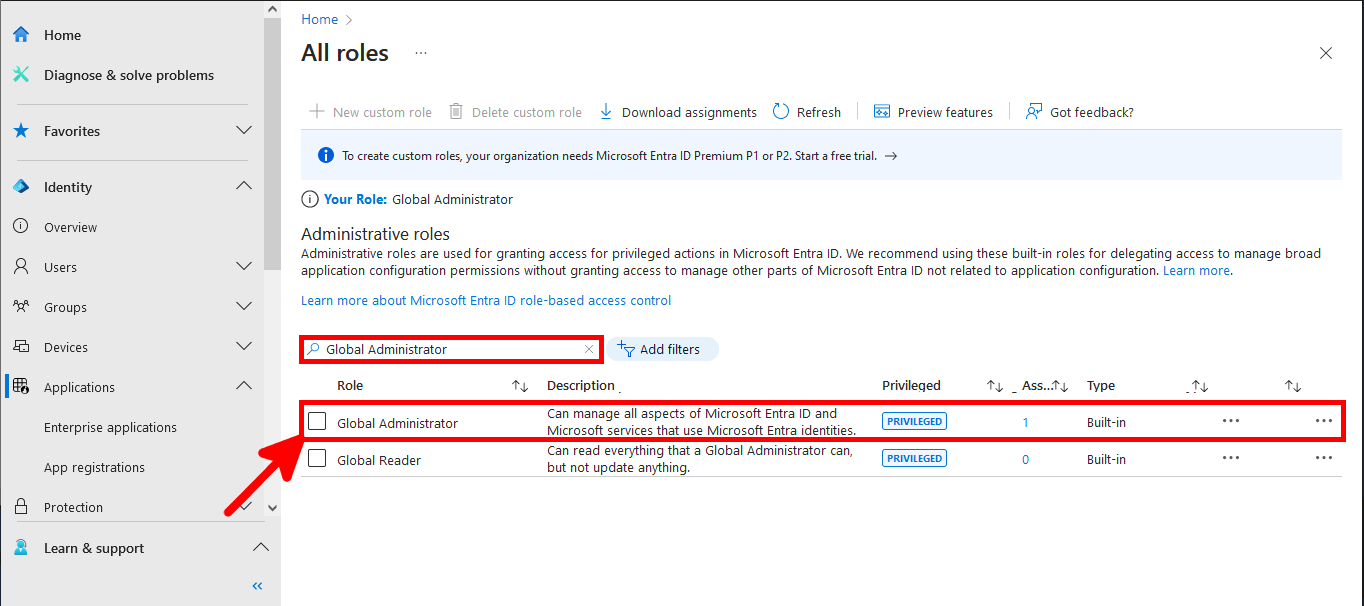
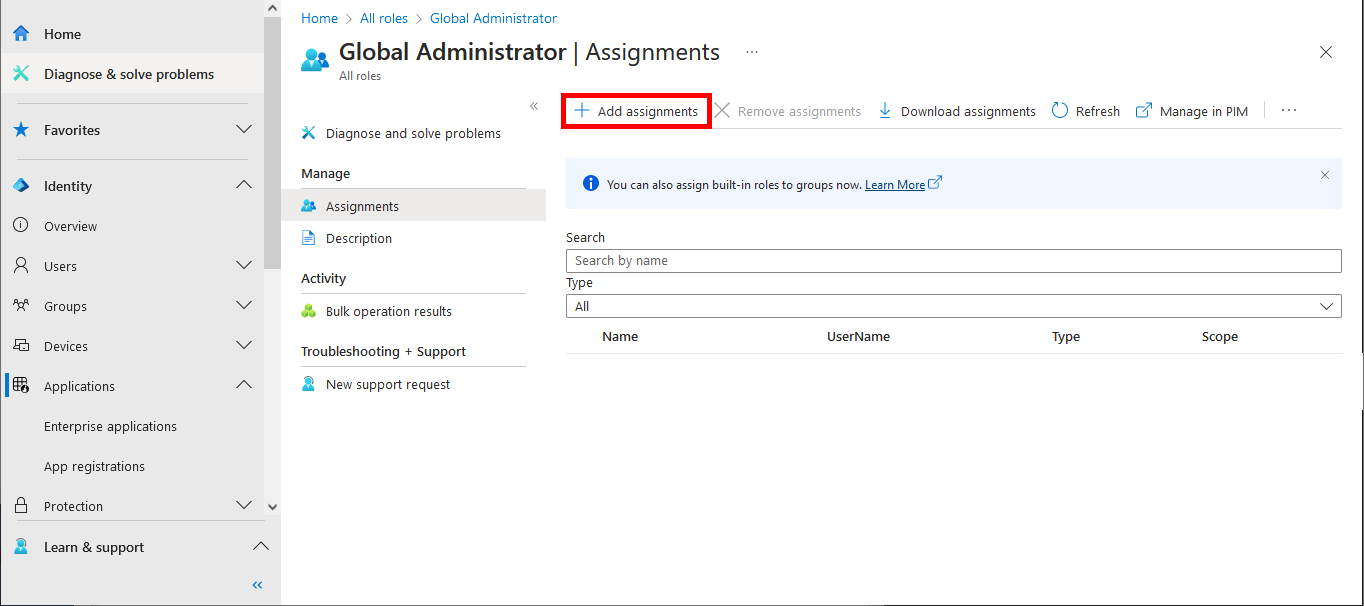
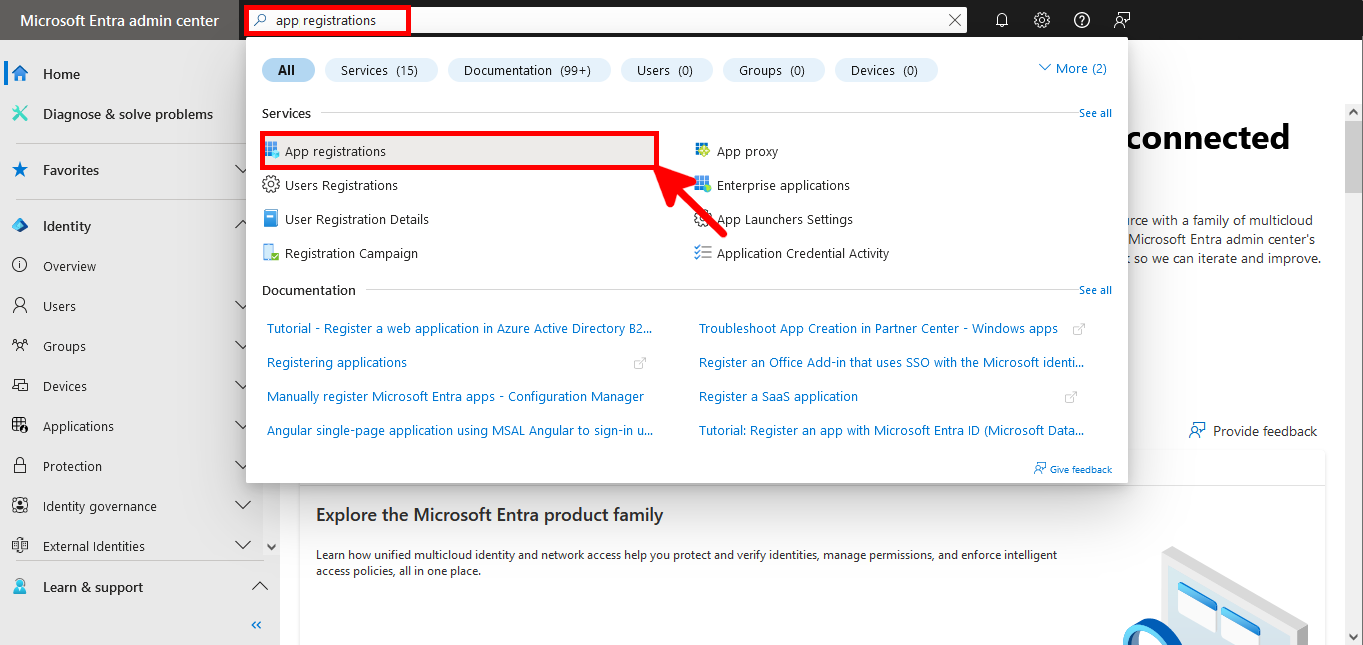
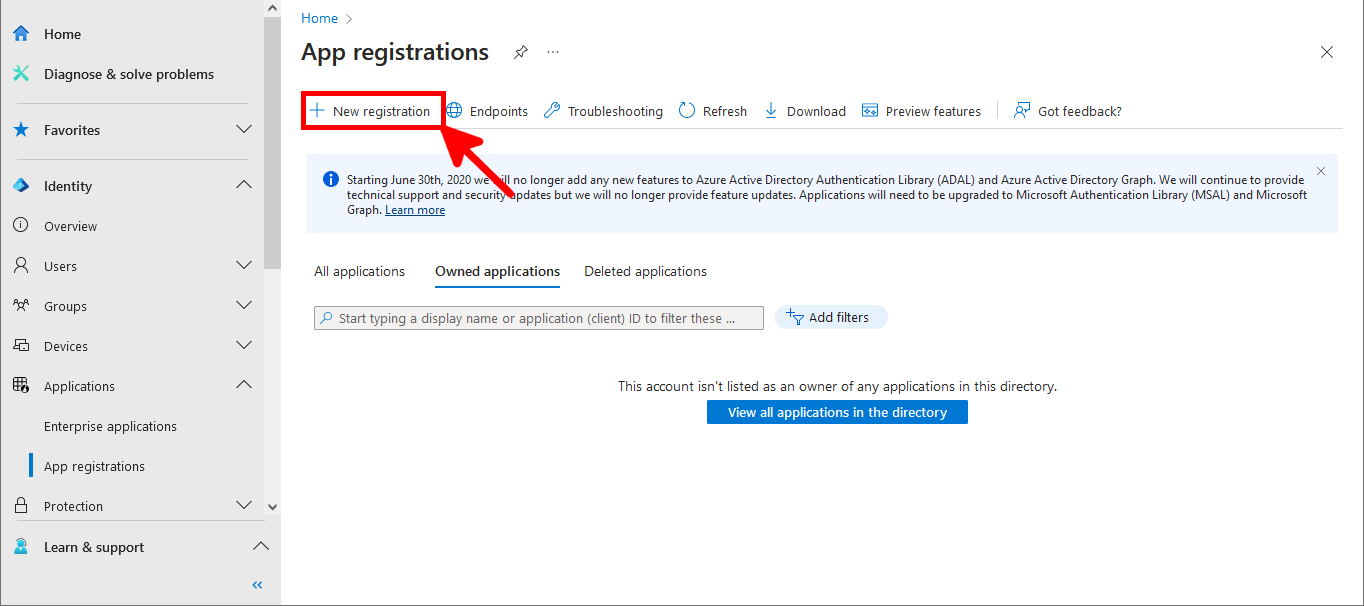
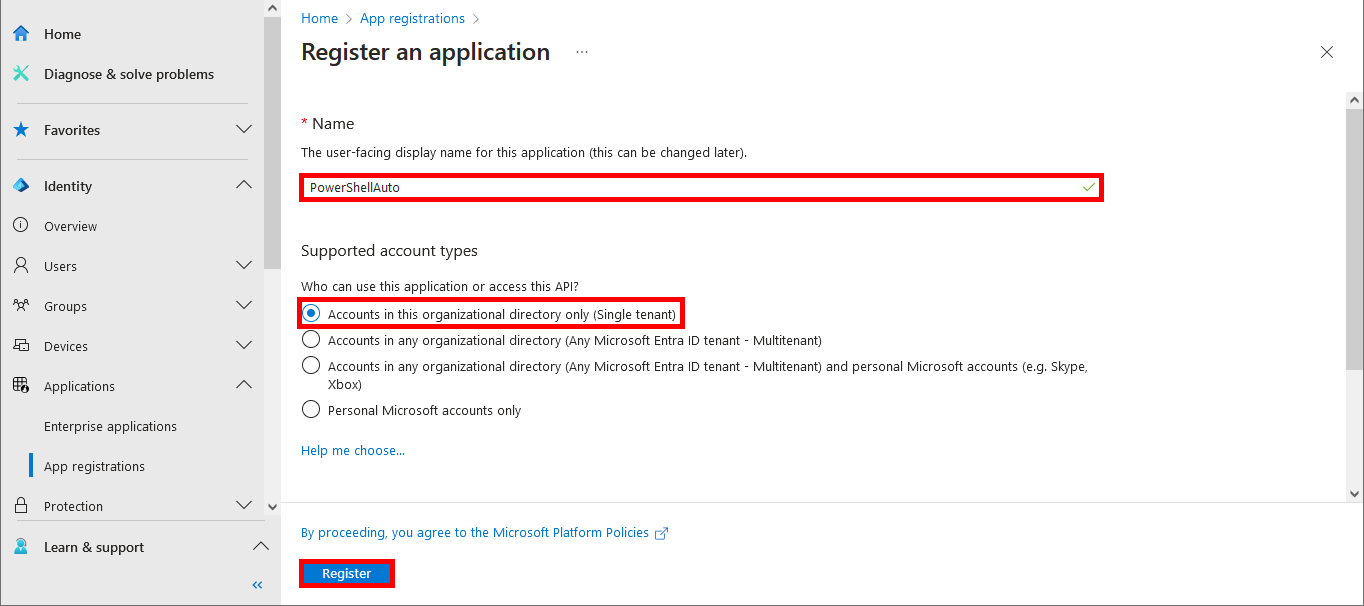
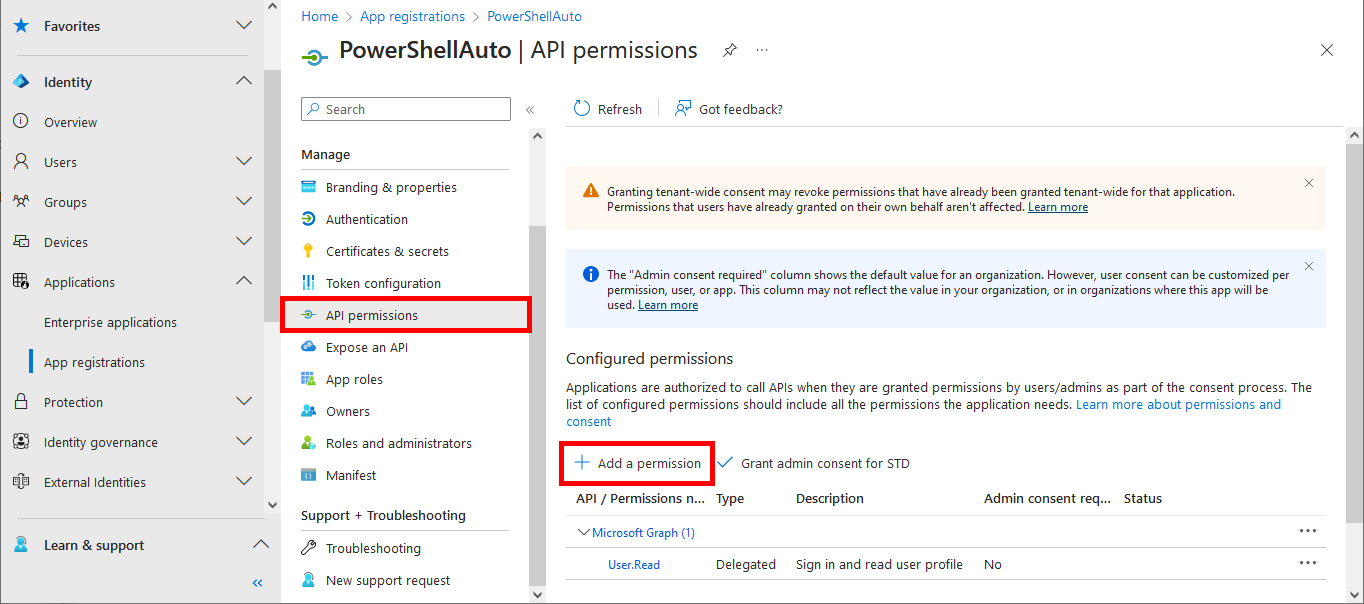
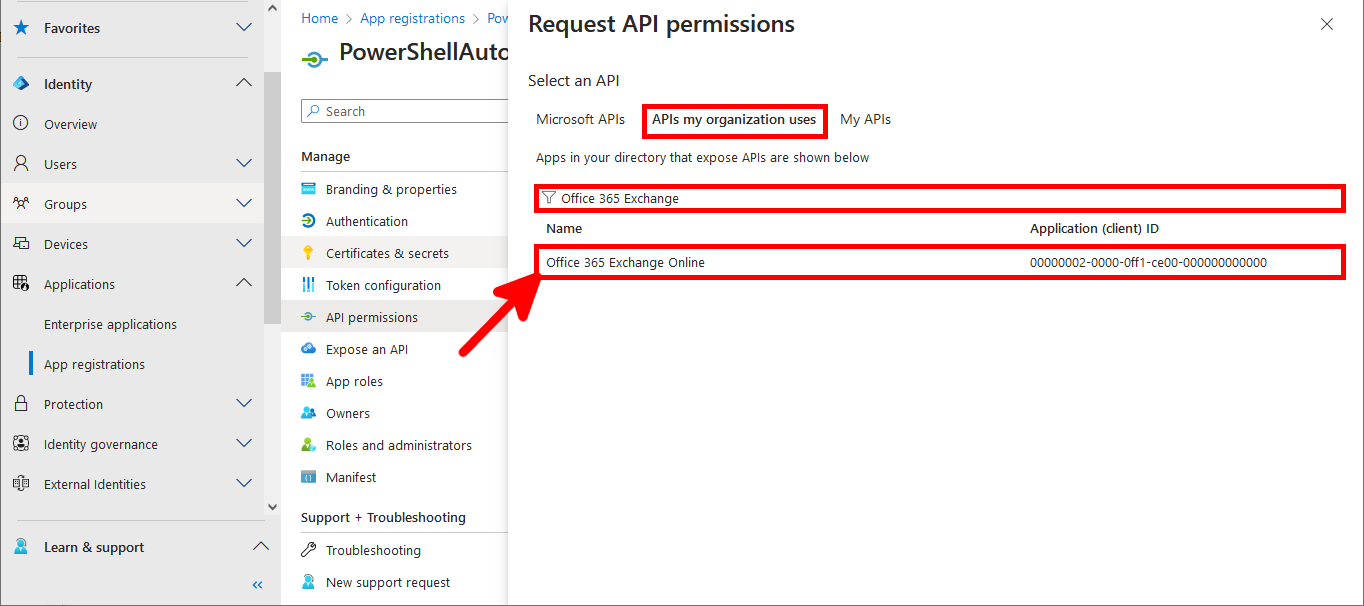
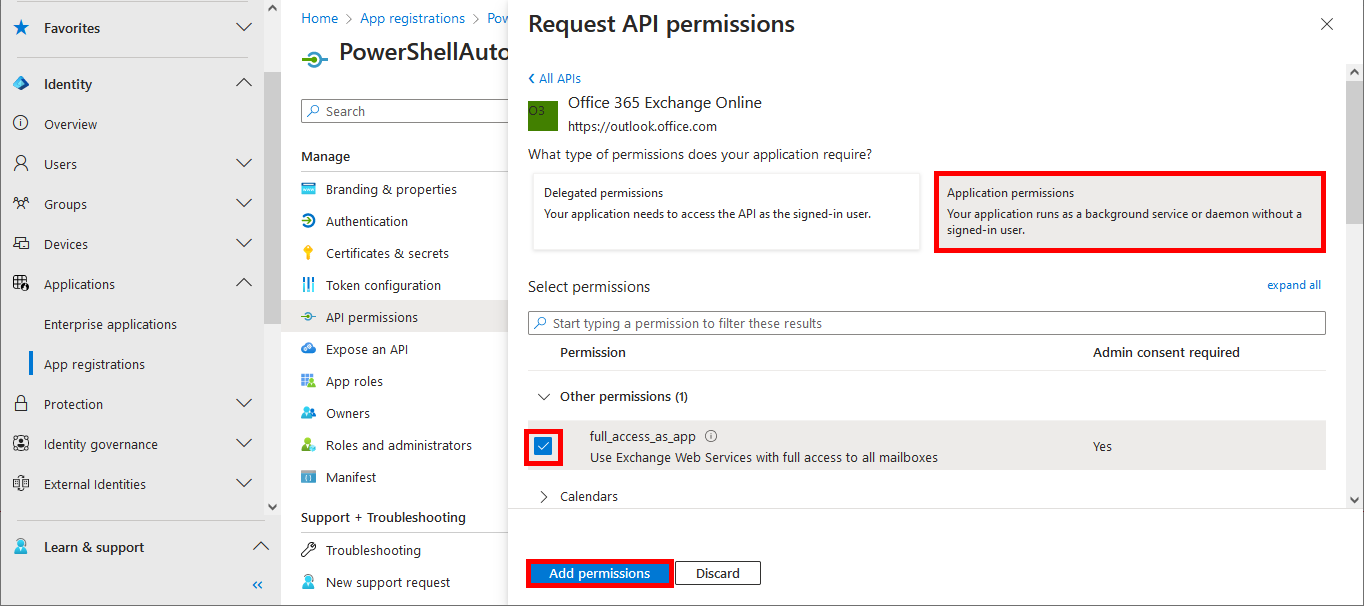
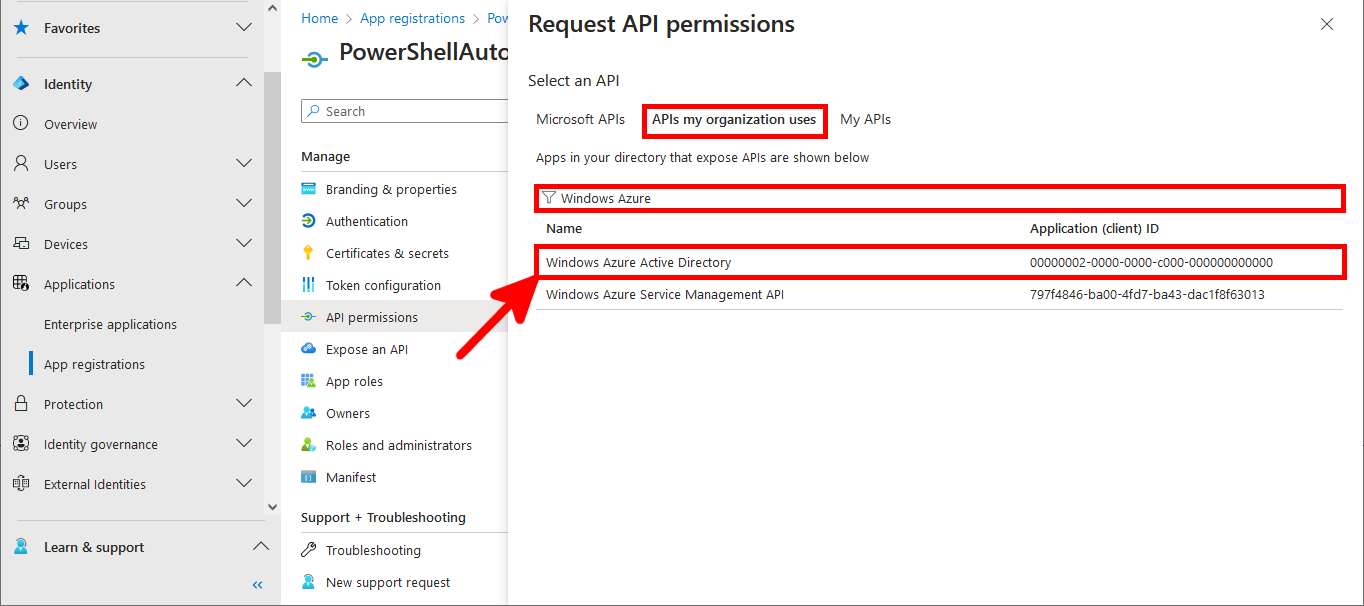
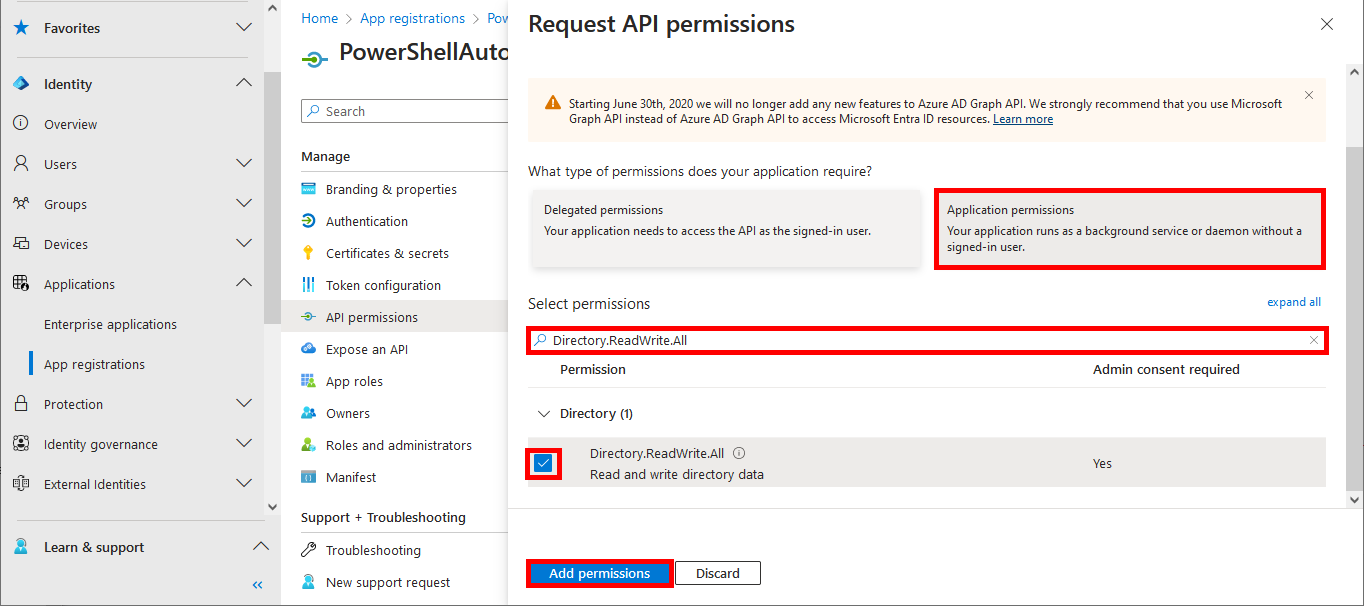
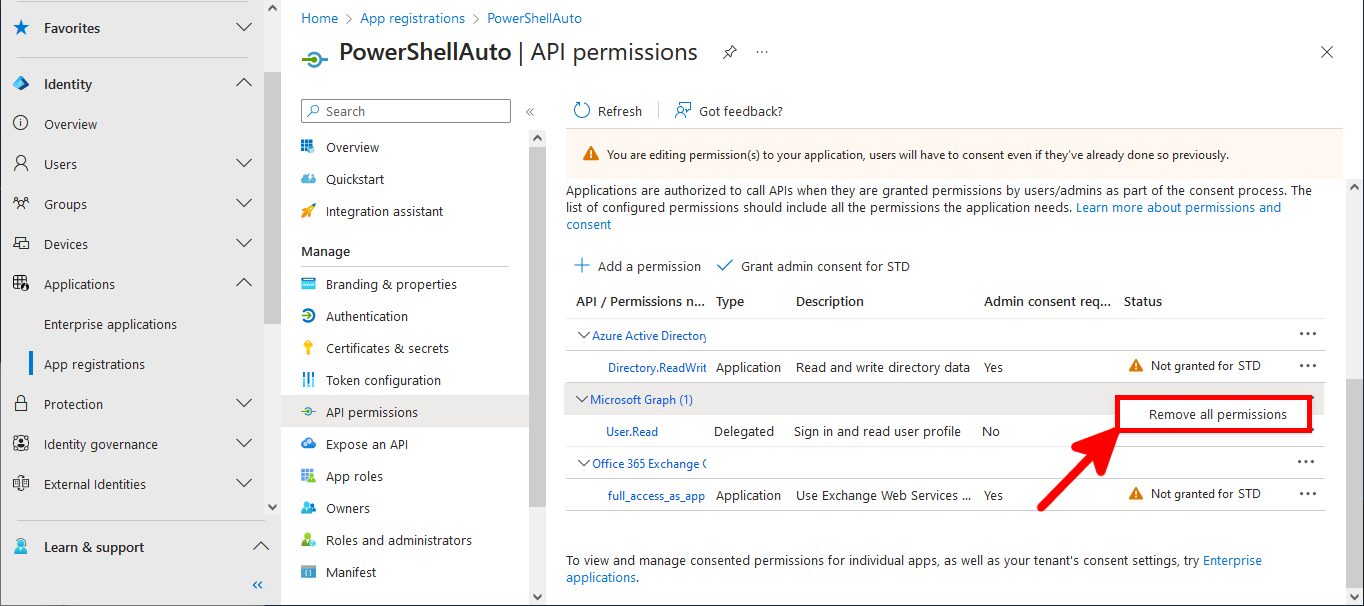
Everything has been configured on the Entra portal, so we can now open a PowerShell prompt (with administrator rights) to connect to Exchange Online Management and AzureAd without needing a password.

PowerShell Modules

  • Install the ExchangeOnlineManagement and AzureAD PowerShell modules:
PS C:\> Install-Module -name ExchangeOnlineManagement PS C:\> Install-Module -name AzureAd
  • Check that you can import modules and enter the powershell.exe -ExecutionPolicy Unrestricted command if you get the following error:
PS C:\> Import-Module ExchangeOnlineManagement Import-Module : File C:\Program Files\WindowsPowerShell\Modules\ExchangeOnlineManagement\3.4.0\netFramework\ExchangeOnlineManagement.psm1 cannot be loaded because running scripts is disabled on this system. For more information, see about_Execution_Policies at https:/go.microsoft.com/fwlink/?LinkID=135170. At line:1 char:1 + Import-Module ExchangeOnlineManagement + ~~~~~~~~~~~~~~~~~~~~~~~~~~~~~~~~~~~~~~ + CategoryInfo : SecurityError: (:) [Import-Module], PSSecurityException + FullyQualifiedErrorId : UnauthorizedAccess,Microsoft.PowerShell.Commands.ImportModuleCommand PS C:\> PowerShell.exe -ExecutionPolicy Unrestricted

Connect to services

  • Get the certificate thumbprint:
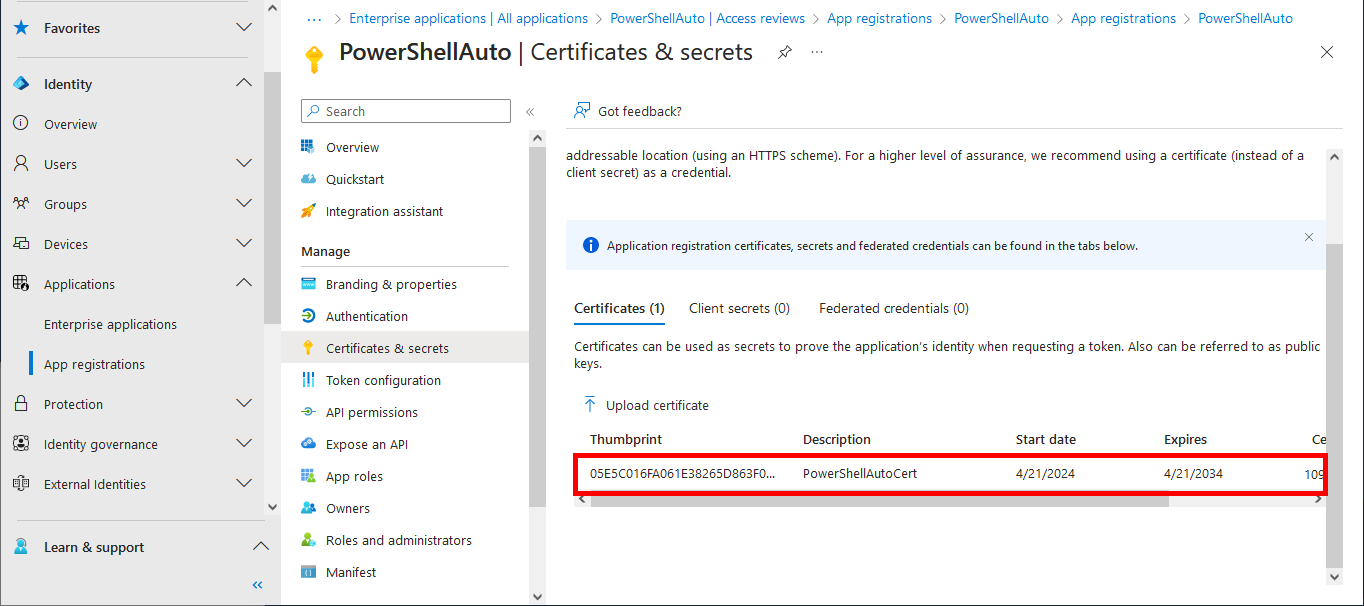
PS C:\> Get-ChildItem -Path Cert:\LocalMachine\My | Where-Object { $_.Subject -eq "CN=Office365Automation" } | Select-Object Thumbprint Thumbprint ---------- 05E5C016FA061E38265D863F04C6CAFC674C84B0
  • Arguments:
    • CertificateThumbprint: Self-signed certificate thumbprint
    • AppId or ApplicationId: Application ID
    • Organization or TenantDomain: the account name in the format XXX.onmicrosoft.com
  • Connect to ExchangeOnline with informations previously collected:
PS C:\> Connect-ExchangeOnline -CertificateThumbprint "05E5C016FA061E38265D863F04C6CAFC674C84B0" -AppId "0fe06d0b-XXXXXX-XXXX-XXXX-XXXXXXXXXXXX" -Organization "XXX.onmicrosoft.com"
  • Connect to AzureAD:
PS C:\> Connect-AzureAD -CertificateThumbprint "05E5C016FA061E38265D863F04C6CAFC674C84B0" -ApplicationId "0fe06d0b-XXXXXX-XXXX-XXXX-XXXXXXXXXXXX" -TenantDomain "XXX.onmicrosoft.com"

Tests

Once logged in, we should be able to create Office365 accounts and set AzureAD rights.

  • For example, create a MailBox and force account to change password:
PS C:\> New-Mailbox -Name "Jane Doe" -DisplayName "Jane Doe" -MicrosoftOnlineServicesID "jane.doe@STD.onmicrosoft.com" -Password (ConvertTo-SecureString -String "P@ssW0rDSuXX" -AsPlainText -Force) -FirstName "Jane" -LastName "Doe" PS C:\> Set-Mailbox -Identity "Jane Doe" -Office "In Hell To Pay" PS C:\> Set-AzureADUser -ObjectId "jane.doe@STD.onmicrosoft.com" -PasswordProfile @{ Password = "P@ssW0rDSuXX"; ForceChangePasswordNextLogin = $true } -Department "In Hell To Pay"
Creative Commons License
This work is licensed under a Creative Commons Attribution-NonCommercial-ShareAlike 4.0 International License.

Contact :

contact mail address