Linux Guide – Installing and Configuring a TFTP Server with tftpd-hpa
- Last updated: Dec 11, 2025

TFTP (Trivial File Transfer Protocol) is a lightweight file transfer protocol that allows a client to upload or download files from a remote host.
Although it is an older protocol, it remains widely used in networking environments, particularly for tasks such as device provisioning and firmware distribution.
I personally use it to update the firmware of my network equipment, including Cisco switches.
This guide explains how to install and configure a TFTP server on Debian using the tftpd-hpa service.
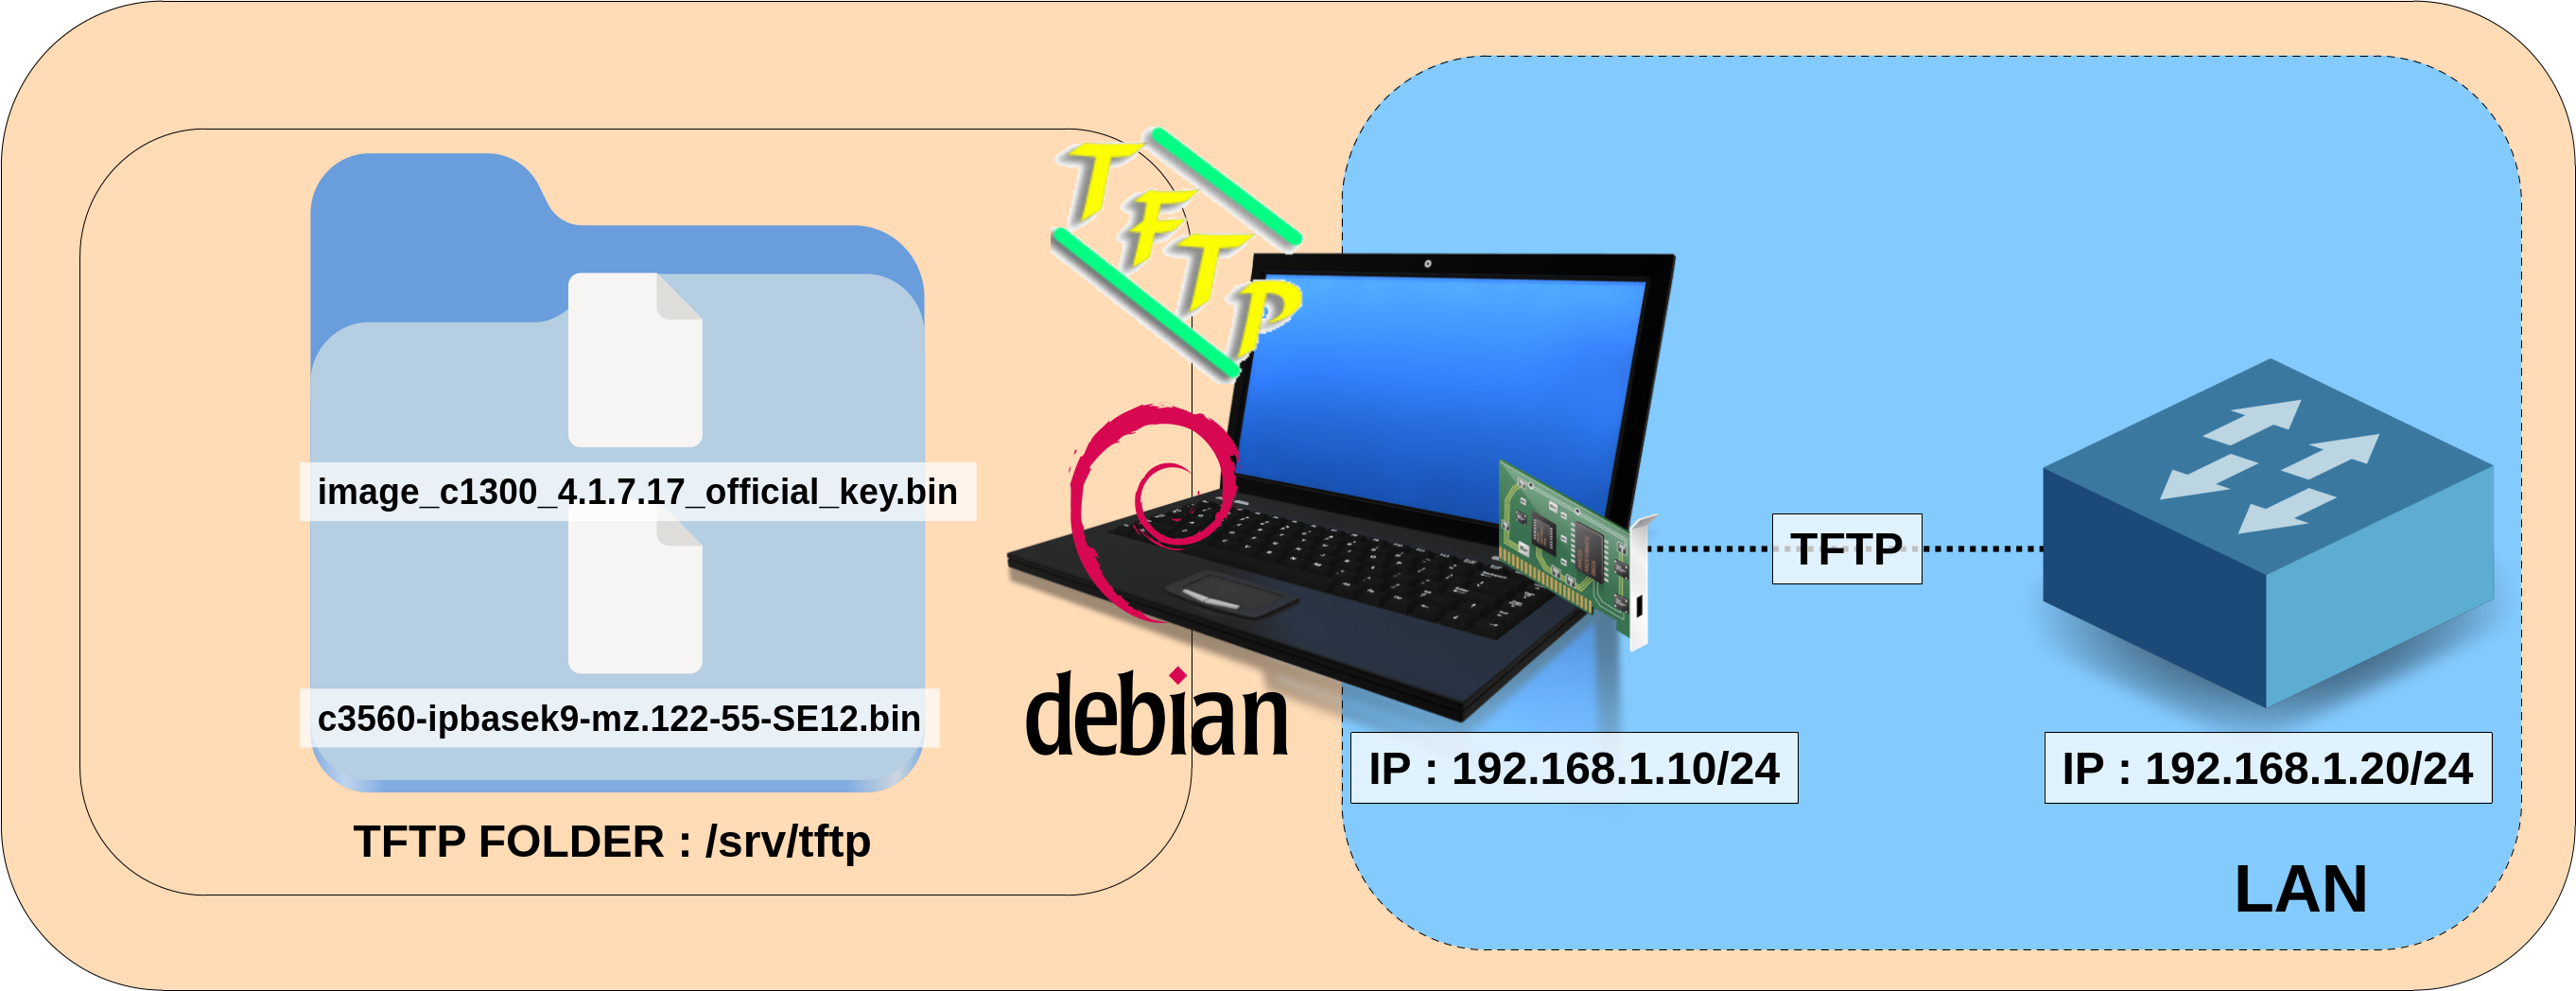
Network Diagram
- Operating System: Debian 13 (Trixie)
- TFTP Server: tftpd-hpa
- Protocol: UDP port 69
- TFTP Root Directory: /srv/tftp
Installation
- Update the package index:
root@server:~# apt update- Install the
tftpd-hpapackage:
root@server:~# apt install tftpd-hpa- The installation normally creates the
/srv/tftpdirectory. If it does not exist, create the TFTP root directory manually:
root@server:~# ls /srv/tftp || mkdir -p /srv/tftpConfiguration
Network Configuration
If your network settings are not already configured, you can follow the instructions below to set up a static IP address.
- Edit the
/etc/network/interfacesfile (replaceens224with your own network interface):
allow-hotplug ens224
iface ens224 inet static
        address 192.168.1.10
        netmask 255.255.255.0
        gateway 192.168.1.254
dns-nameservers 192.168.1.254- Restart the network service (or the entire system) to apply the new configuration:
root@host:~# systemctl restart networkingTFTP service configuration
By default, and for security reasons, the tftpd-hpa server operates in read-only mode. This means that clients can download files, but cannot upload anything. If you want to allow write access (for example, to export configuration files from a switch, see export a configuration file from a Cisco switch), you must enable it manually.
- Edit
/etc/default/tftpd-hpaand add the--createoption to allow clients to upload files:
# /etc/default/tftpd-hpa

TFTP_USERNAME="tftp"
TFTP_DIRECTORY="/srv/tftp"
TFTP_ADDRESS=":69"
TFTP_OPTIONS="--secure --create"- Restart the
tftpd-hpaservice:
root@server:~# systemctl restart tftpd-hpa.service- Set read and write permissions so that files under
/srv/tftpare accessible:
root@server:~# chmod -R ugo+rw /srv/tftp/Checking from a client
To verify that the server is working properly, we can use a TFTP client.
- If you are using a Debian machine (which is a good choice), install the tftp-hpa client:
root@client:~# apt update && apt install tftp-hpa- Connect to the TFTP server:
user@client:~$ tftp 192.168.1.10- Display the client status:
tftp> status
Connected to 192.168.1.10.
Mode: netascii Verbose: off Tracing: off Literal: off
Rexmt-interval: 5 seconds, Max-timeout: 25 seconds- Download a file from the server:
tftp> get c1000-universalk9-mz.152-7.E4.bin- Upload a file to the server (only if write access is enabled):
tftp> put c1000-universalk9-mz.152-7.E4.bin- Exit the TFTP session:
tftp> quitDHCP Server
In some situations, setting up a DHCP server may be necessary. Here is how to configure one on Debian.
- Install the
isc-dhcp-serverpackage:
root@client:~# apt update && apt install isc-dhcp-server- Edit the
/etc/dhcp/dhcpd.conffile. The example below defines an address pool from192.168.10.10to192.168.10.20:
option domain-name "example.org";
default-lease-time 600;
max-lease-time 7200;
ddns-update-style none;

subnet 192.168.10.0 netmask 255.255.255.0 {
  range 192.168.10.10 192.168.10.20;
}- Edit the
/etc/default/isc-dhcp-serverfile and specify the network interface on which thedhcpdservice will listen:
INTERFACESv4="ens224"
#INTERFACESv6=""- Restart the
isc-dhcp-serverservice:
root@client:~# systemctl restart isc-dhcp-server.service- View the active
dhcpdleases:
root@client:~# grep dhcpd /var/log/syslog