How to Create a Mozilla VPN Gateway on Ubuntu Linux
- Last updated: Oct 18, 2025

I have a Mozilla VPN license because I think it’s an excellent way to support the foundation, and it’s also a very solid VPN solution. But I have to admit, I’m a slightly frustrated user!
Indeed, Mozilla VPN officially supports Windows 10/11, macOS, Android, iOS, Ubuntu, and Debian (partially). But what if you're using Arch Linux or another unsupported distribution?
This guide shows you how to create a VPN gateway using Ubuntu that routes traffic from any Linux machine on your network through Mozilla VPN. This solution is not only more flexible but also more practical than installing the VPN client on every device.
What you'll learn:
- Install and configure Mozilla VPN on Ubuntu
- Set up IPv4 and IPv6 forwarding
- Create NAT masquerading rules
- Route traffic from unsupported Linux distributions
- Configure port-based routing for specific protocols
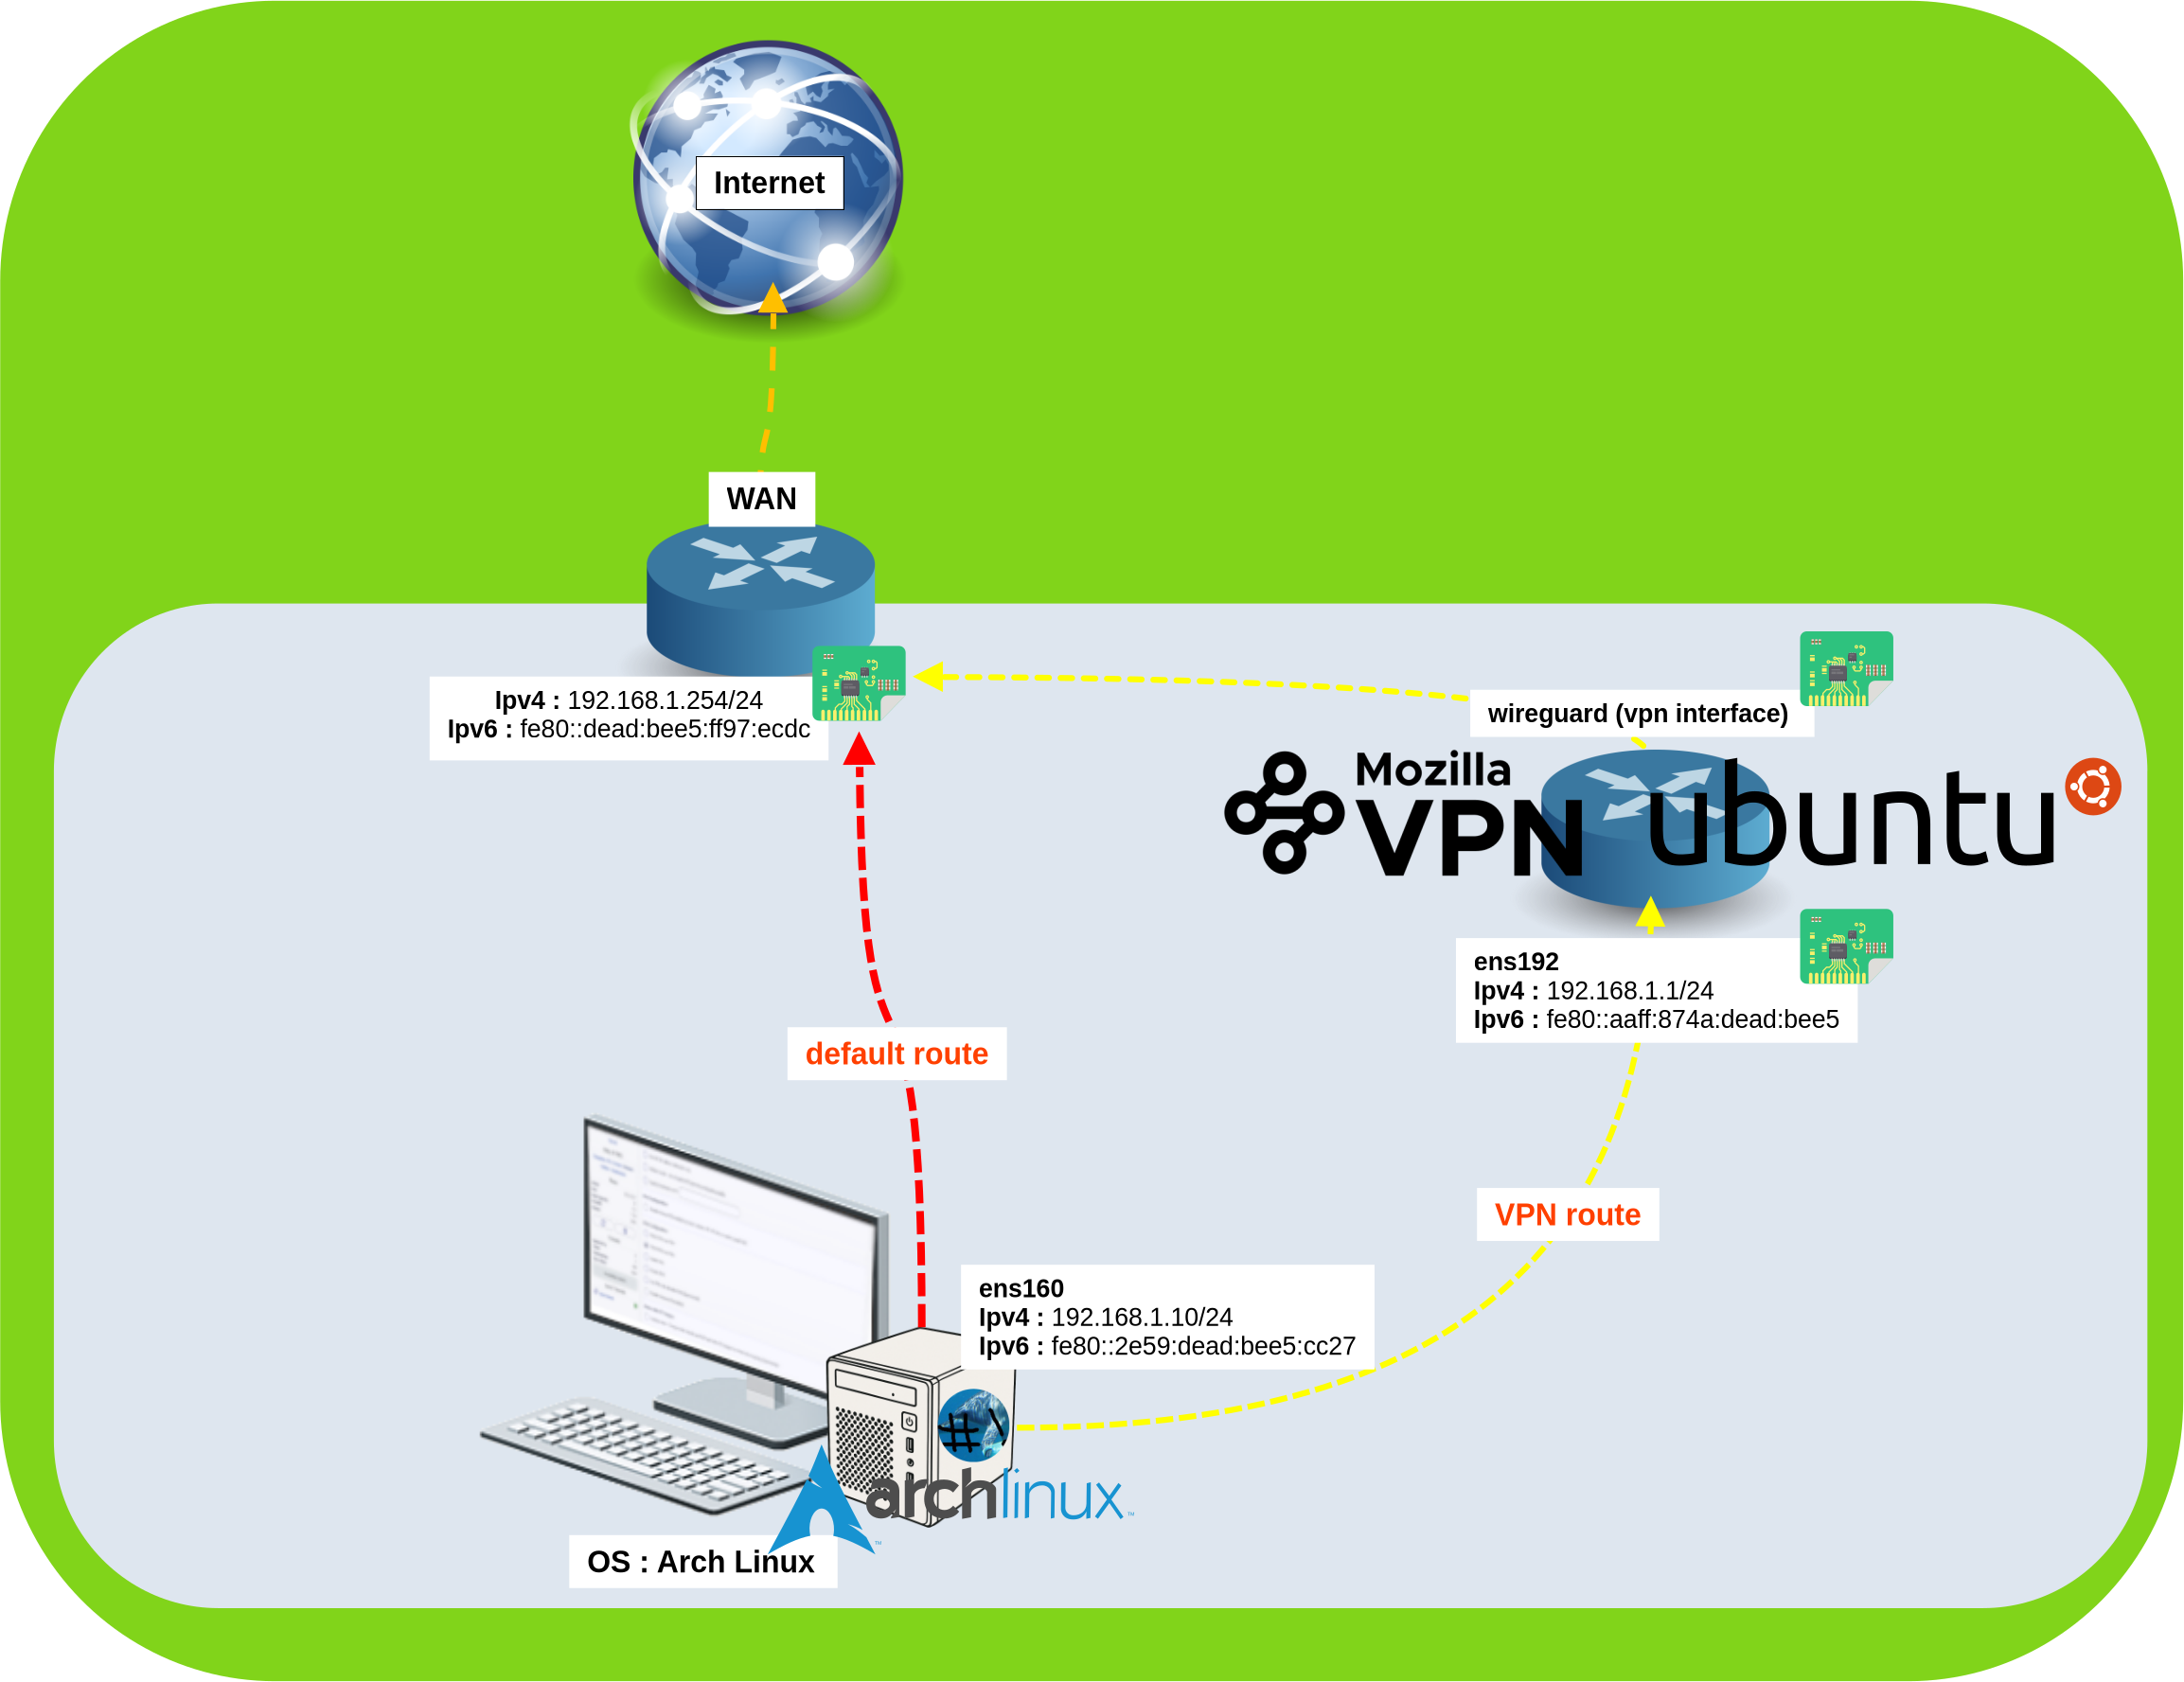
VPN Gateway Network Architecture
This tutorial demonstrates how to configure an Ubuntu machine as a VPN gateway router. This setup enables any device on your network—such as an Arch Linux machine—to route traffic through the Mozilla VPN connection.

Setting Up Ubuntu as a VPN Gateway
Install Mozilla VPN on Ubuntu
Follow these steps to install Mozilla VPN from the official Mozilla APT repository for Linux. Using the official repository ensures automatic updates and proper package verification.
Add Mozilla APT Repository
- Create the APT keyrings directory:
user@ubuntu:~$ sudo install -d -m 0755 /etc/apt/keyrings- Import the Mozilla APT repository signing key:
user@ubuntu:~$ wget -q https://packages.mozilla.org/apt/repo-signing-key.gpg -O- | sudo tee /etc/apt/keyrings/packages.mozilla.org.asc > /dev/null- Ensure the fingerprint matches
35BAA0B33E9EB396F59CA838C0BA5CE6DC6315A3to confirm authenticity:
user@ubuntu:~$ gpg -n -q --import --import-options import-show /etc/apt/keyrings/packages.mozilla.org.asc | awk '/pub/{getline; gsub(/^ +| +$/,""); if($0 == "35BAA0B33E9EB396F59CA838C0BA5CE6DC6315A3") print "\nThe key fingerprint matches ("$0").\n"; else print "\nVerification failed: the fingerprint ("$0") does not match the expected one.\n"}'- Add the Mozilla APT repository to your sources list:
user@ubuntu:~$ echo "deb [signed-by=/etc/apt/keyrings/packages.mozilla.org.asc] https://packages.mozilla.org/apt mozilla main" | sudo tee -a /etc/apt/sources.list.d/mozilla.list > /dev/nullInstall Mozilla VPN Package
- Update your package list and install Mozilla VPN:
user@ubuntu:~$ sudo apt updateuser@ubuntu:~$ sudo apt install mozillavpnExport Mozilla VPN Configuration for WireGuard
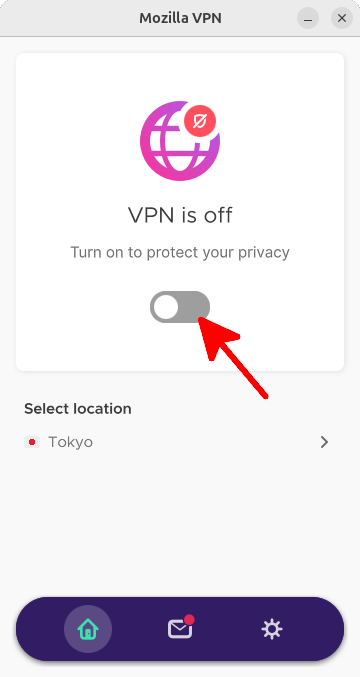
Launch Mozilla VPN from the GUI:
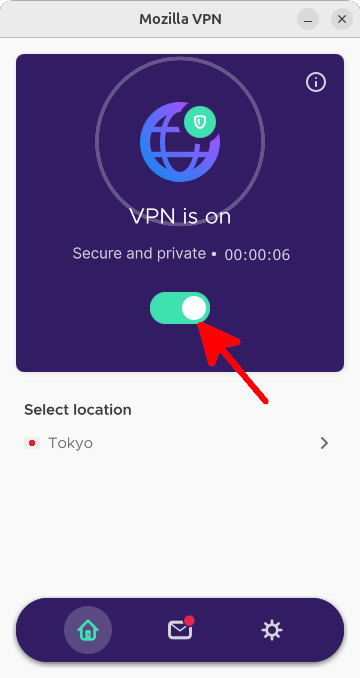
Click the toggle switch to activate the VPN connection. You can select your preferred server location (e.g., Tokyo) before connecting.

Save the current VPN configuration to a WireGuard file:
Use the mozillavpn wgconf command to export your VPN configuration. This creates a wireguard.conf file that can be used with the standard WireGuard tools:
user@ubuntu:~$ mozillavpn wgconf > wireguard.confDisable Mozilla VPN from the GUI:
Once the configuration is exported, turn off the Mozilla VPN client by clicking the toggle switch. We'll use WireGuard directly instead of the GUI application:

Start the VPN using WireGuard:
Load the exported configuration file with the wg-quick command:
user@ubuntu:~$ sudo wg-quick up ./wireguard.confEnable IP Forwarding on Ubuntu
To transform your Ubuntu server into a VPN gateway, you must enable IP forwarding. This kernel parameter allows the server to route packets between network interfaces, which is essential for forwarding traffic from clients through the Mozilla VPN tunnel.
Enable IPv4 Forwarding
- Temporarily method (active until reboot):
user@ubuntu:~$ echo 1 | sudo tee /proc/sys/net/ipv4/ip_forward- Persistent method (survives reboot). Edit the
/etc/sysctl.conffile and add or uncomment the following line:
net.ipv4.ip_forward=1- Apply the configuration changes:
user@ubuntu:~$ sudo sysctl -pEnable IPv6 Forwarding
- Temporarily method (active until reboot):
user@ubuntu:~$ echo 1 | sudo tee /proc/sys/net/ipv6/conf/all/forwarding- Persistent method (survives reboot). Edit the
/etc/sysctl.conffile and add or uncomment the following line:
net.ipv6.conf.all.forwarding=1- Apply the configuration changes:
user@ubuntu:~$ sudo sysctl -pConfigure NAT Masquerading Rules
Configure NAT masquerading to allow clients to route their traffic through the VPN gateway. This translates internal IP addresses to the VPN's external address.
IPv4 Masquerading
- Add the iptables NAT rule:
user@ubuntu:~$ sudo iptables -t nat -A POSTROUTING -o wireguard -j MASQUERADEIPv6 Masquerading
- Add the ip6tables NAT rule:
user@ubuntu:~$ sudo ip6tables -t nat -A POSTROUTING -o wireguard -j MASQUERADEThe Ubuntu VPN gateway configuration is complete. The server can now route client traffic through the Mozilla VPN tunnel. In the following section, we'll configure an Arch Linux machine to use this gateway for internet access.
Configure Arch Linux Client to Use VPN Gateway
Now that the Ubuntu VPN gateway is operational, you can configure client devices to route their traffic through it. This section demonstrates three different routing strategies for Arch Linux clients:
- Route all traffic - Send all internet traffic through the VPN gateway
- Route specific hosts - Only route traffic to selected IP addresses through the VPN
- Port-based routing (PBR) - Route traffic based on protocols (HTTP, HTTPS, etc.) through the VPN
Choose the method that best fits your use case. The first option is the simplest, while port-based routing offers the most flexibility.
Route All Traffic Through the VPN Gateway
This is the simplest configuration method. By changing the default gateway on your Arch Linux client, all internet traffic will automatically route through the Ubuntu VPN gateway.
Configure IPv4 Default Route
- Remove the current default route:
root@arch:~# route del default- Add the VPN gateway as the default route (replace
192.168.1.1with your Ubuntu gateway's IP address andens160with your network interface name):
root@arch:~# route add default via 192.168.1.1 dev ens160Configure IPv6 Default Route
- From the Ubuntu VPN gateway, note the IPv6 link-local address:
user@ubuntu:~$ ip -6 addr sh
2: ens192: <BROADCAST,MULTICAST,UP,LOWER_UP> mtu 1500 qdisc fq_codel state UP group default qlen 1000
    inet6 2001:db8::/64 scope global dynamic mngtmpaddr
       valid_lft 86187sec preferred_lft 14187sec
    inet6 fe80::aaff:874a:dead:bee5/64 scope link
valid_lft forever preferred_lft forever- From the Arch Linux client, remove the current IPv6 default route:
root@arch:~# ip -6 route del default- Add the VPN gateway as the IPv6 default route. (replace
fe80::aaff:874a:dead:bee5with your Ubuntu gateway's link-local address andens160with your interface name):
root@arch:~# ip -6 route add default via fe80::aaff:874a:dead:bee5 dev ens160 metric 1Route Specific Hosts Through the VPN Gateway
Instead of routing all traffic, you can configure static routes for specific destination IP addresses or networks. This method allows you to selectively use the VPN for certain destinations while maintaining direct internet access for everything else.
IPv4 Host-Based Routing
- Route a single IP address through the VPN gateway, for example, to route traffic destined for Google DNS (
8.8.8.8) through the VPN:
root@arch:~# ip route add 8.8.8.8 via 192.168.1.1 dev ens160- Route an entire network through the VPN gateway:
root@arch:~# ip route add 10.0.0.0/8 via 192.168.1.1 dev ens160- Route multiple specific hosts:
root@arch:~# ip route add 1.1.1.1 via 192.168.1.1 dev ens160
root@arch:~# ip route add 8.8.4.4 via 192.168.1.1 dev ens160
IPv6 Host-Based Routing
- Route a specific IPv6 address through the VPN gateway:
root@arch:~# ip -6 route add 2001:0db8::1 via fe80::aaff:874a:dead:bee5 dev ens160Verify and Manage Routes
- View the routing table:
root@arch:~# ip route show- Remove a static route:
root@arch:~# ip route del 8.8.8.8Port-Based Routing (PBR)
PBR (Port-Based Routing) consists of marking specific network packets that should be routed through the VPN gateway. Only packets marked with the value 0x80 will use the VPN route. This method allows you to send selected hosts or protocols — such as HTTP or HTTPS traffic — through the Mozilla VPN tunnel while keeping other traffic on the regular network path.
VPN Routing Table
- Create a dedicated vpn routing table:
root@arch:~# echo "200 vpn" >> /etc/iproute2/rt_tables- Associate the 0x80 packet mark with the vpn table:
root@arch:~# ip rule add fwmark 0x80 table vpn- Add your Ubuntu VPN gateway as the default route for the vpn table:
root@arch:~# ip route add default via 192.168.1.1 dev ens160 table vpn- Check the VPN routing table:
root@arch:~# ip route list table vpn
default via 192.168.1.1 dev ens160
Route Specific Protocols with nftables Rules
In this example, we will mark outgoing HTTP and HTTPS packets so they are routed through the VPN gateway. Using nftables allows flexible packet marking based on ports, addresses, or protocols — a powerful approach for advanced Linux routing setups with Mozilla VPN.
- Create a new nftables MANGLE chain:
root@arch:~# nft add chain ip filter MANGLE { type route hook output priority -150\; policy accept \; }- Mark all HTTP and HTTPS packets except those destined for the local LAN (192.168.1.0/24):
root@arch:~# nft add rule ip filter MANGLE tcp dport { 80, 443 } ip daddr \!= { 192.168.1.0/24 } meta mark set 0x80 counter- To mark all outbound TCP packets instead:
root@arch:~# nft add rule ip filter MANGLE tcp sport \>= 1024 ip daddr \!= { 192.168.1.0/24 } meta mark set 0x80 counter- To mark all outbound UDP packets:
root@arch:~# nft add rule ip filter MANGLE udp sport \>= 1024 ip daddr \!= { 192.168.1.0/24 } meta mark set 0x80 counterCheck Your VPN Connection
Now that everything is configured, let's verify that your traffic is actually going through the Mozilla VPN gateway. The easiest way to confirm this is by checking your public IP address (WAN IP). If your VPN is working correctly, your IP address should match the location of your selected VPN server.
IPv4
- Retrieve your current public IPv4 address:
root@arch:~# curl ipinfo.io/ipIPv6
- Retrieve your current public IPv6 address:
root@arch:~# telnet -6 ipv6.telnetmyip.comCheck IP Addresses with Firefox WebExtension STIP
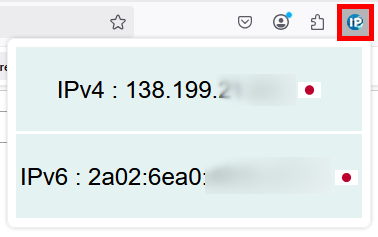
I've developed a lightweight Firefox WebExtension to called STIP 🥰 that lets you instantly view your current public IPv4 and IPv6 addresses directly from the browser. You can download it for free 🤗 from the official Mozilla Add-ons website:
Get the STIP extension on Mozilla Add-ons

The app has spoken — we’re indeed in Tokyo! (Or at least, our internet connection is.)