Installing Kali Linux in a VMware ESXi Virtual Machine
- Last updated: Jun 28, 2025


There are many hypervisors compatible with Kali Linux, as shown on the official Kali Linux download page.
Surprisingly, no official ESXi-native image is provided. While the Virtual Machines section includes a VMware image of Kali Linux, it is only designed for VMware Workstation, which is not directly compatible with VMware ESXi.
This guide details a method to import the VMware Workstation image into a VMware ESXi host.
- Configuration:
- VMware ESXi version: 8
- Kali Linux release: 2024.3
Download Kali Linux
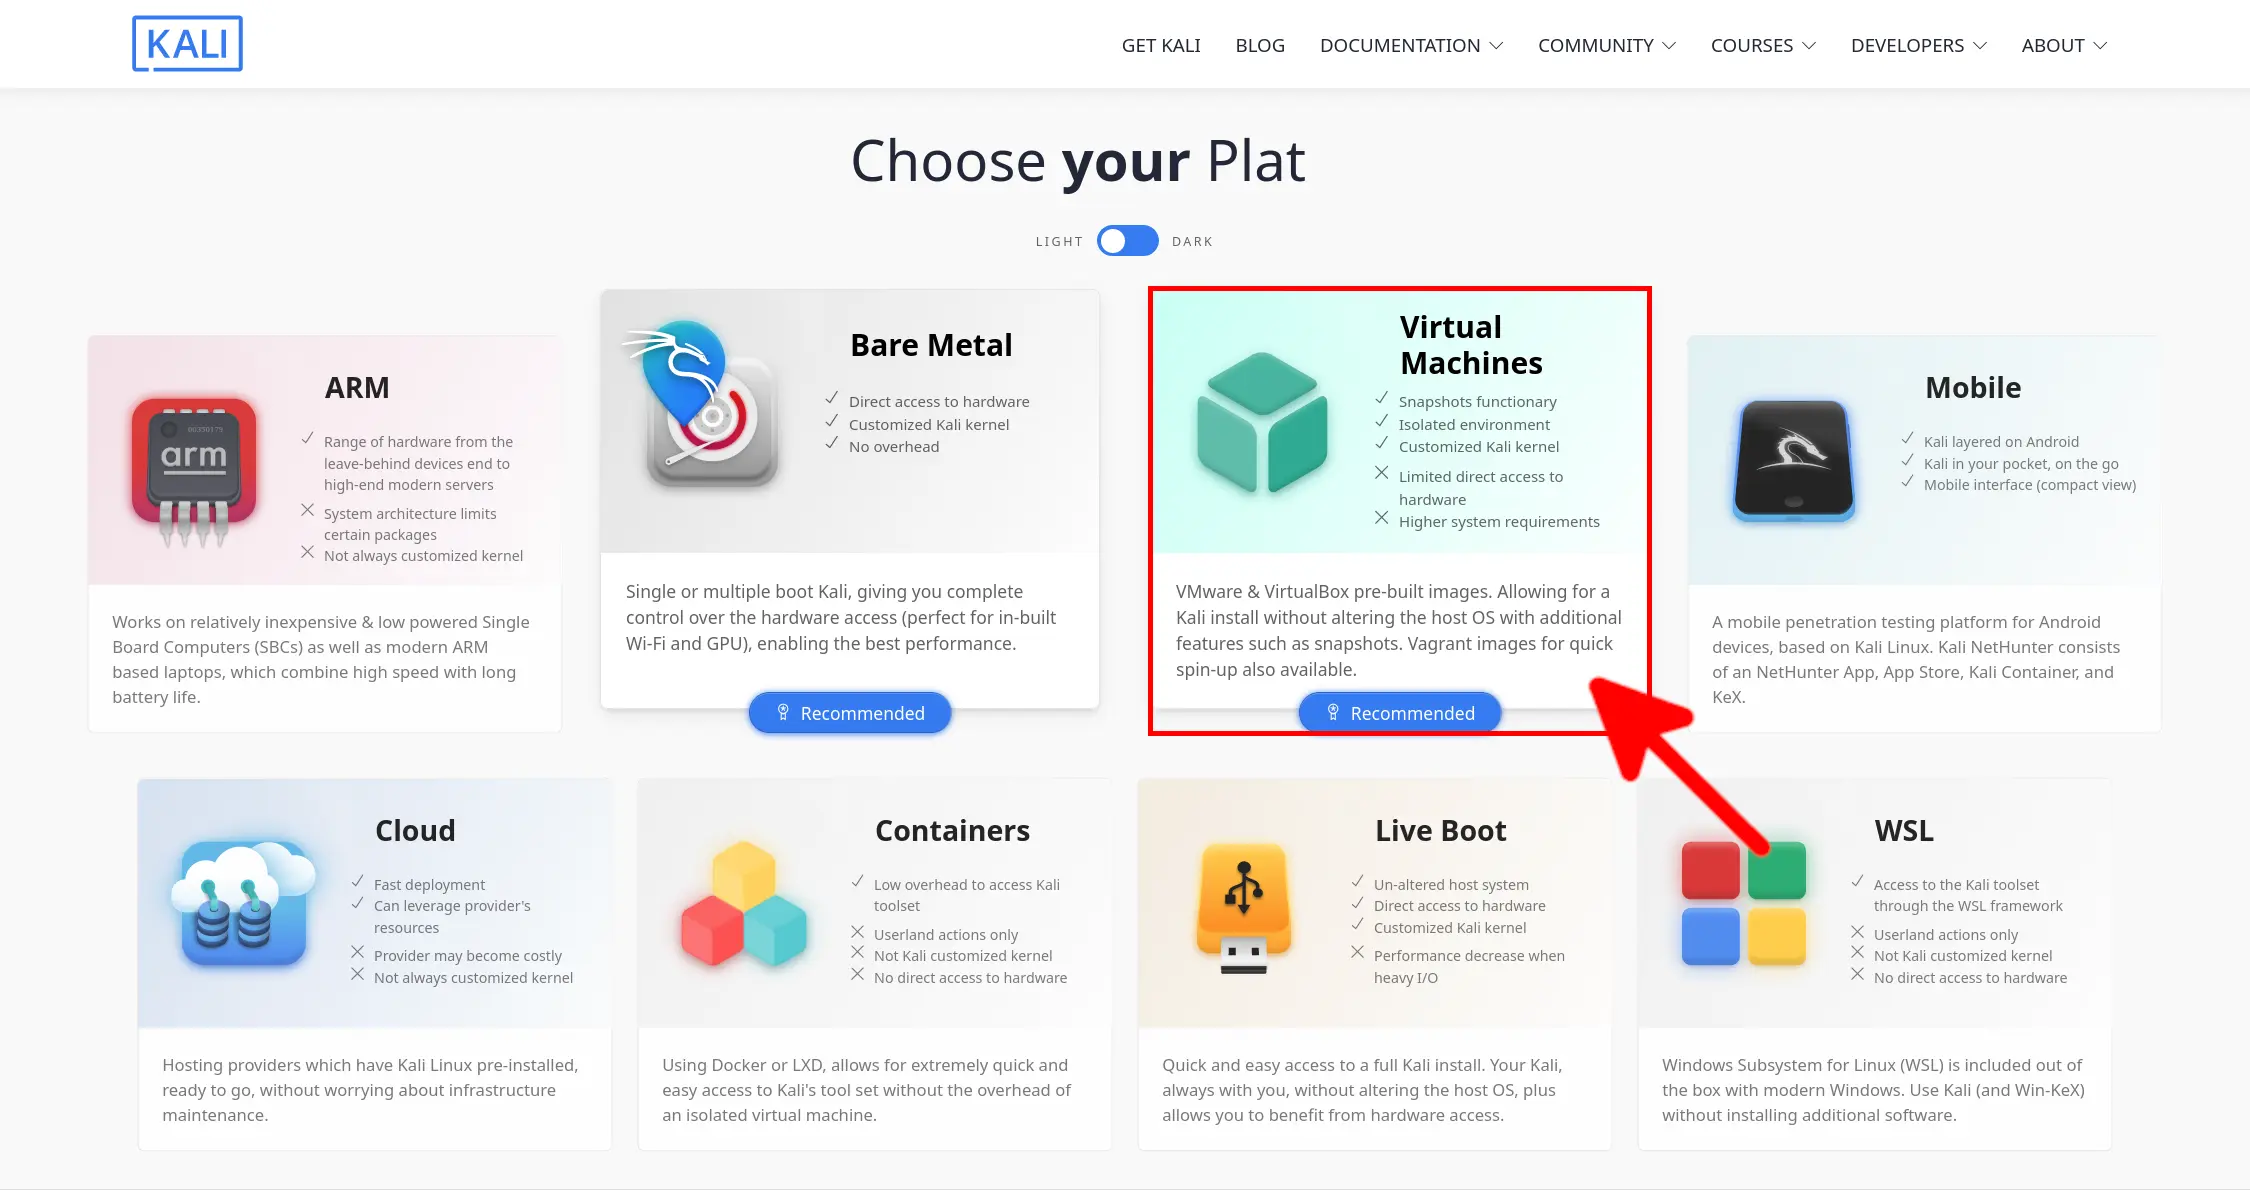
Start by visiting the Kali Linux official download page.
- Then, click on the Virtual Machines tab to access pre-built VM images:
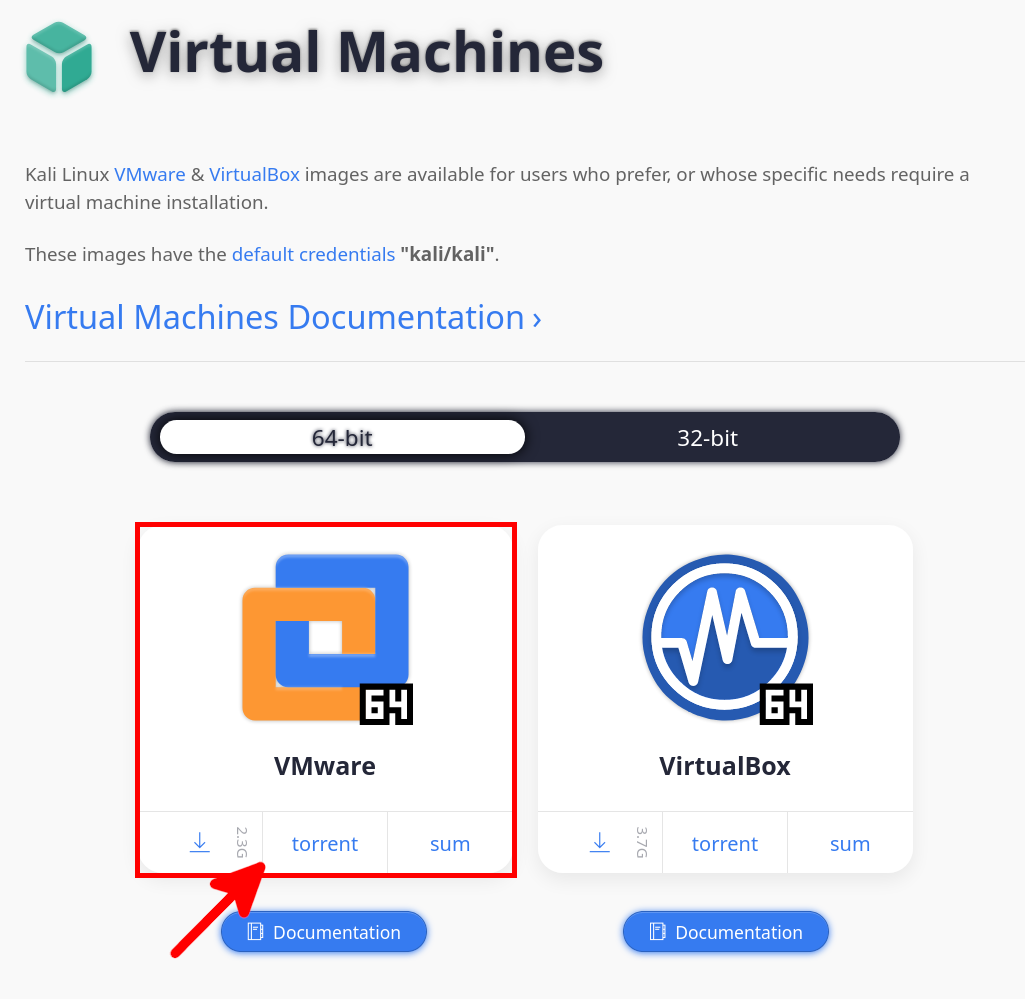
- Select your preferred download method (Torrent or direct download):
- Once downloaded, you should have a 7zip archive file:
- Next, extract the contents using a GNU/Linux shell. The following command extracts the files into a KALI directory:
user@host:~$ mkdir KALI && 7z e ./kali-linux-2022.2-vmware-amd64.7z -o./KALI/Import a Kali Linux Virtual Machine to VMware ESXi
Import to ESXi host
Note: Before proceeding, connect to the ESXi host web interface and accept the HTTPS certificate. Otherwise, file uploads from vCSA may fail.
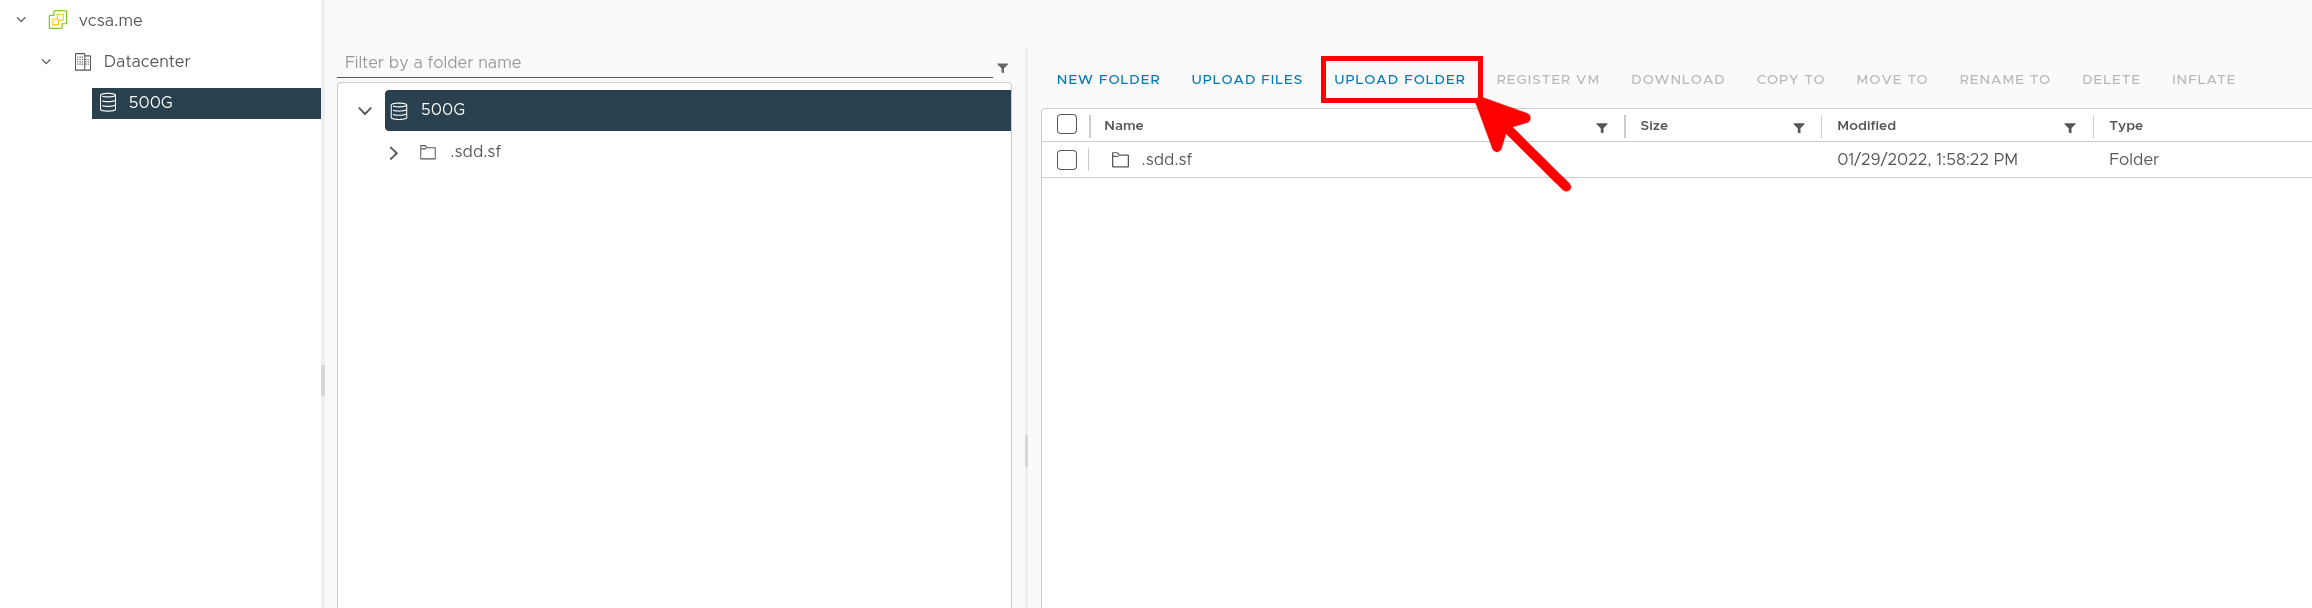
- Open the Datastore menu, select the target storage for your Kali Linux virtual machine, and click the «UPLOAD FOLDER» button:
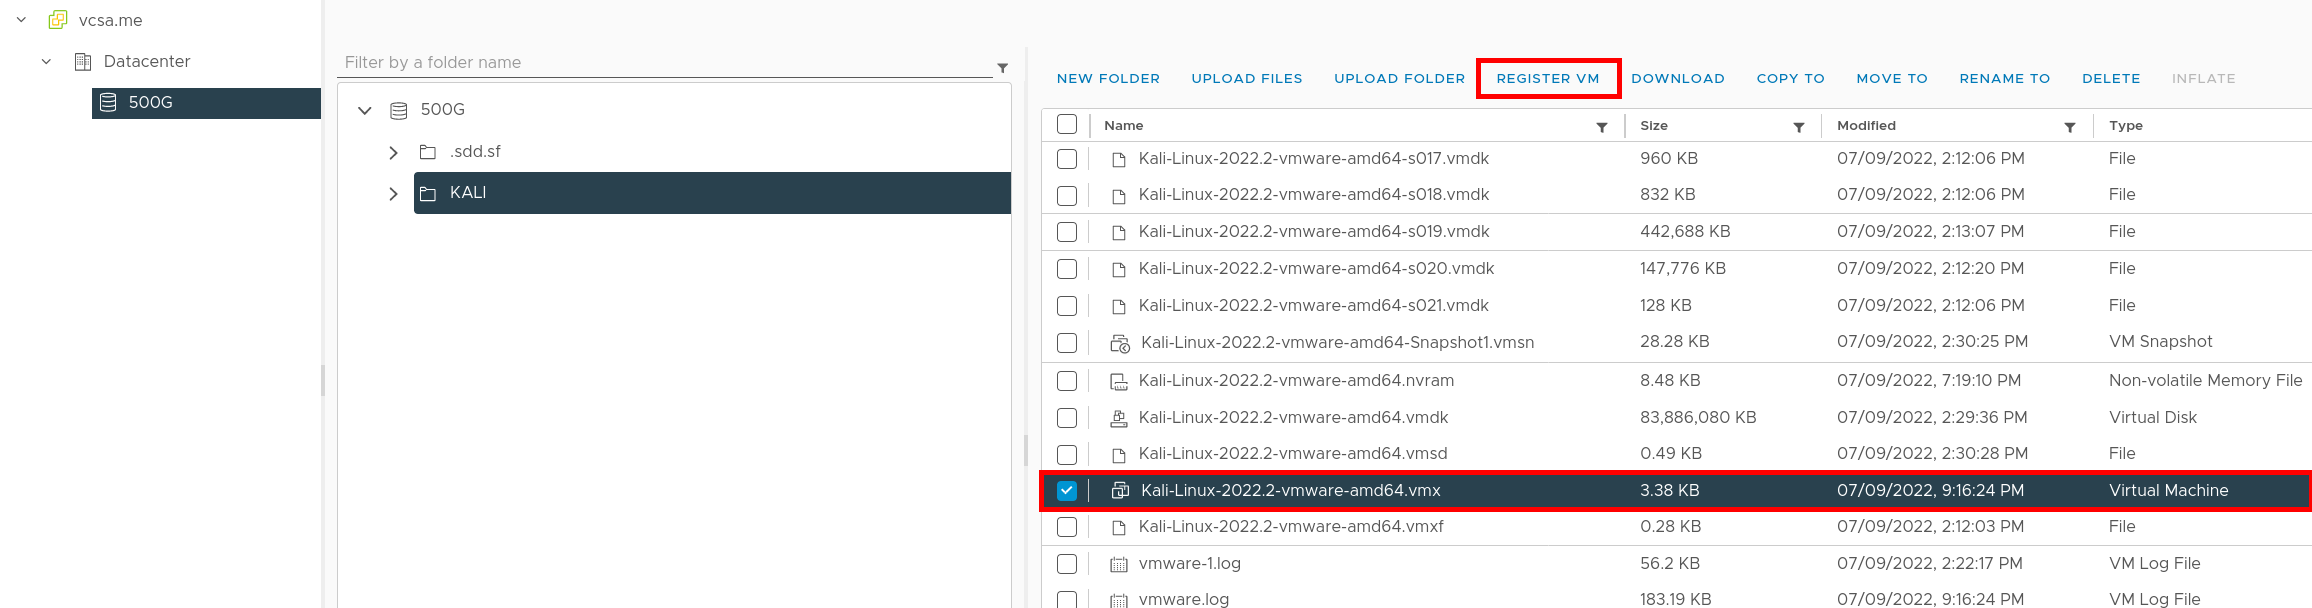
- Once downloaded, open the
KALIfolder, select the filekali-linux-2024.3-vmware-amd64.vmx, and click the «REGISTER VM» link.
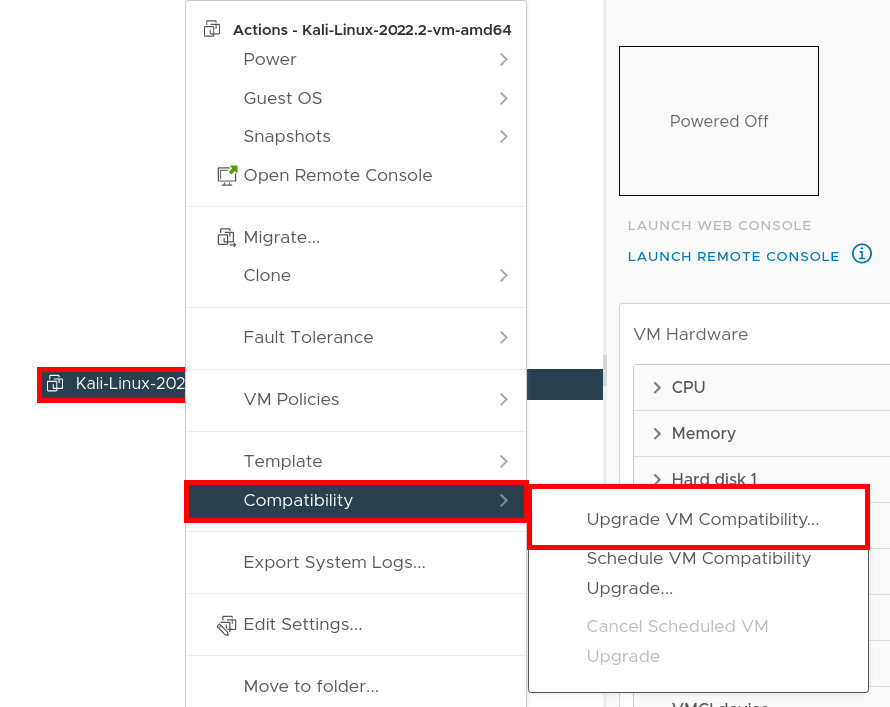
- In the main menu, right-click on the virtual machine named
kali-linux-2024.3-vmware-amd64, then select Upgrade VM Compatibility.
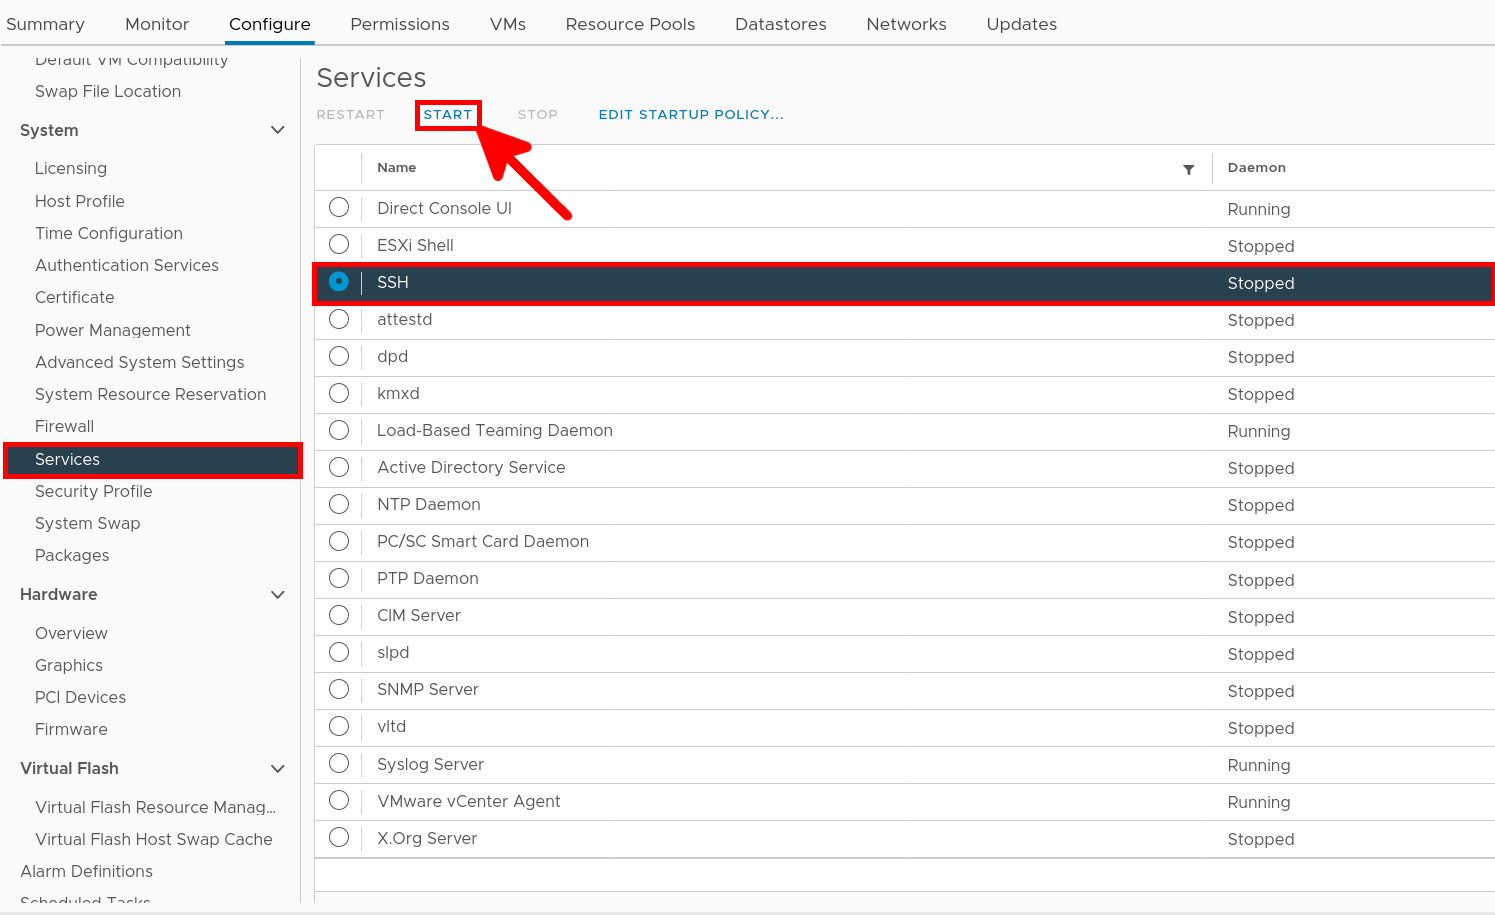
Enable SSH and convert the VMDK disk
- From the vCSA web console, go to Configure > Services and start the SSH service:
- Then, connect to your ESXi host via SSH:
user@host:~$ ssh root@ESXi_IP- To list the available datastores on your system, use the following command:
[root@localhost:~] df -h
	Filesystem   Size   Used Available Use% Mounted on
	VMFS-6     465.0G 286.4G    178.6G  62% /vmfs/volumes/500G
	VMFS-L     119.8G   3.9G    115.9G   3% /vmfs/volumes/OSDATA-0269c4cb-fe6feb41-f534-d4be32a1d43e
	vfat         4.0G 203.8M      3.8G   5% /vmfs/volumes/BOOTBANK1
vfat 4.0G 64.0K 4.0G 0% /vmfs/volumes/BOOTBANK2- Navigate to the
KALIdirectory:
[root@localhost:~] cd /vmfs/volumes/500G/KALI- Rename the original
vmdkfile:
[root@localhost:~] mv kali-linux-2024.3-vmware-amd64.vmdk OLD.vmdk- Convert the
vmdkfile to ESXi-compatible format:
[root@localhost:~] vmkfstools -i OLD.vmdk kali-linux-2024.3-vmware-amd64.vmdkYou should now be able to start the Kali Linux Virtual Machine.
Default login/password: kali / kali 🙂