Implementing MFA in a RDS infrastructure
MFA authentication is the new way to increase Users authentication security. It allows to reduce passwords compromission risk.
Indeed, MFA require multiple forms of verification to prove your identity when signing into an application.
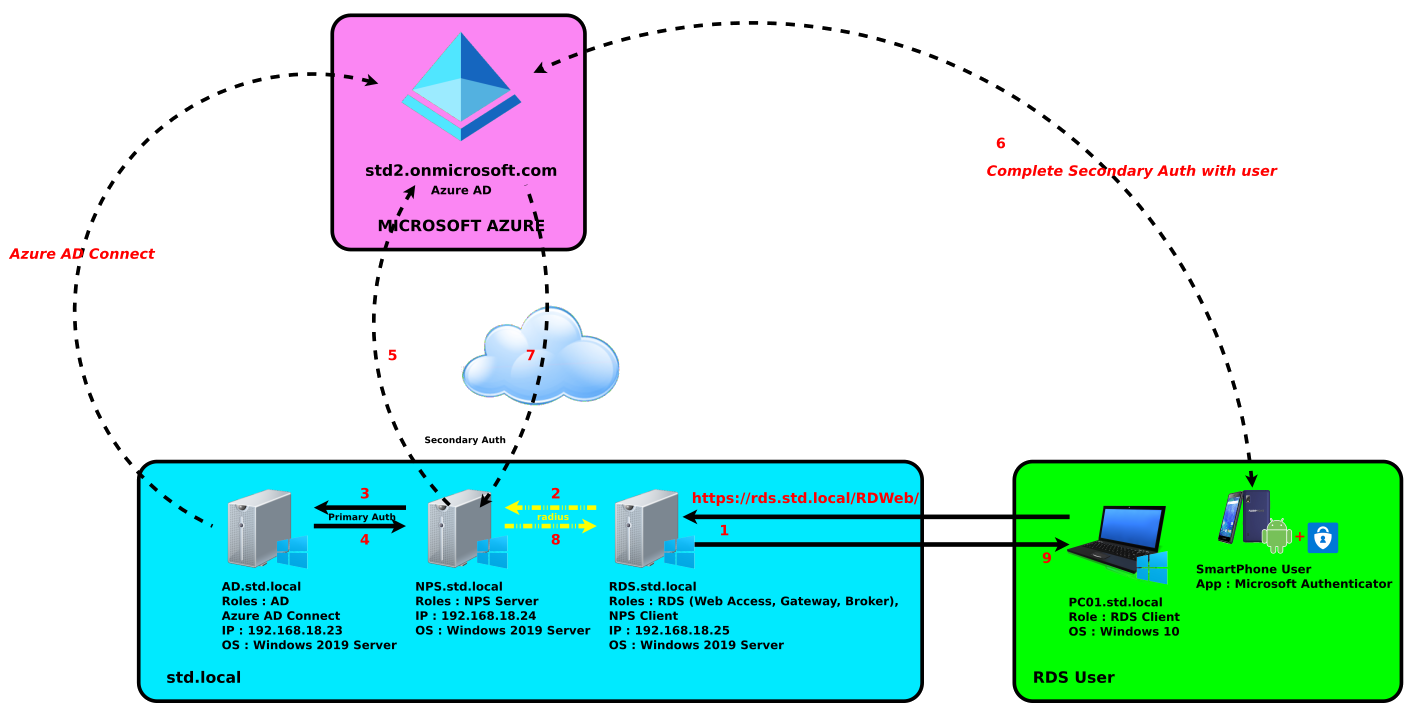
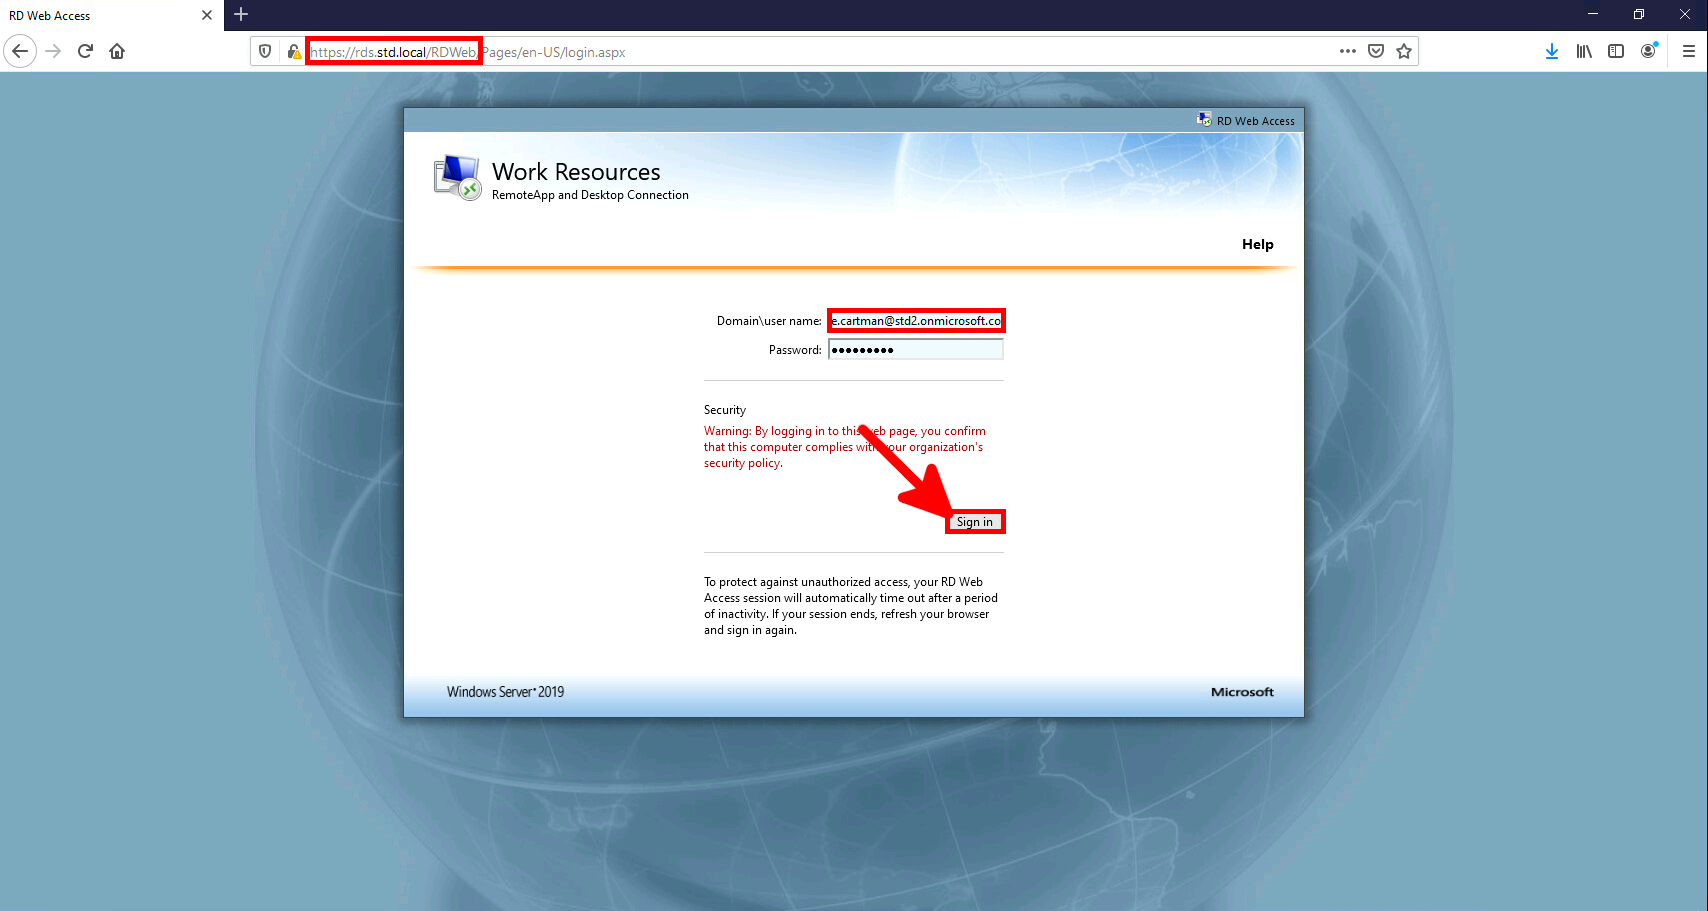
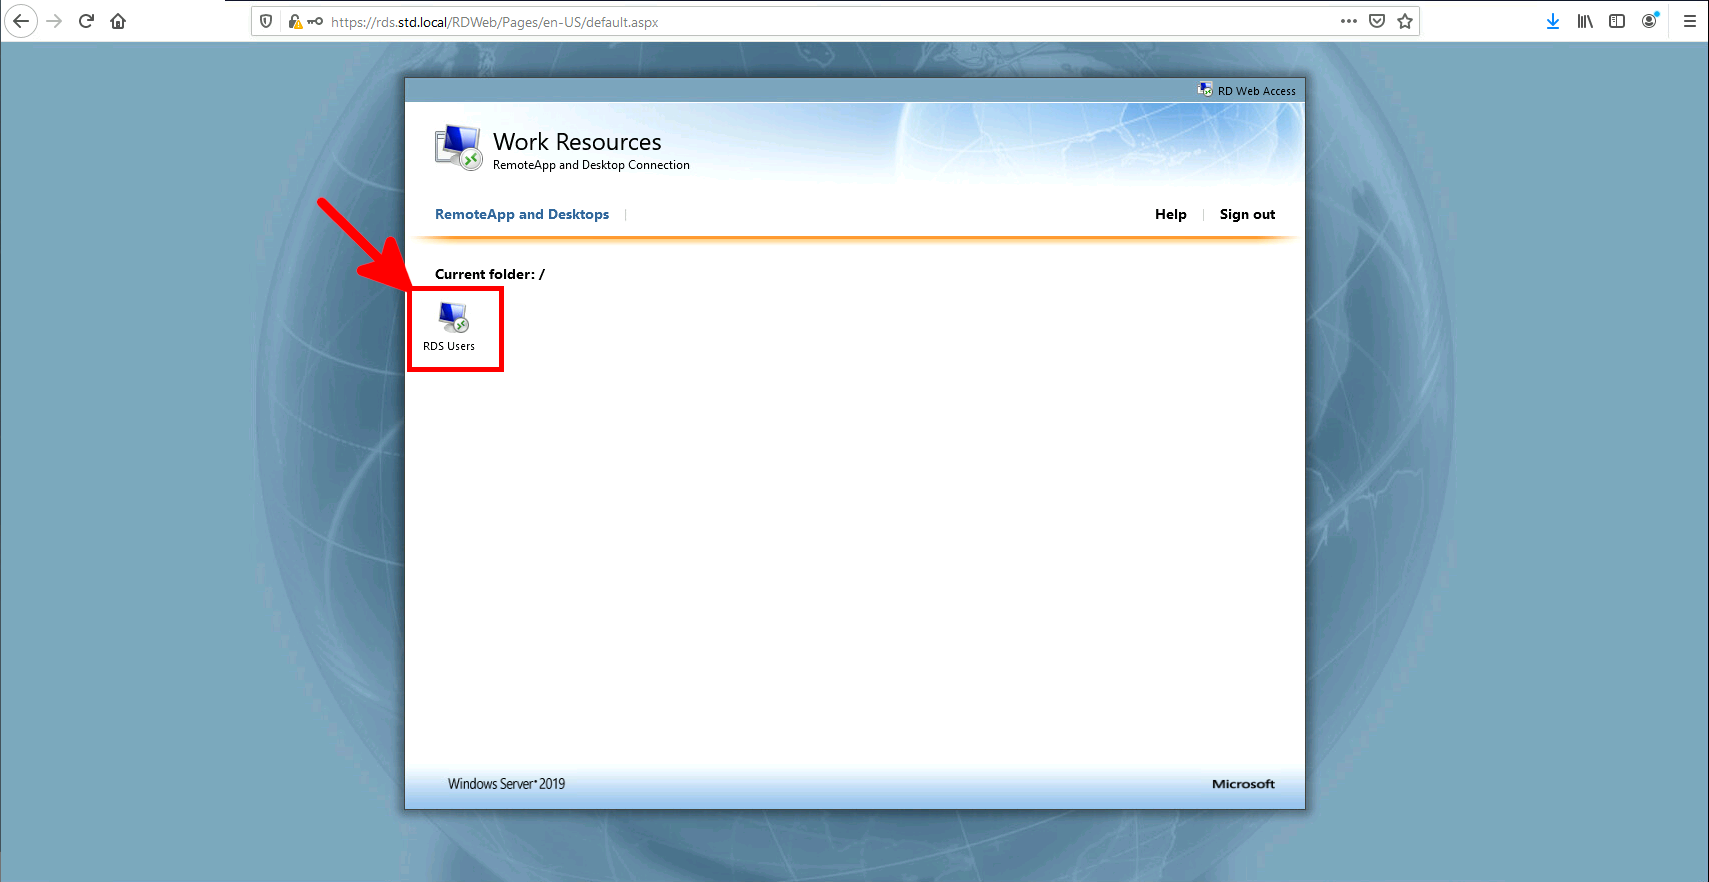
In this guide, we will see how to enable MFA for RDS users by using the Microsoft Authenticator app.
- Last updated: Nov 28, 2020
Network diagram
Links to know
Prerequisites
Licensing
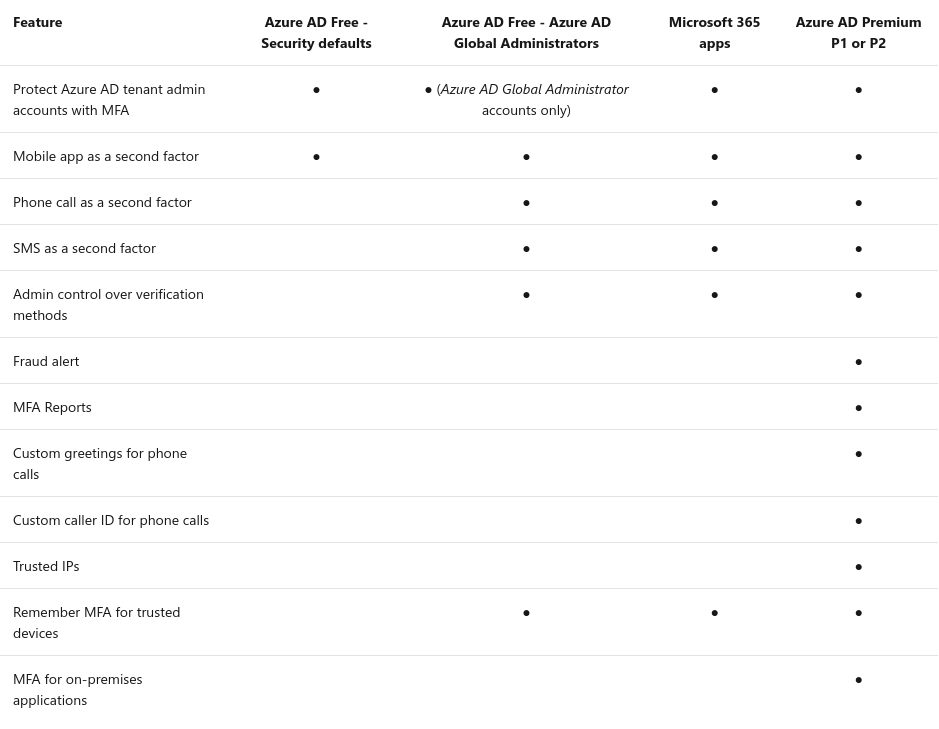
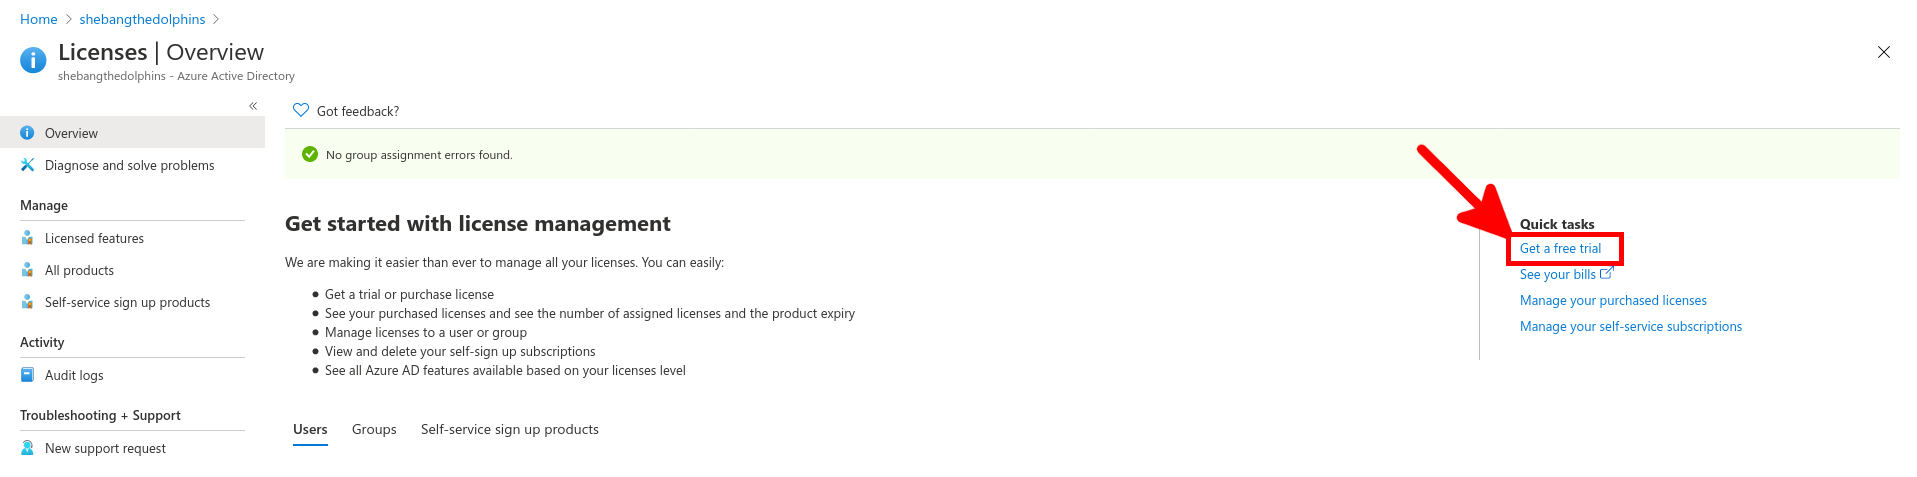
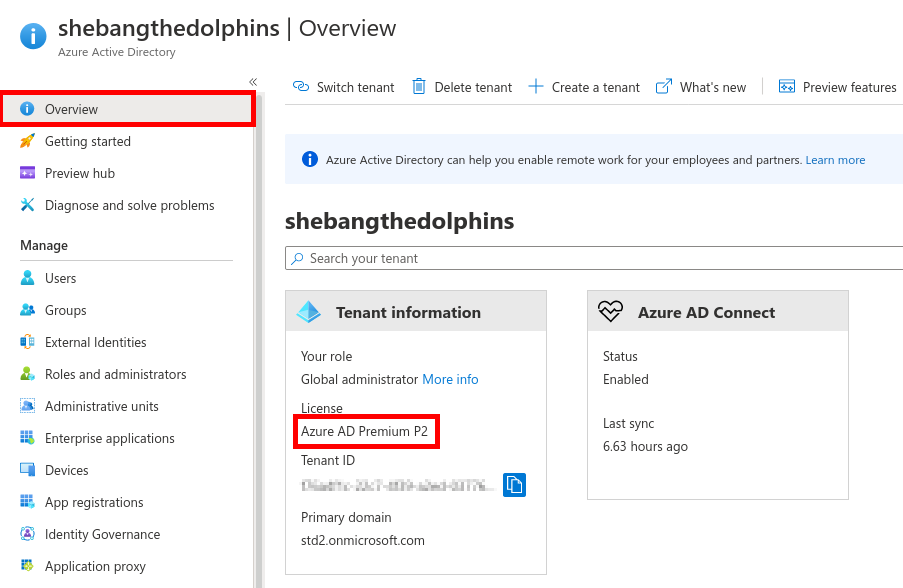
No surprise with Microsoft nothing very clear about licensing, but it seems we need a P1 or P2 license.
Architecture
- We need :
- Azure AD infrastructure (I used the commercial trial to set it up).
- AD server with AD Connect to synchronise users.
- NPS server as authentication bridge between Azure AD and local Active Directory.
- RDS server a classic remote computer server with Web Access, Gateway and Connection Broker.
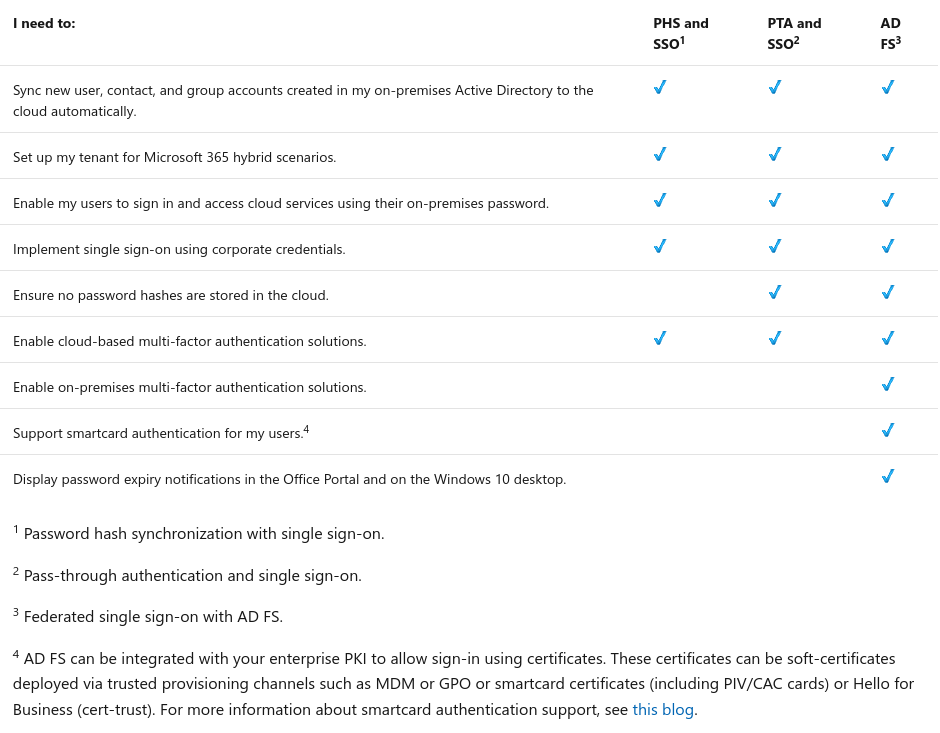
Not really clear neither but it seems we also need don't need a AD FS server : link.
Azure AD (part I)
Create a tenant
- If you don't have one yet, create a new tenant :
- Select Azure Active Directory :
- Configure your new directory :
- Once validation passed, click create :
Activate Azure AD Premium P2 License
- From left panel, click Licenses :
- And Activate a Azure AD Premium P2 license :
- After few minutes you should see your Azure AD Premium P2 license :
Create a AD Connect User
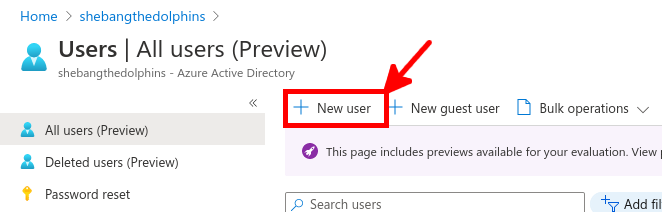
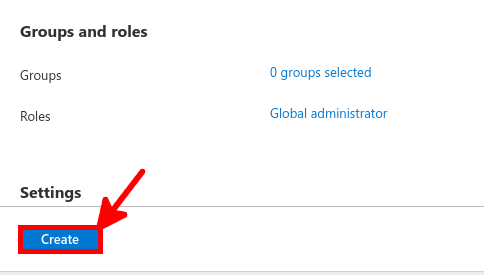
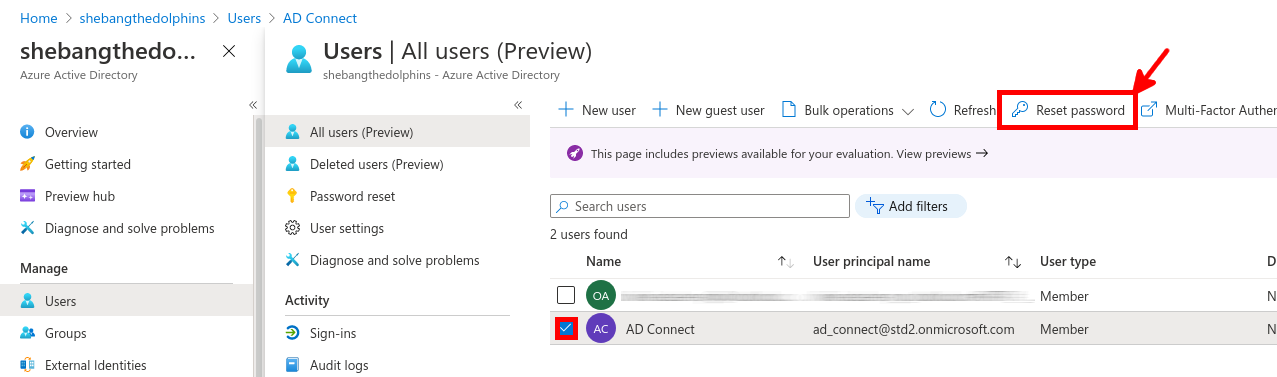
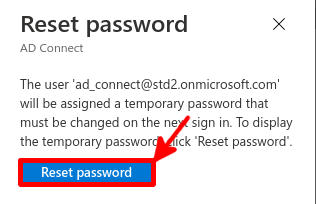
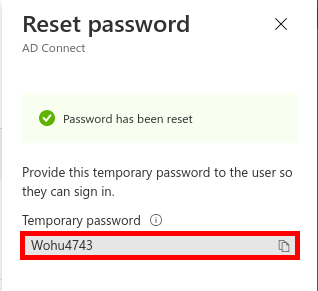
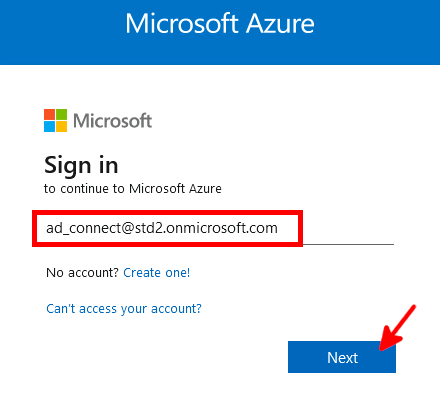
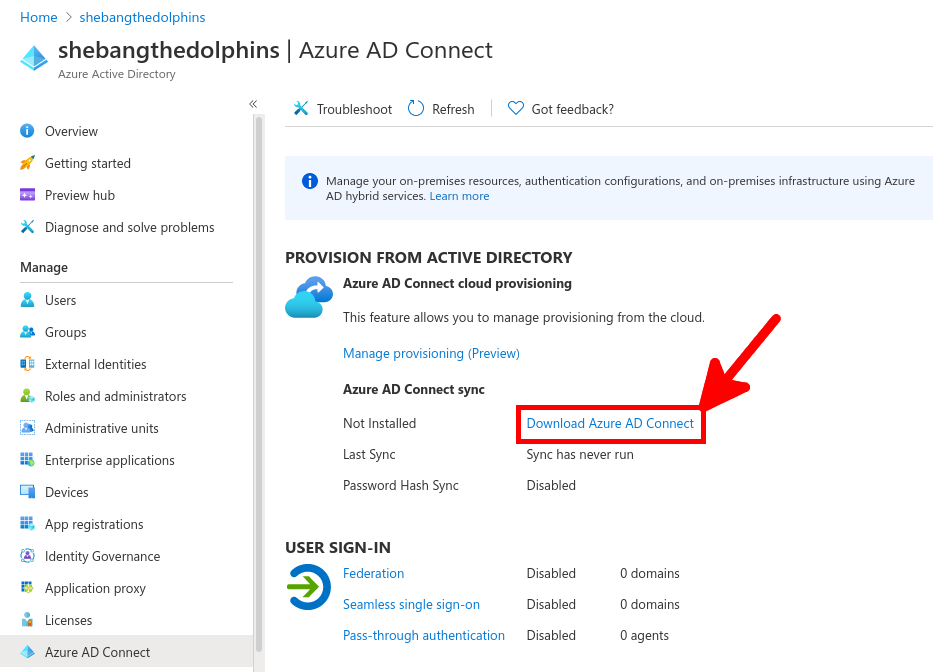
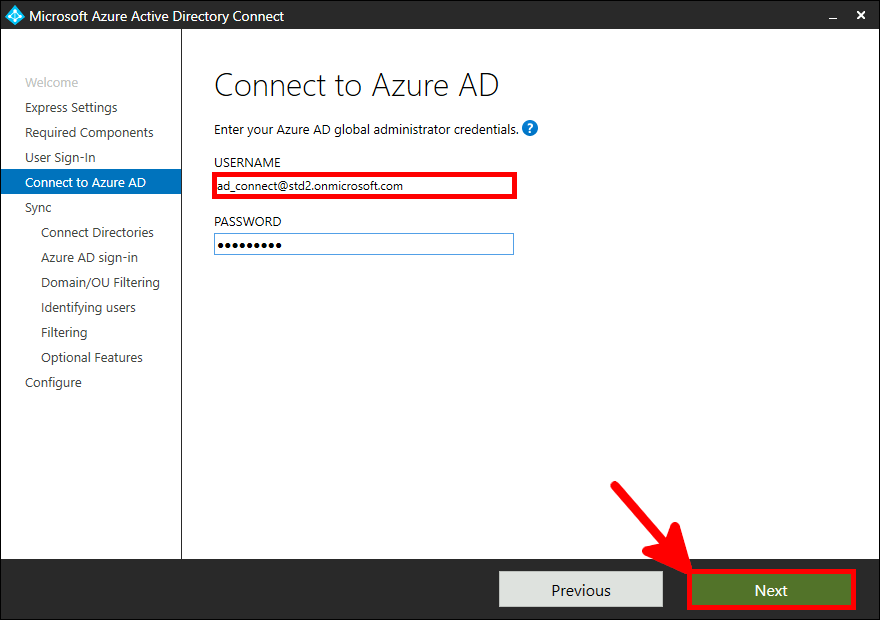
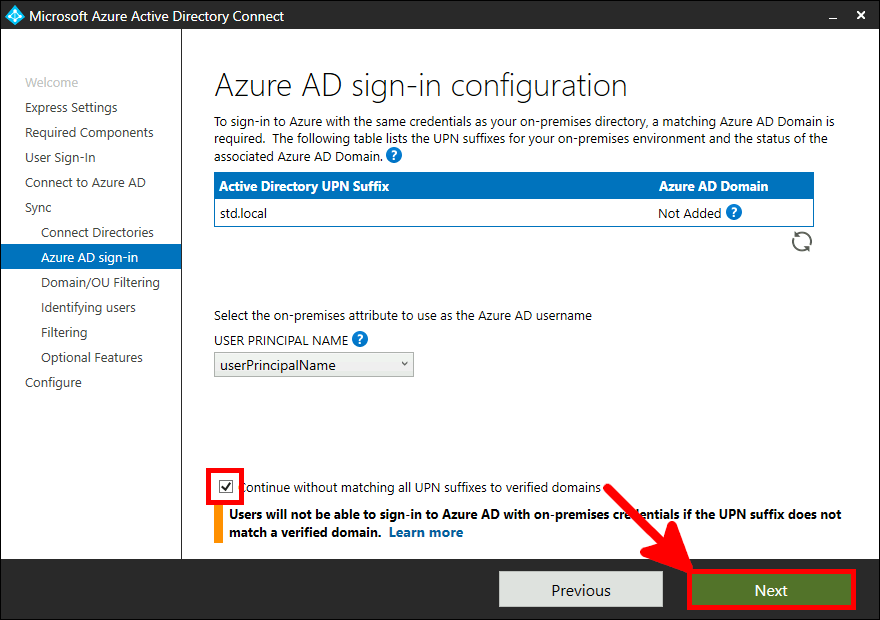
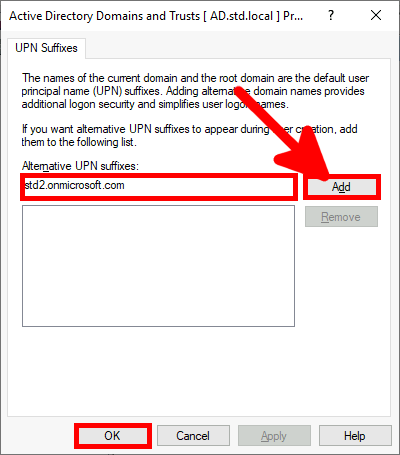
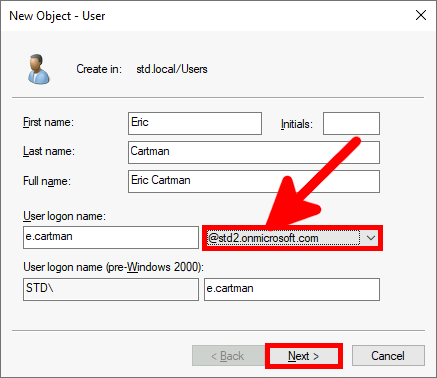
From the Azure portal we will create a New user account which will be used to sync our local AD (std.local) server with Azure AD (std2.onmicrosoft.com).
- Specify User name and a Name :
- On the same page, specify a Role by clicking on User :
- Select Global administrator and click Select :
- Now we can click on Create :
- Go back to All Users view, select AD Connect user and click Reset password :
- Note the temporary password :
- And set a secure password :
AD Server
AD Connect
Download
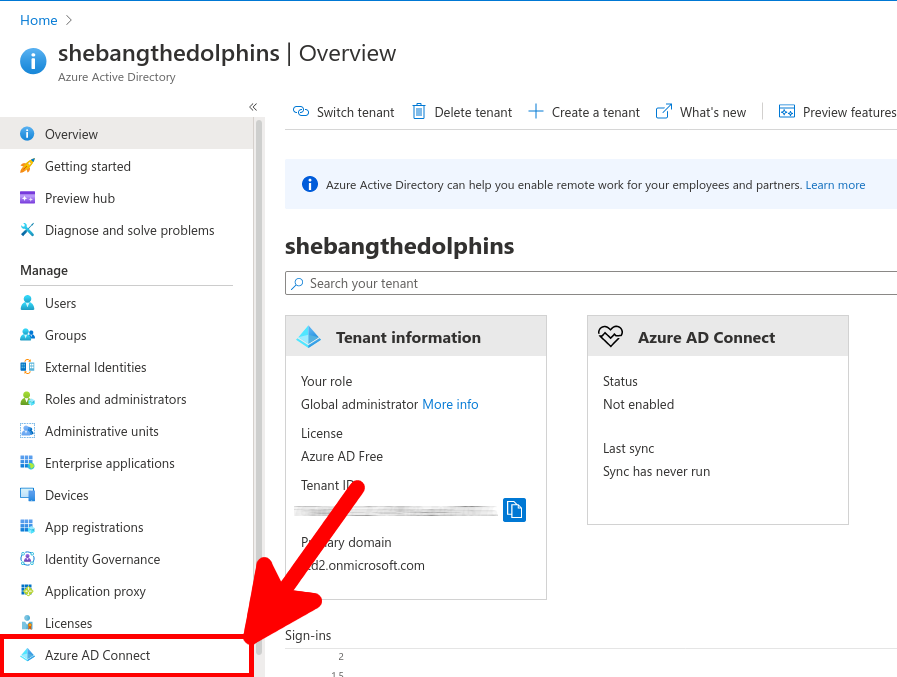
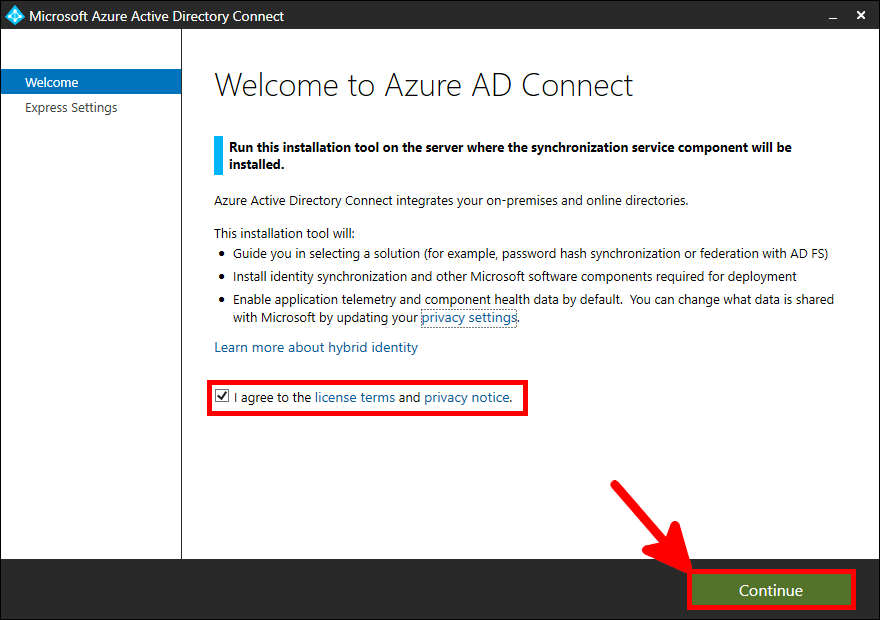
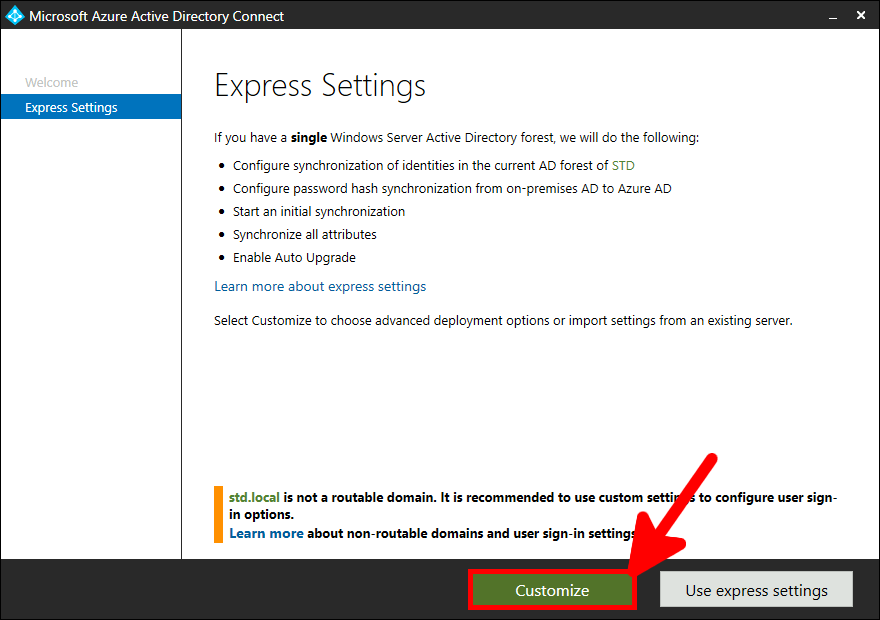
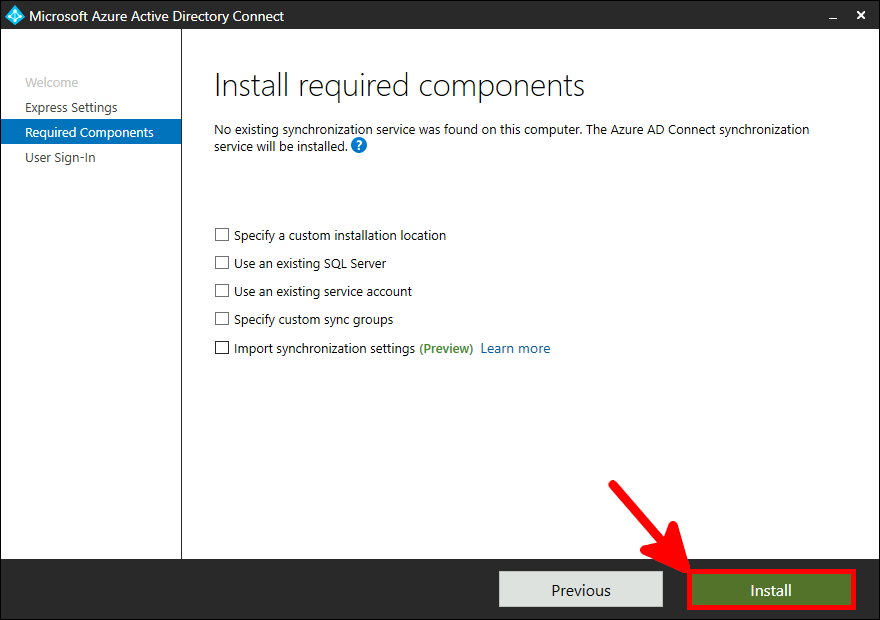
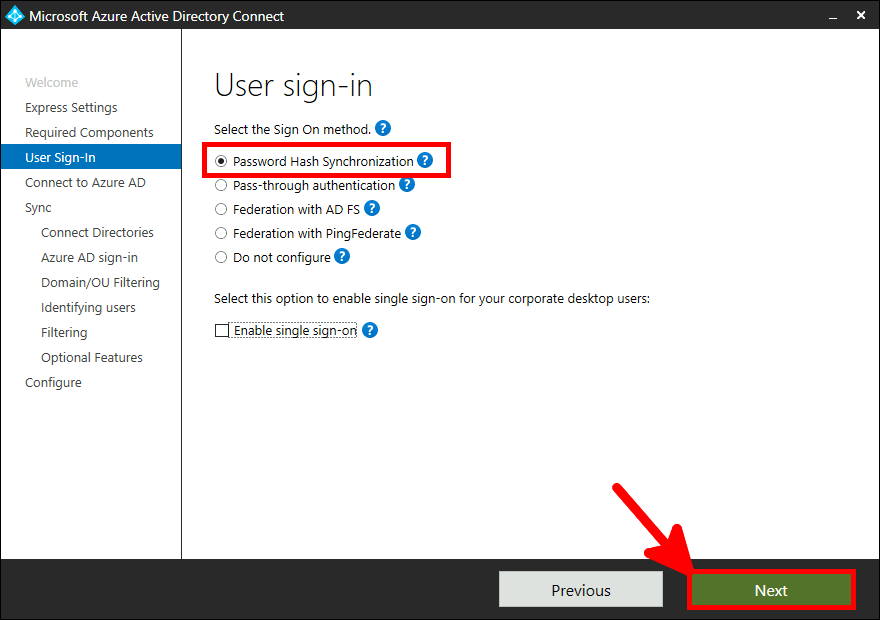
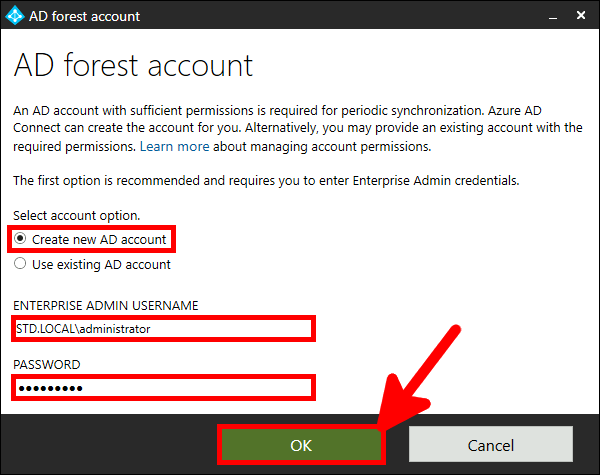
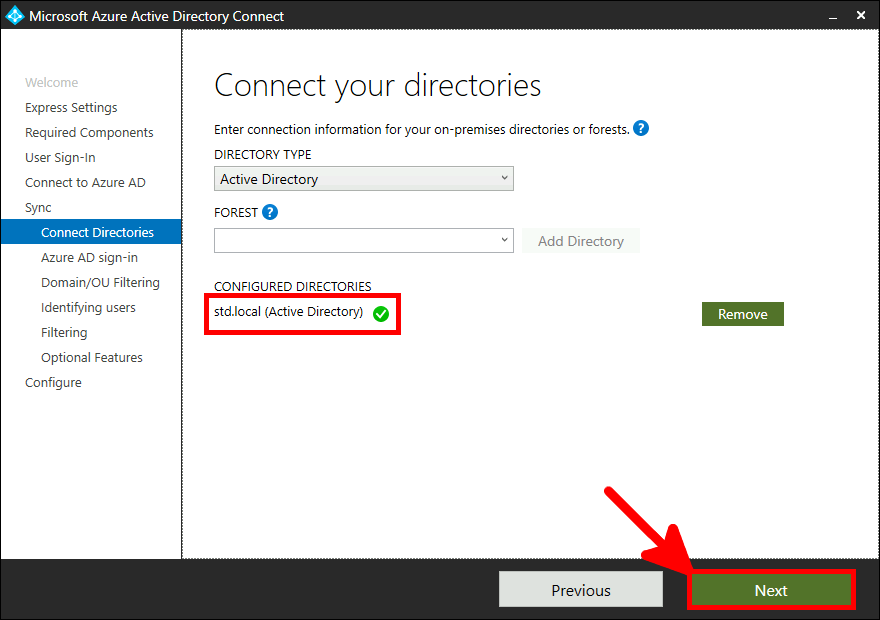
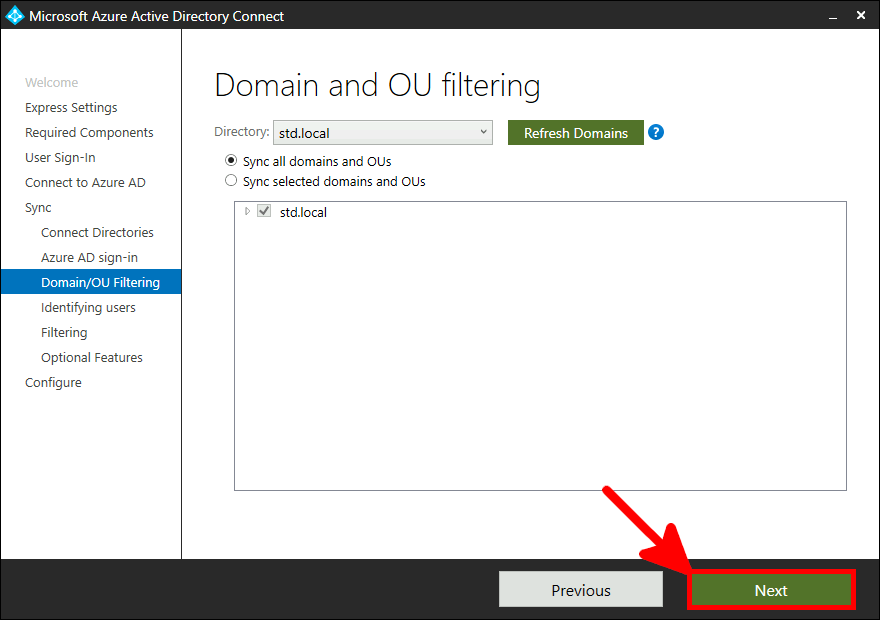
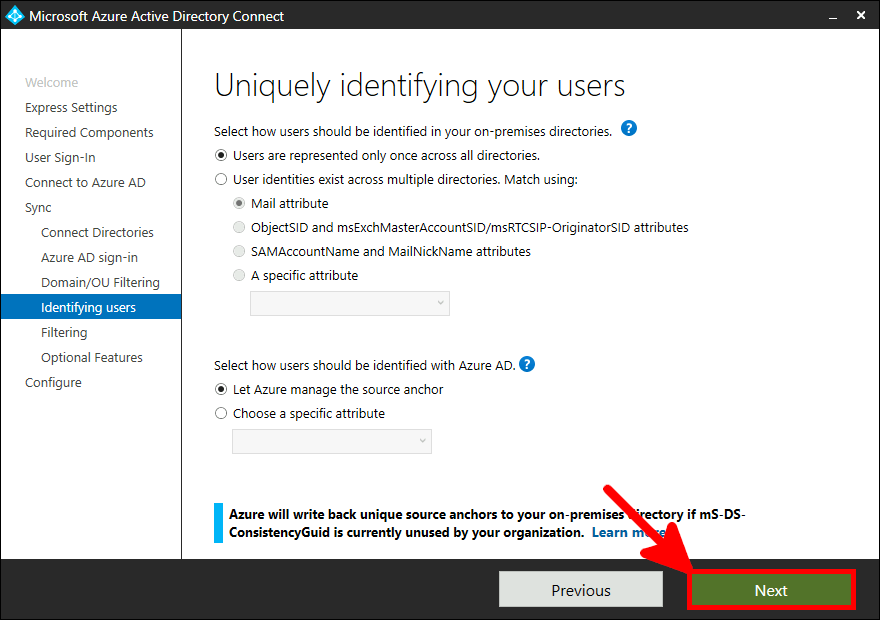
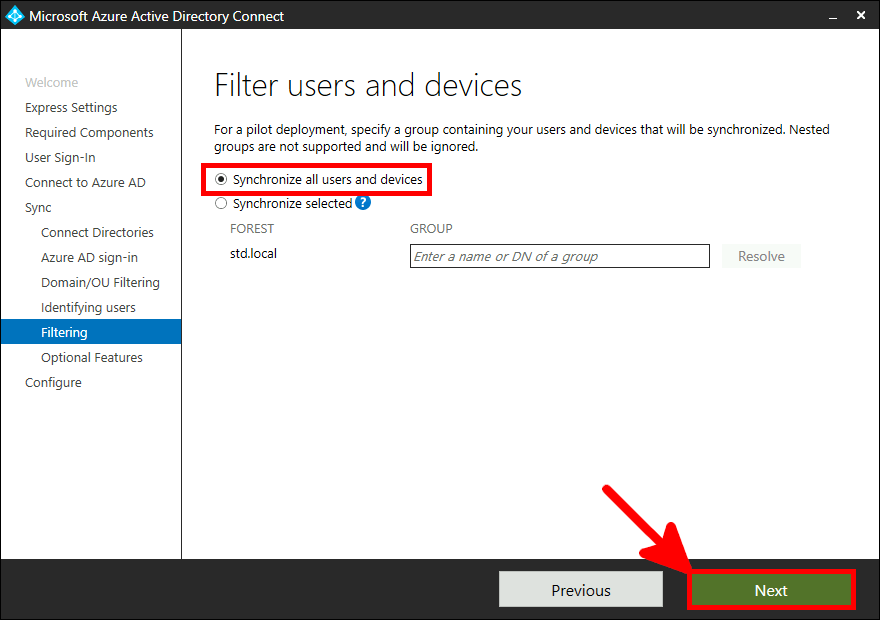
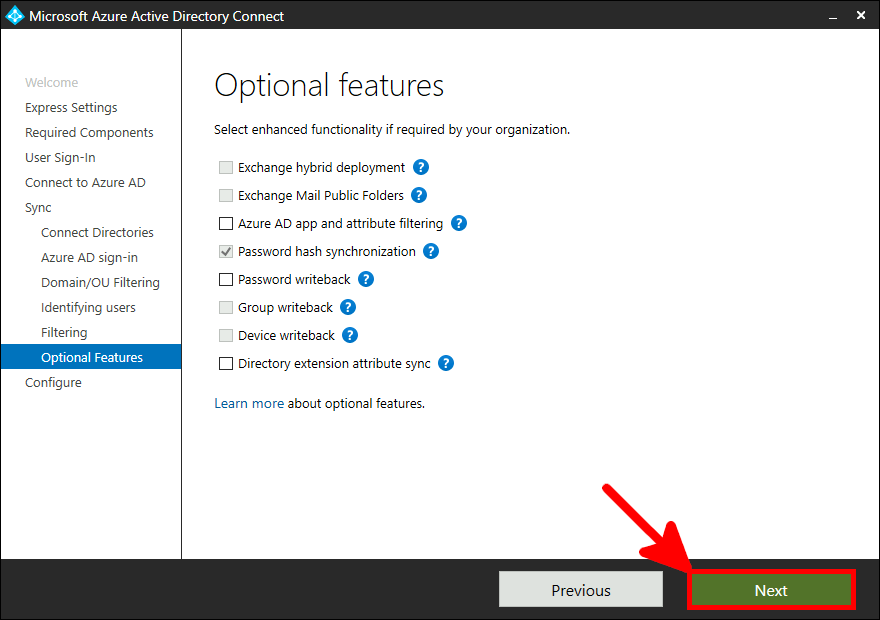
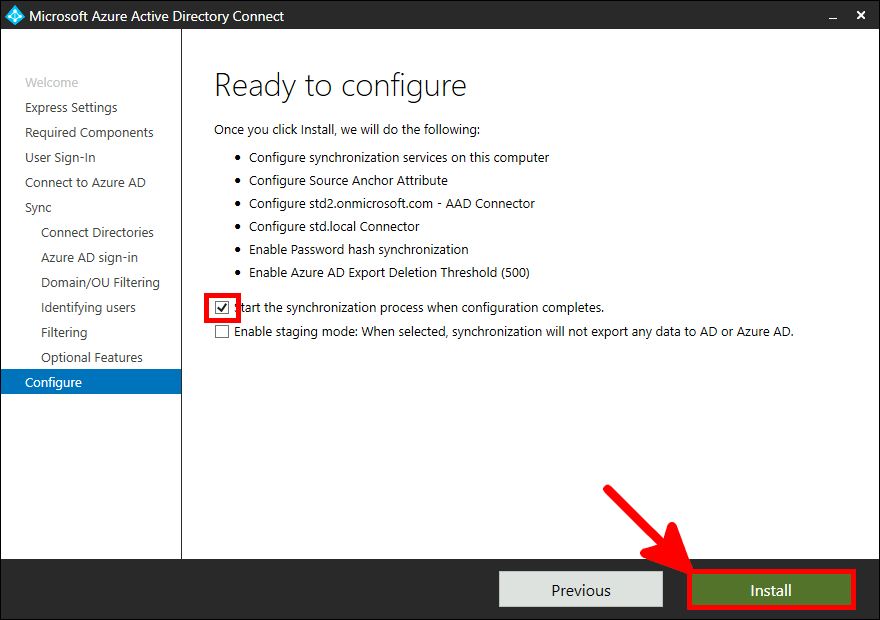
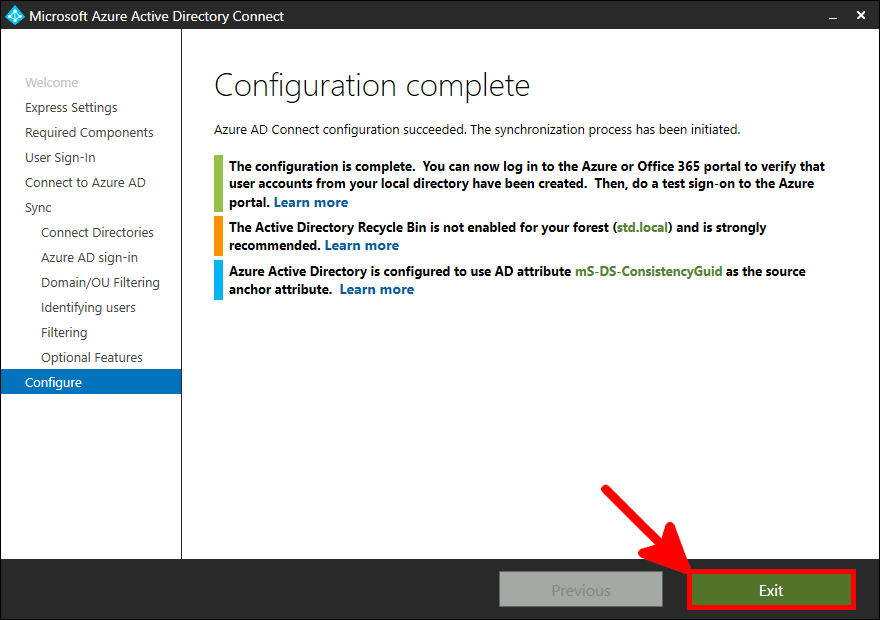
Now we need to install and configure AD Connect. This software is used to synchronize our AD local users to our AD Azure infrastructure.
This software needs to be installed once, on a AD server.
- Click on the Download Azure AD Connect link :
Installing AD Connect
- Run the .exe from you Active Directory server. Accept the license and click on Continue :
- You can choose express settings or Customize if you want to specify custom parameters :
- Select Password Hash Synchronization :
- Use the ids previously created :
- Type local AD administrator ids :
- Once done, click on Next :
- Check Continue without matching UPN :
- Synchronize specific OUs or synchronize all :
- Select to Synchronize all users and devices :
- Finally, check Start the synchronization… and run Install :
- After few seconds it's done :
Add Primary Azure Domain to your local AD
- Open Active Directory Domains and Trusts management console :
- Right-click to Active Directory Domains and Trusts :
- Add your Primary Azure Domain :
Create RDS Users
- Open Active Directory Users and Computers management console :
- Select the Primary Azure Domain :
Azure AD (part II)
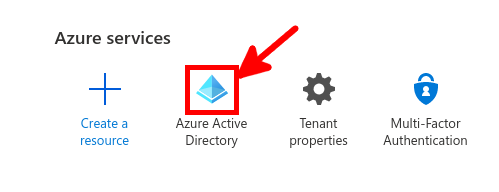
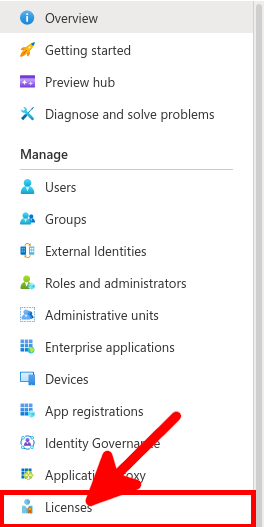
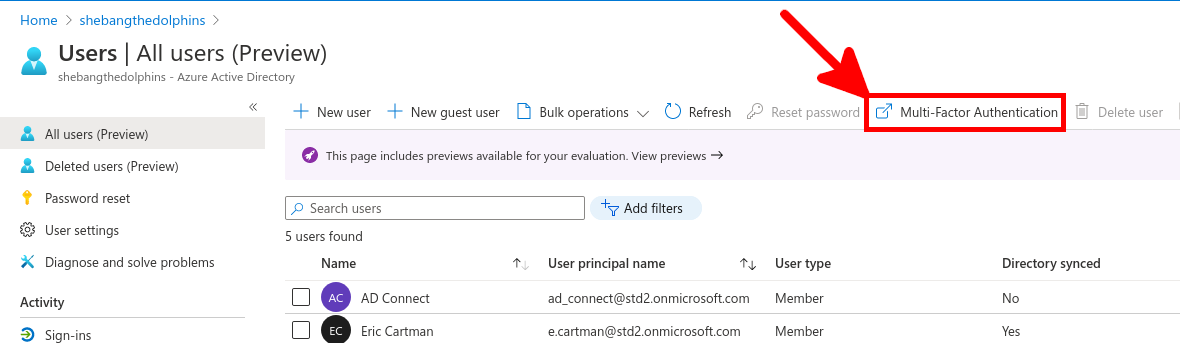
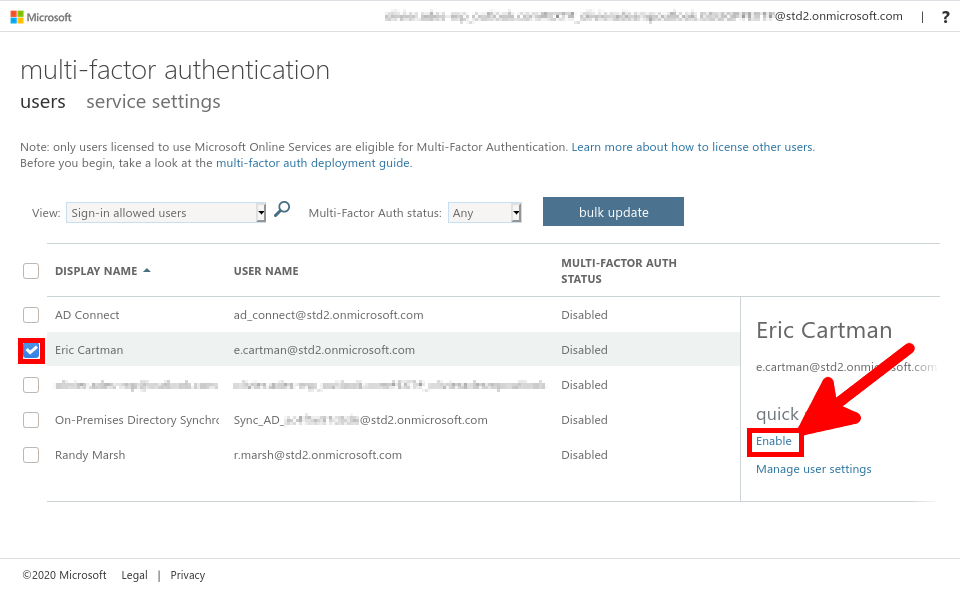
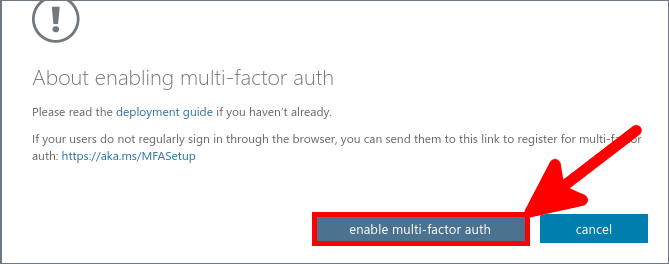
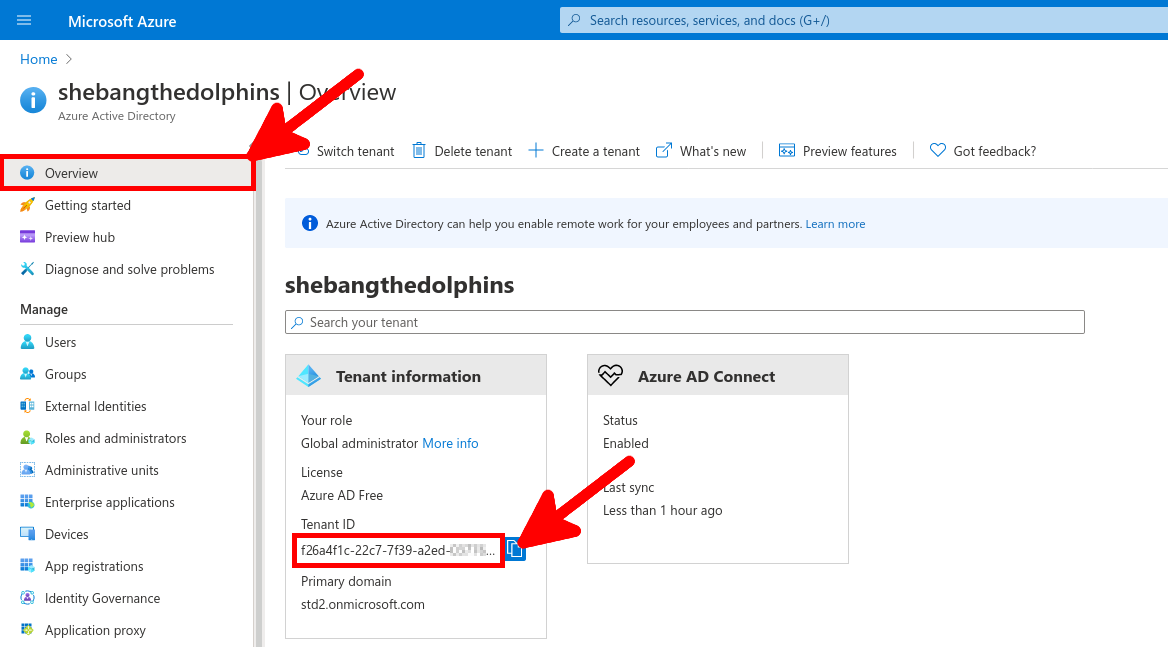
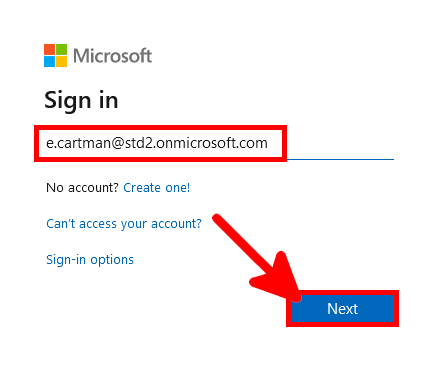
Go back to Azure portal, to enable MFA.
Enable MFA
- From All users menu, click on Multi-Factor Authentication :
- Select users you want to enable for Multi-Factor Authentication, and click enable :
- Confirm by clicking enable multi-factor auth :
NPS Server (part I)
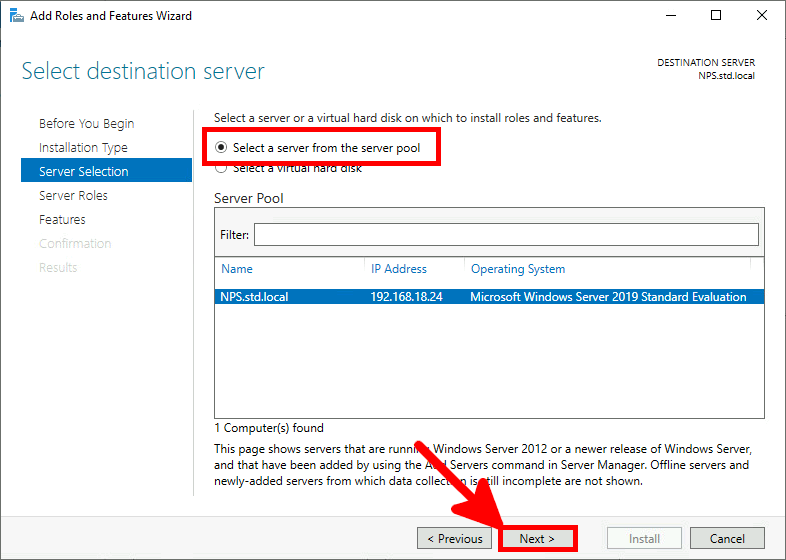
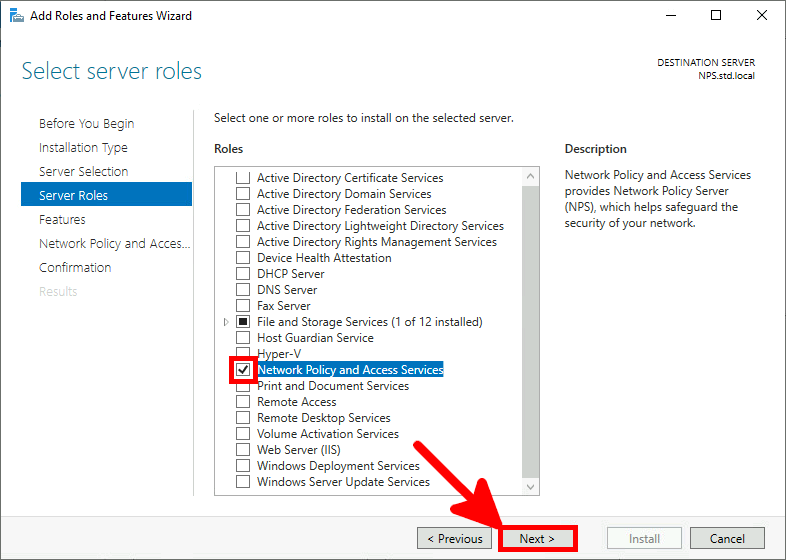
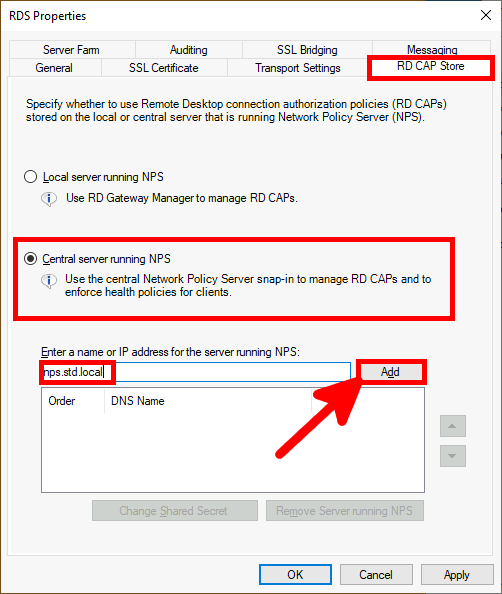
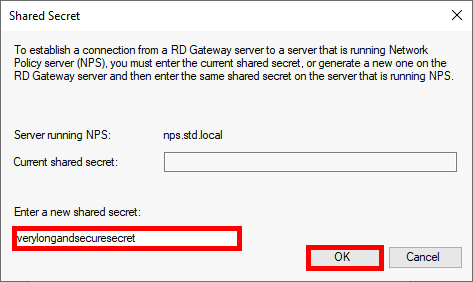
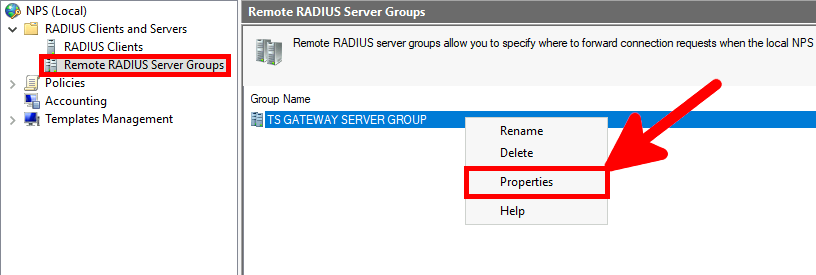
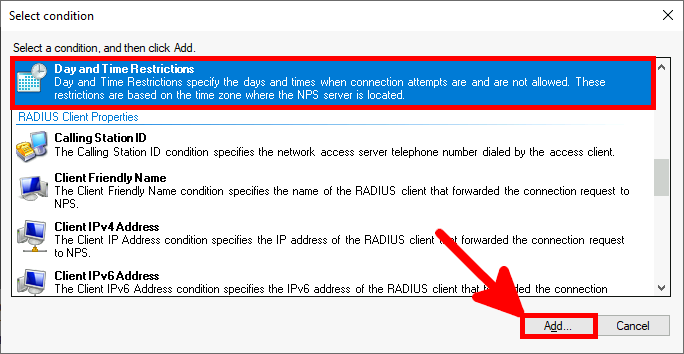
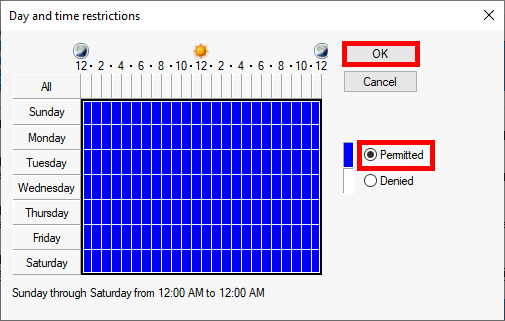
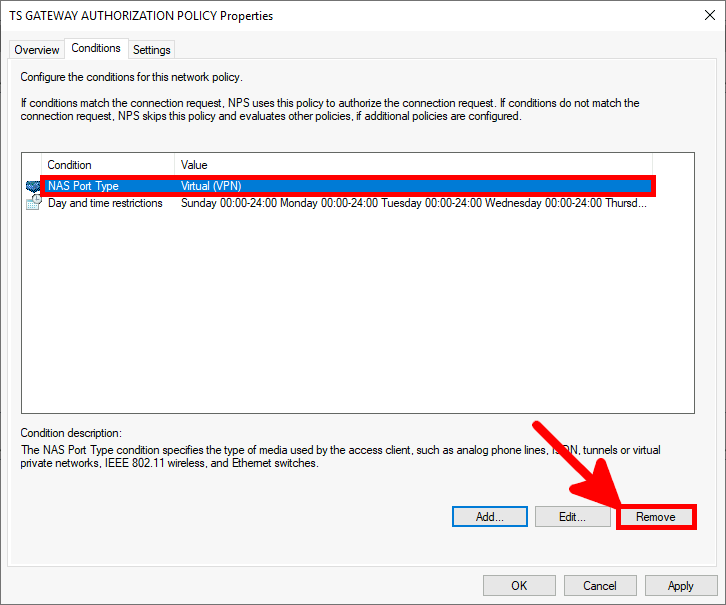
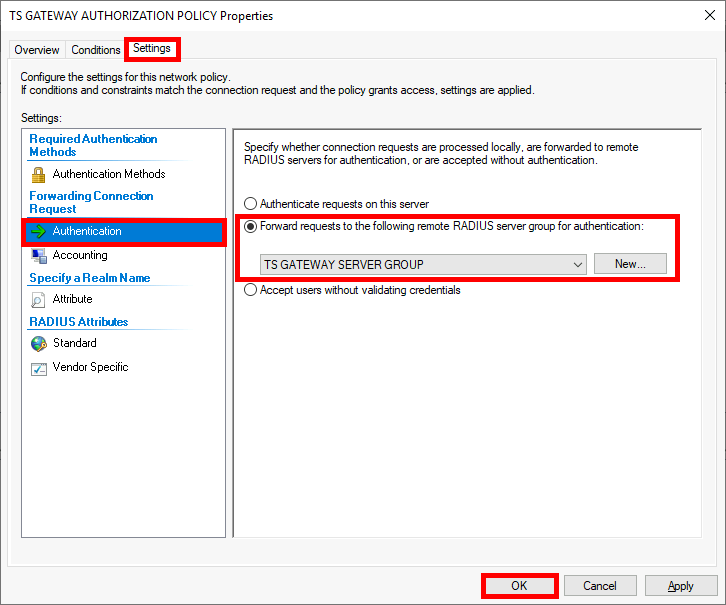
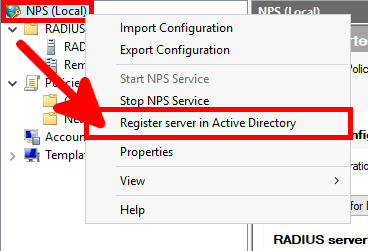
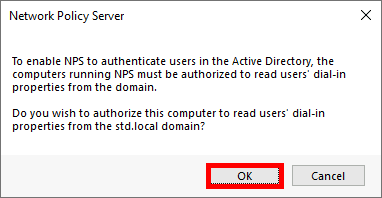
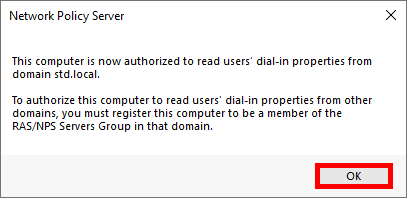
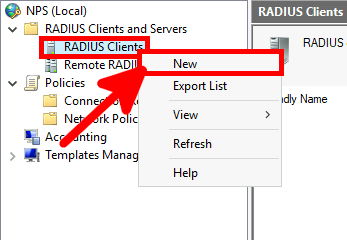
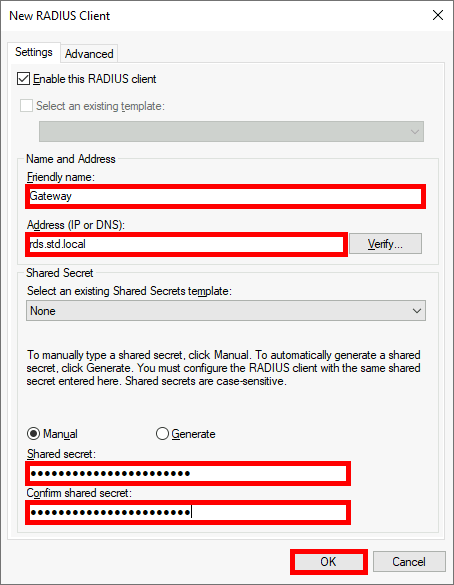
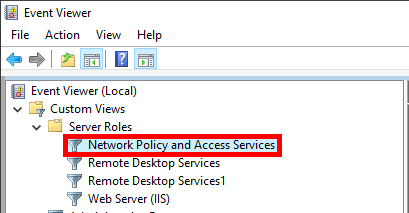
We need a NPS server, it could be installed on the AD server but in this guide I will install it on a brand new virtual machine.
Disable IE Enhanced Security Configuration
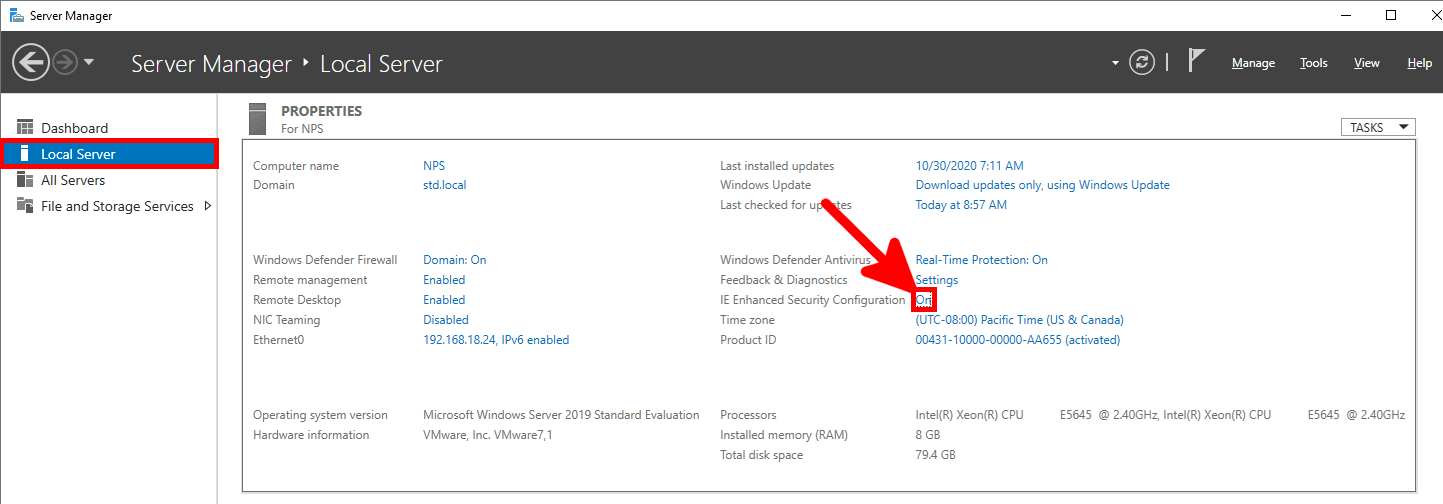
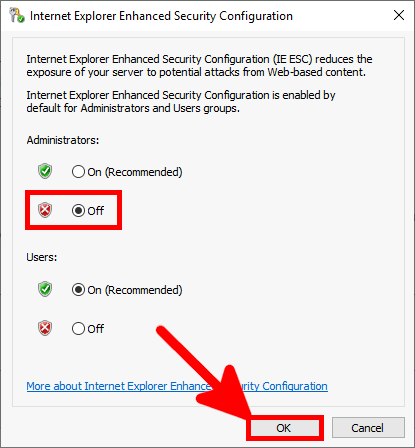
I recommend to (temporarily) disable IE Enhanced Security because it can prevent the Azure authentication to work during the AzureMfaNpsExtnConfigSetup PowerShell script execution.
- From the Server Manager Dashboard :
- Turn off Security for administrators :
Installing NPS role
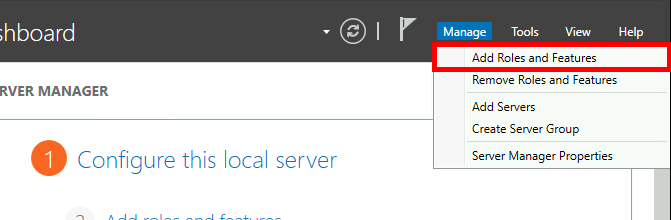
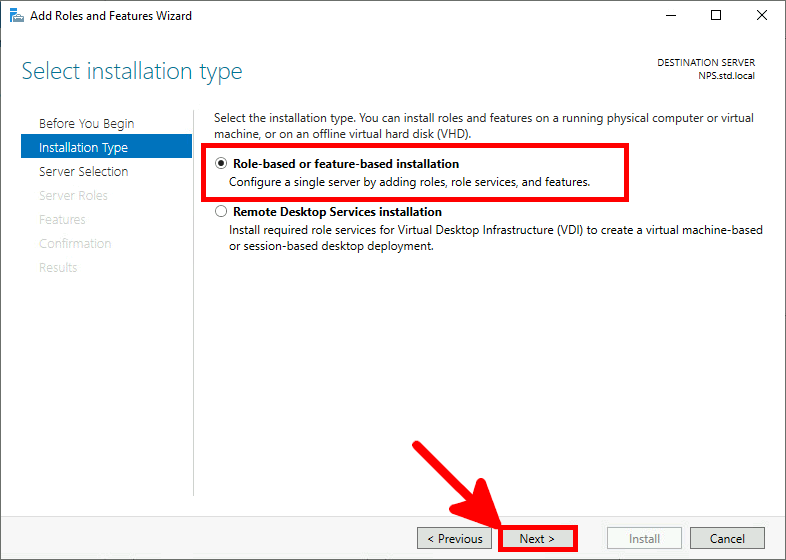
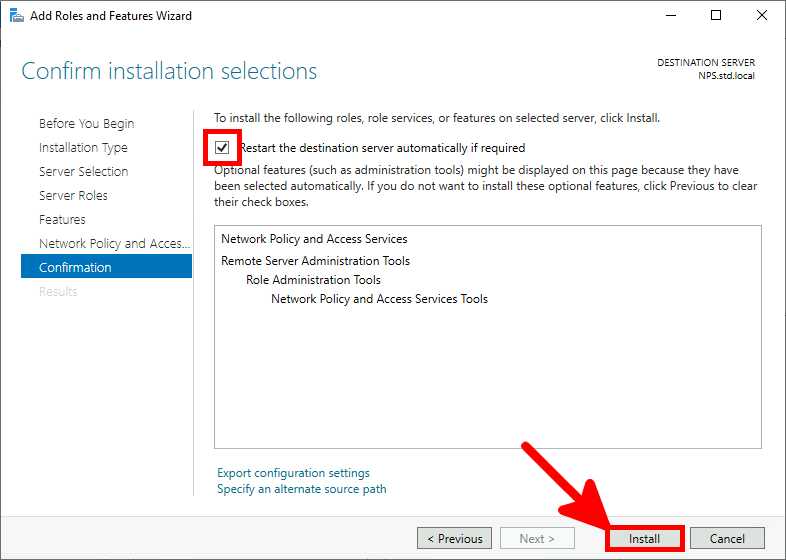
We can choose to install NPS role with PowerShell or via Graphical User Interface.
PowerShell
- The one command line PowerShell :
PS C:\Users\administrator.STD> Install-WindowsFeature NPAS -Restart -IncludeManagementTools
GUI
- From Server manager dashboard, Add Roles and Features :
- Select Role-based or feature-based installation :
- Select Network Policy Server role :
- ♫No Feature, No Feature, No Feature for me♫ :
- Check Restart destination server and click on Install :
NPS Extension For Azure MFA
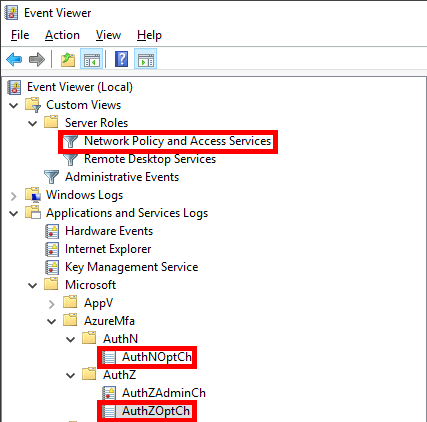
It's a module which allows to add cloud-based MFA capabilities. It will directly communicate with Azure AD infrastructure.
Installing
- Download and install NPS Extension For Azure MFA :
AzureMfaNpsExtnConfigSetup.ps1 script
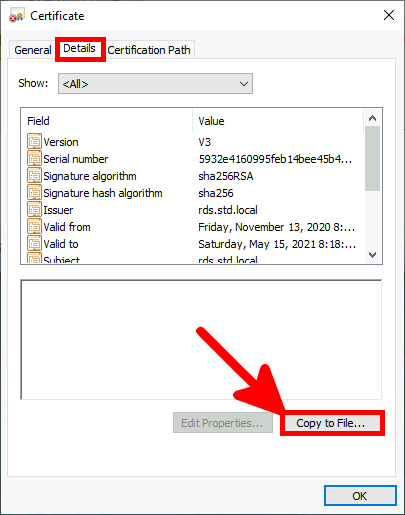
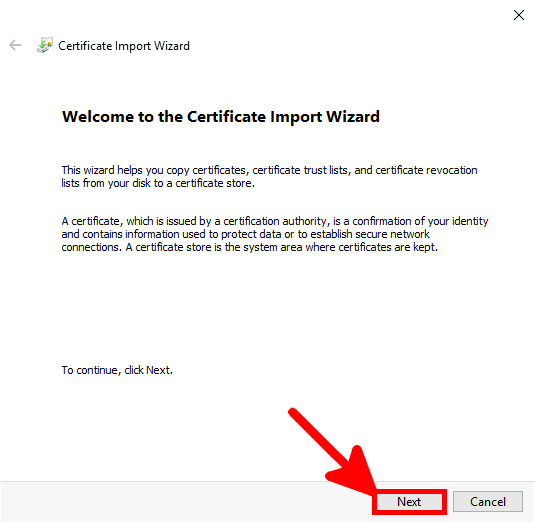
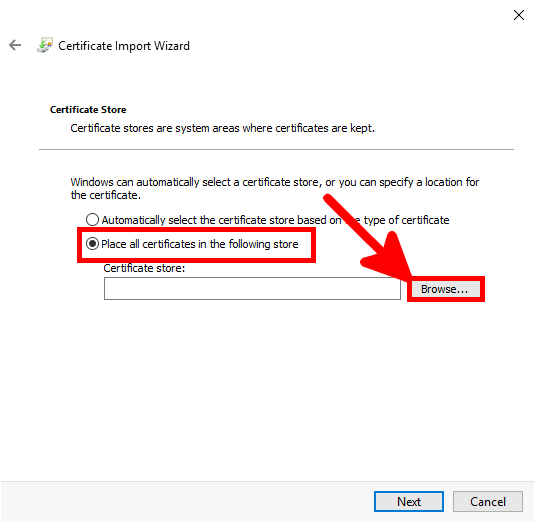
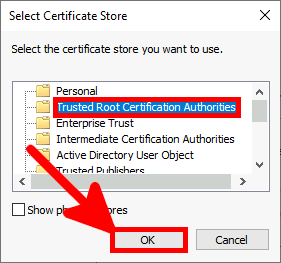
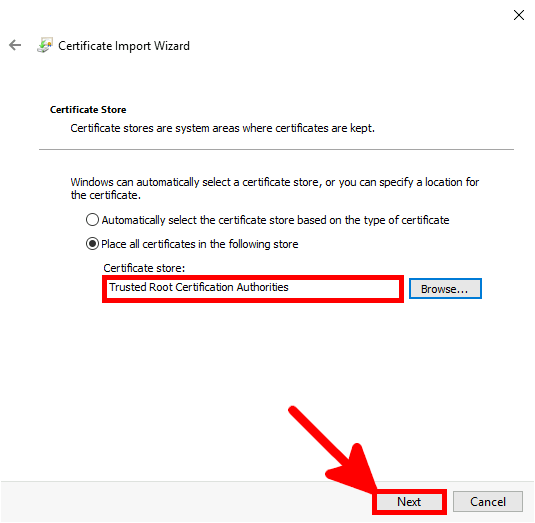
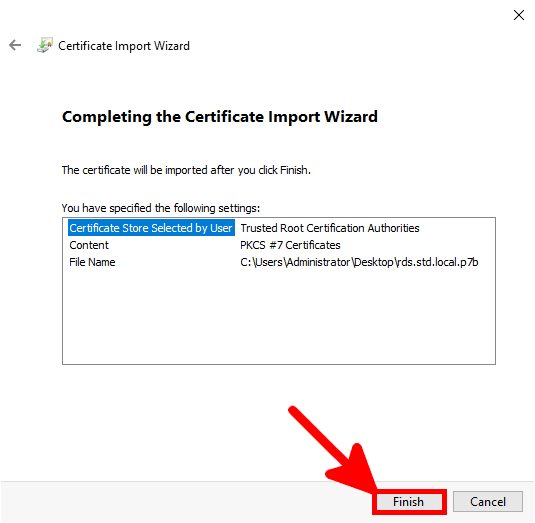
Now we need to execute the AzureMfaNpsExtnConfigSetup.ps1 PowerShell script in order to configure certificates which will be used by the NPS extension.
- From a PowerShell admin console :
PS C:\Users\administrator.STD> cd 'c:\Program Files\Microsoft\AzureMfa\Config'
PS C:\Users\administrator.STD> .\AzureMfaNpsExtnConfigSetup.ps1
- Install NuGet provider if asked :
- When prompted for, identify yourself with a tenant administrator account, we can use for example our ad connect account previously created :
- Get your Tenant ID from the Azure AD portal :
- Paste the Tenant ID to the PowerShell admin console :
Windows Firewall
It seems that Windows (I tried on a Windows Server 2019) doesn't automatically open RADIUS ports. So, create a firewall rule to open incomming udp 1812, udp 1813, udp 1645, udp 1646.
- You can do it with this command :
PS C:\Users\administrator.STD> netsh advfirewall firewall add rule name="NPS" dir=in localport=1812,1813,1645,1646 remoteport=0-65535 protocol=UDP action=allow remoteip=any localip=any
RDS Server
- Open the Remote Desktop Gateway Manager :
- Right click on RDS (local), then Properties :
- In the RD CAP Store tab, select Central server running NPS, then Add your NPS Server :
- Enter a password, it will be shared between RDS and NPS servers :
- Open NPS management console :
- From the NPS management console, expand RADIUS Clients and Servers, select Remote RADIUS Server Groups, then do a right click on TS GATEWAY SERVER GROUP and Properties :
- Select the NPS server and then click Edit :
- Modify values in Load Balancing tab :
- Still from the NPS management console, expand Policies > Connection Request Policies, then do a right click on TS GATEWAY AUTHORIZATION POLICY and Properties :
- From Conditions tab, Add a nonrestrictive rule :
- Select Day and Time Restrictions and click Add :
- Permit every time and validate with OK :
- Remove NAS Port Type condition :
- Now from Settings tab, click Authentication and check that RADIUS client is configured to Forward requests to the following… :
NPS Server (part II)
- Open NPS management console :
Register server in Active Directory
- Register NPS Server in Active Directory. Do a right click on NPS (Local), and then click Register server in Active Directory :
Create Radius Client
- Still from NPS management console, right-click RADIUS Clients and click New to create a RADIUS Client :
- From New RADIUS Client window, provide a Friendly Name (anything you want), and the IP or DNS name of our RDS. Also enter the same secret that you used before (on our RDS). Finally click OK to validate :
Create Network Policy
- Now expand Policies > Network Policies. Right click Connections to other access servers policy and select Duplicate Policy :
- Right click Copy of Connections to other access servers, and click Properties :
- In Policy Window, configure a Policy name, enable policy and Grant access :
- In Conditions tab check that you have a nonrestrictive condition :
- In Constraints tab check Allow clients to connect without negotiating an authentication method :
RDS User
Android Device / Microsoft Authenticator App
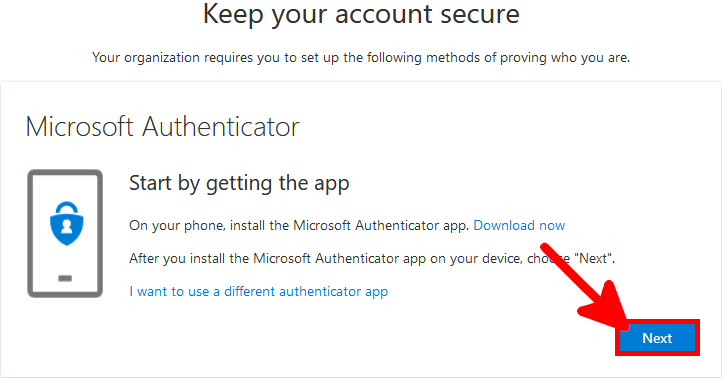
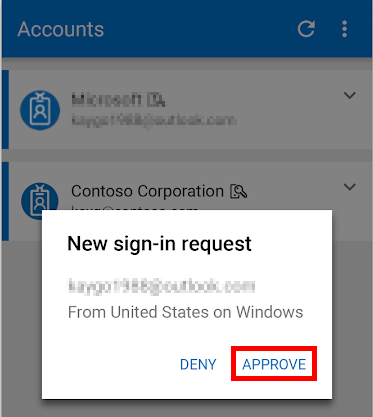
Microsoft Authenticator is a Android and iOS phone app. It allows two factor authentication by using a phone.
Install the App from any store you want.
- Tap Pair your account to the app :
Check default sign-in method
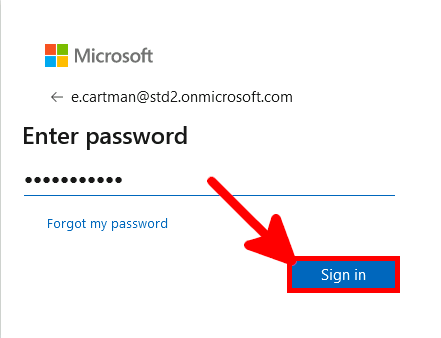
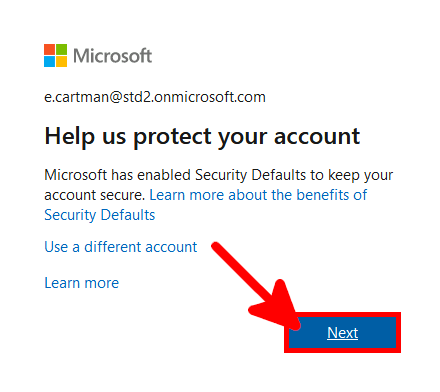
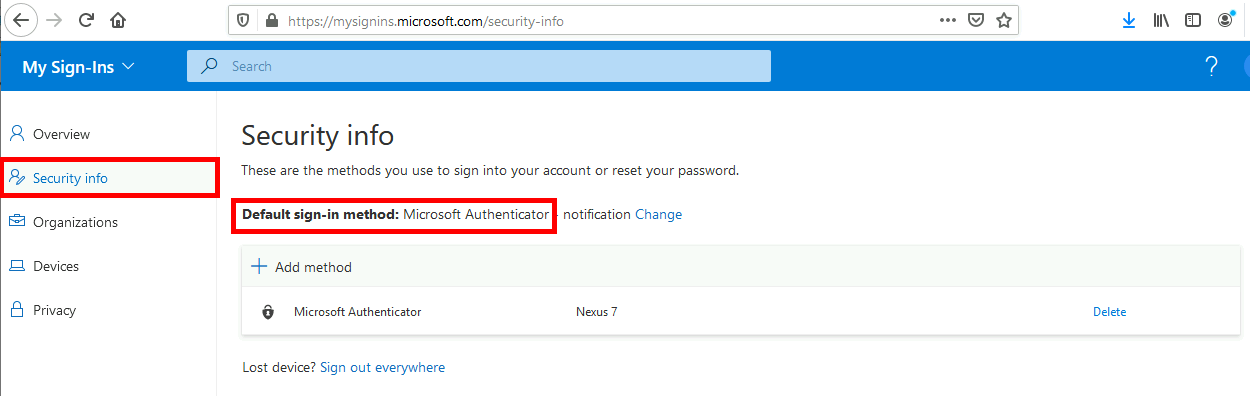
We need to check that our default authentication method is Microsoft Authenticator otherwise MFA could send SMS to authenticate, which can't be used to allow RDS connection.
- From Security info menu, check that Microsoft Authenticator is set as default sign-in method :
RDS Client
- Now connect to your RDS web server, and use your Azure AD ids :
Install certificate
- If you got the message «This computer can't verify the identity of the RD Gateway», click View Certificate… :
- Go to Details tab, and click Copy to File…
- Check Include all certificates in the… :
- Export and save the Certificate :
- Right-click on the Certificate freshly exported and click Install Certificate :
- Select Place all certificates in the following store and Browse :
- Select Trusted Root Certification Authorities store :
- Enter your local domain credentials :
- Check your Microsoft Authenticator app on your phone, if everything went fine, it will ask to approve connection :
Troubleshooting
- I receive SMS but my Microsoft Authenticator doesn't challenge me : Check default sign-in method
- Event Viewer Logs to check in case of troubles :
- RDS Server :
- NPS Server :
References